All feedback, tickets, chat conversations that you get from various support channels could be handled in the Inbox section which provides flexible options to manage support queues and custom reports. Support agents would see only those requests that are intended to be seen from the forums where they have access to, or according to Tickets Visibility in the team's management.
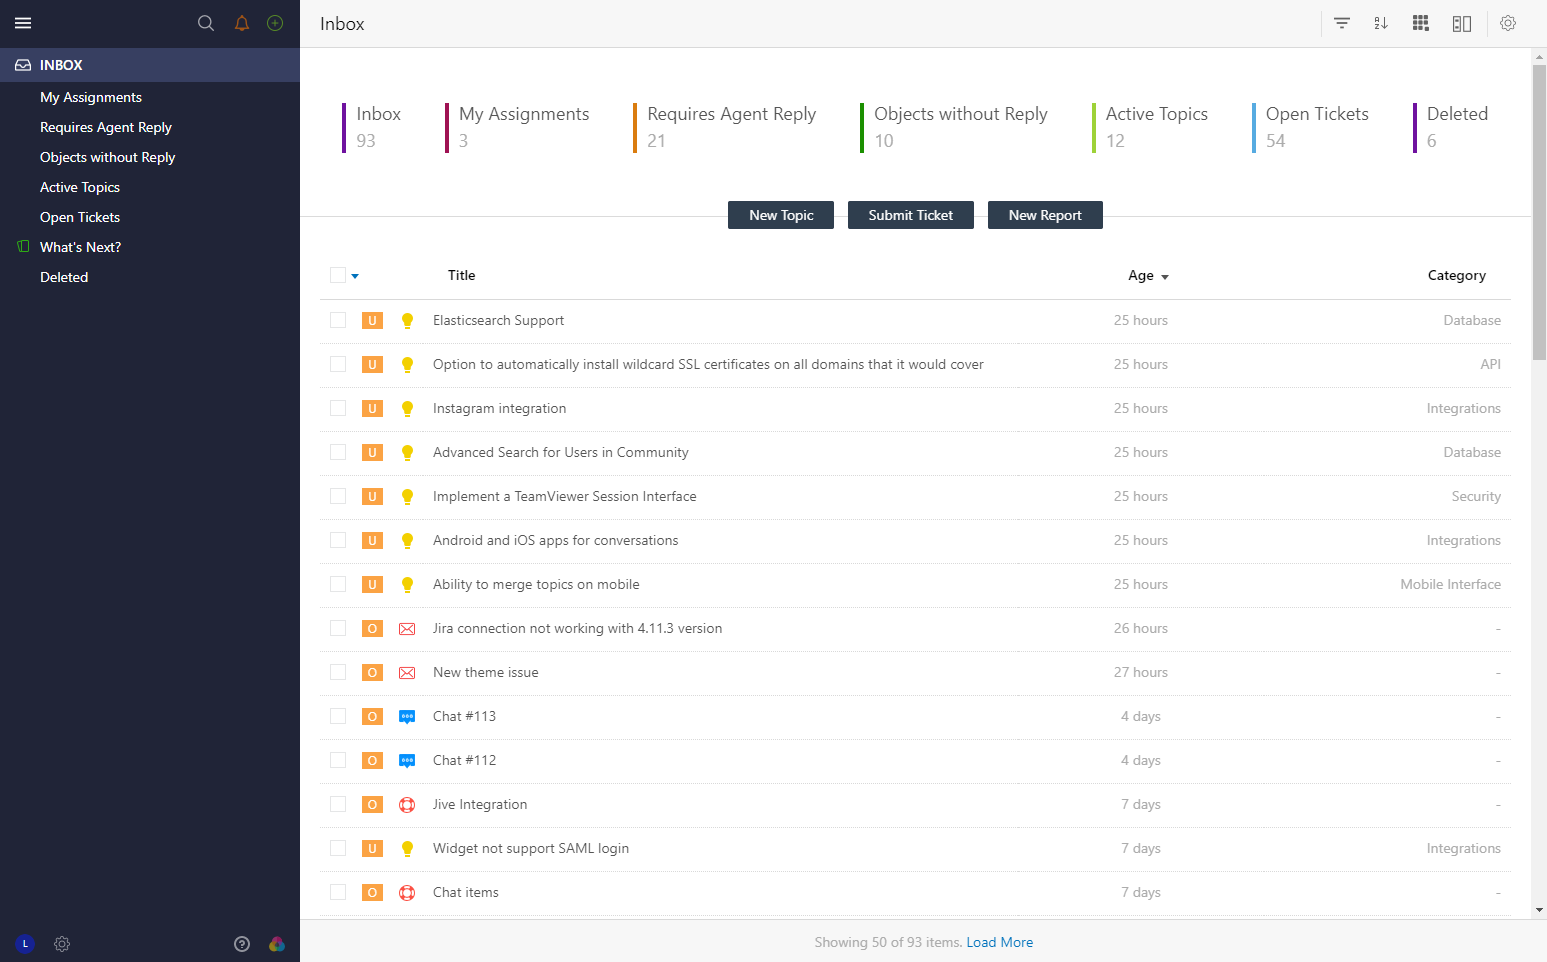
By default, you have a predefined reports list, where Inbox would display all recent requests in a table view.

At the top, you can find quick filters option by clicking on which you are able to group, sort or filter objects on the go without any report management.
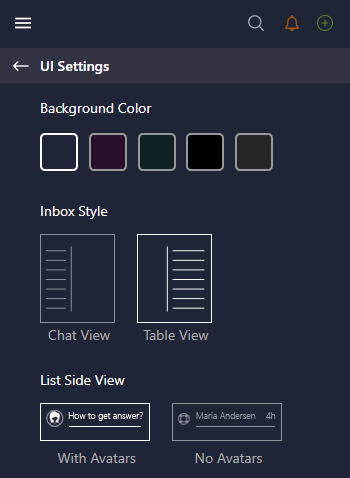
If you use only Live Chat solution, it might be helpful to manage all chat conversations in a chat view that can be enabled under Interface settings. To change default UI settings of the agent interface, click Customize icon at the bottom left. Besides the report's style, there is an option to choose one of the views of the left navigation panel with requests.

Along with the table list, OnsiteSupport provides an easy-to-understand and compact single view of customer requests - Kanban view.
There is a number of system reports provided by default and couldn't be disabled:
- Inbox - displays all recently added requests sorted by date. Unread requests are shown in bold. This report could be customized later;
- Deleted - all objects that are moved to trash that could be restored or completely deleted from the system;
- On Moderation - topics and comments that are currently on moderation and require action from support agents;
- Spam - all requests that are considered to be spam or those messages that were bounced back to see which users have wrong emails or system couldn't deliver one of the messages.
All predefined reports except for "Inbox" can be modified or completely deleted. If you don't require them temporarily, just deactivate them.
Reports & Queues Management
By default, only Administrators of the system can manage all the reports. That could be changed for other teams in Menu » Users by creating a new team and assigning support agent to it.
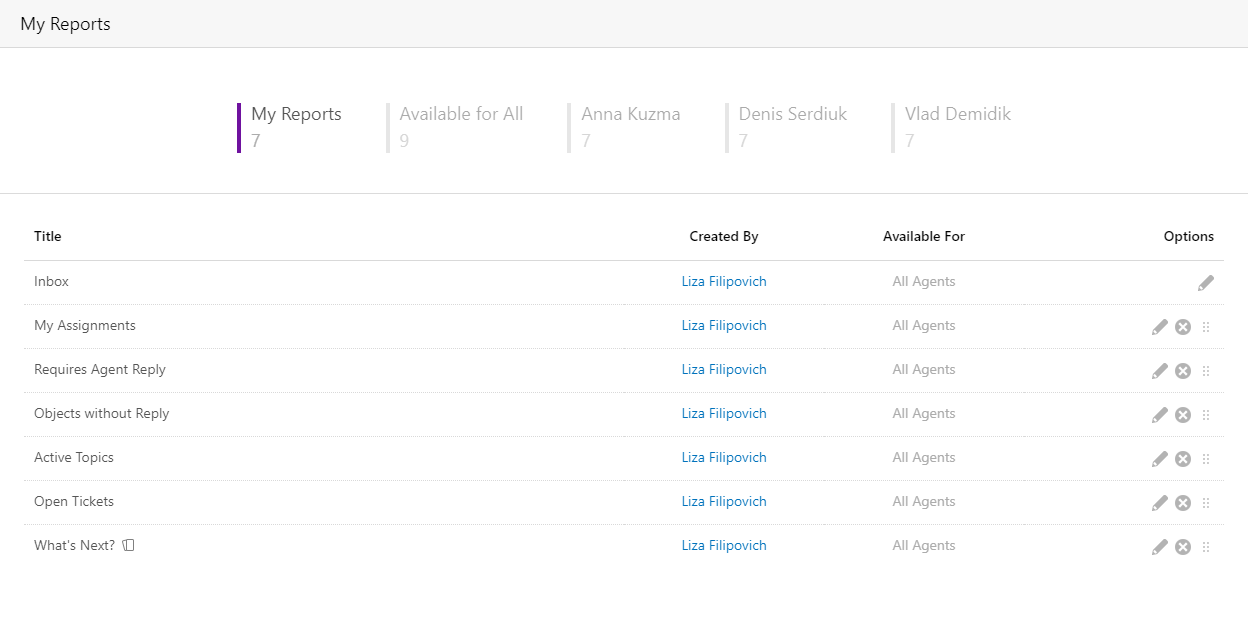
Agents with "Manage Reports" permission can create reports for other support staff. To manage current reports, you need to select a relative item under Options while you are located on the requests page and the management section with options will appear.

Administrator and agent with "Manage Reports" permission would see their own reports by default. In case you want to modify the existing queue for all agents in the team, you need to switch to the "Available for All" tab and click the edit icon next to the report. If this report has already been modified by team members, the system will ask you whether it should replace modified reports with an updated one or not.
You can manage the reports either for a particular agent and a certain team in the company.
New Reports: Save & Run
In order to build your own custom report, click plus icon at the top left and select Report in the list or click the "New Report" button.
OnsiteSupport provides the ability to set a specific number of conditions based on custom fields, your custom workflow, and business requirements.
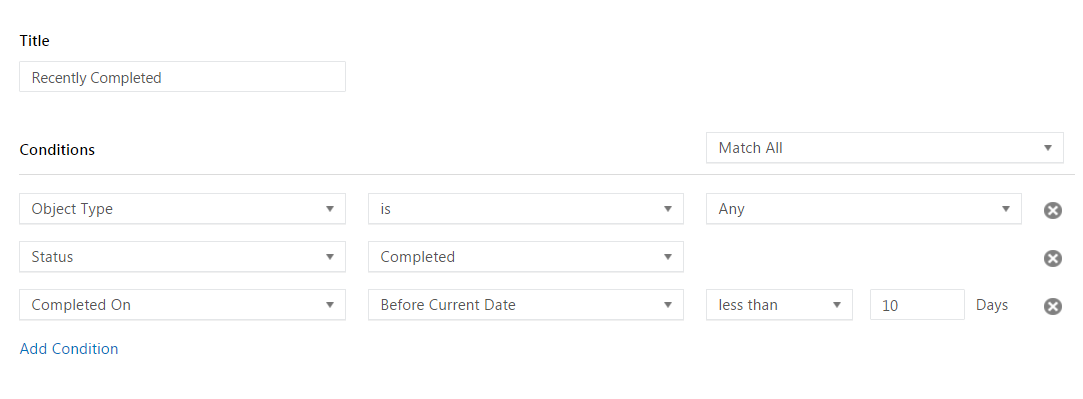
Here is one of the examples: you need to review all tickets and topics of your community that have been completed during 10 last days. That's what you need to select in the conditions:

You can define what sorting, grouping, filtering options would be used in the report. The final report also has custom table columns that would provide additional information on the object, limited maximum to 5 to be displayed. There is a way to apply the same table formatting to all reports if you would like to have the same additional information in all other reports.
Finally, you can either save the report to be used later on a frequent basis or just Run it for getting one-time results.
Batch Actions
On the requests page, you can perform multiple actions with objects and users. To get more details, please see Batch Actions article.
We do apply the same logic in Users section to manage users' segments


