
OnsiteSupport lets create an interactive ticket and feedback forms with conditional logic.
It means that hidden fields will be displayed on the next step to the customer depending on values chosen on the previous step of a specific field. Besides that, you can also build multi-step forms to make it more user friendly.
There are different reasons and cases you might need to add dependent fields:
- To set up a complex and well-organized hierarchy of categories and subcategories for e-commerce business;
- To build nested multilevel form without making your customers fill in a long list of required fields while submitting a new request;
- To specify the details about the issue submitted by your customer and distribute support queries between most qualified agents;
- If you gather customer ideas around your software, you may ask what feature customer request relates to and the priority of its implementation.
Below we'll walk you through the details on how to build dependent forms. Before we start, make sure you added all ticket or topic fields that can be set as parent fields. Check out the article on the basics of fields and properties in OnsiteSupport.
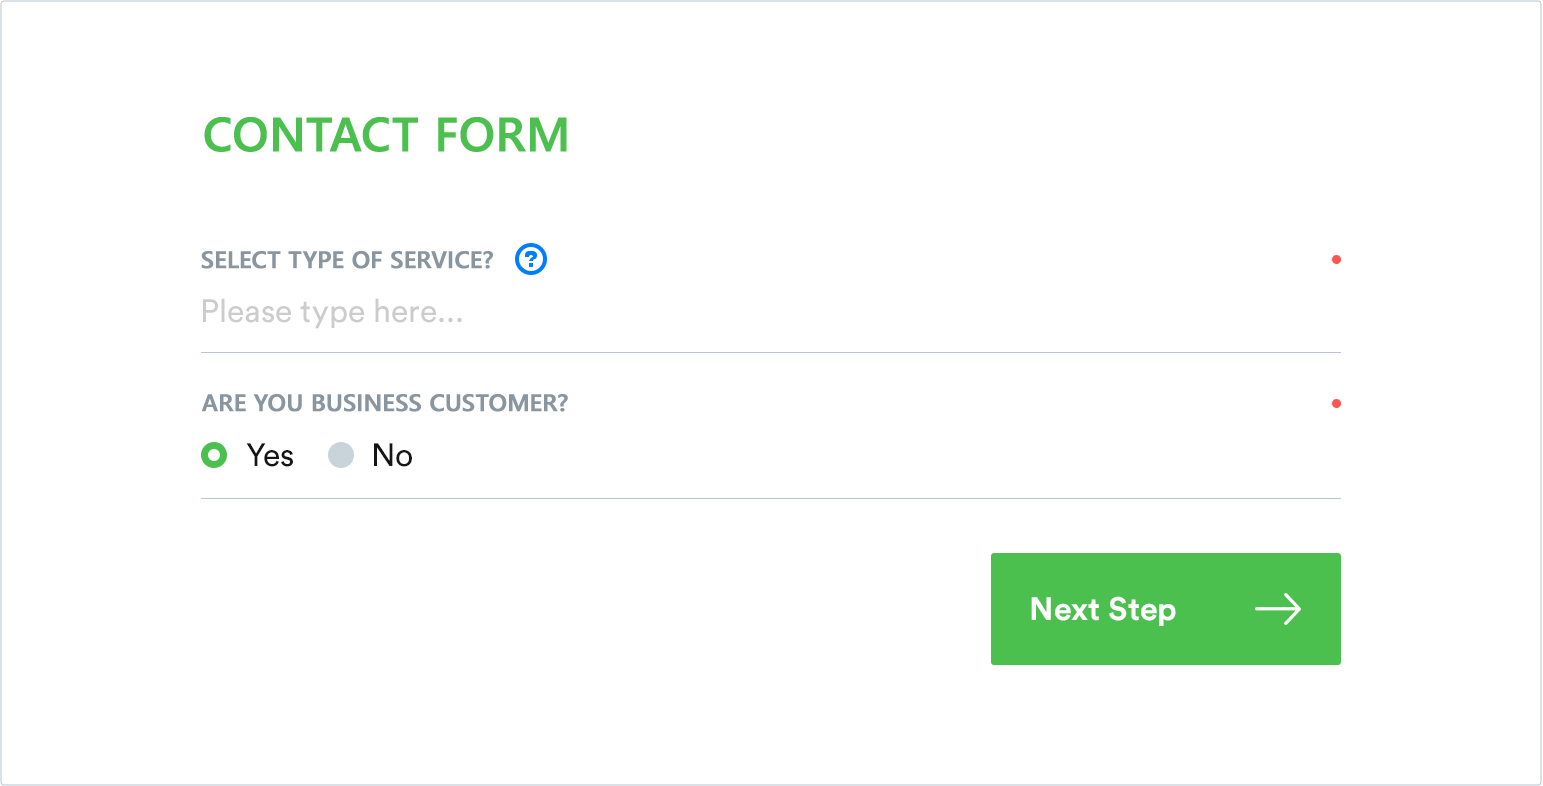
You can associate dependent fields only with custom fields of select type.
Build Dependent Form
Once you have custom fields with drop-down options, you can add extra questions customers have to answer based on a particular response. Follow the next steps:
- Enable Conditional Fields in Administration » Applications;
- In Administration » Custom Fields » Tickets select custom field with the arrow icon;
- Click New » New Field at the top right;
- In the pop up define the value of parent field customer needs to choose before dependent ticket field becomes visible;
- Enter the field's title, type, optionally define its visibility and set it to be a required one;
- Save the changes;
- Proceed to add extra data to other options of the root field.
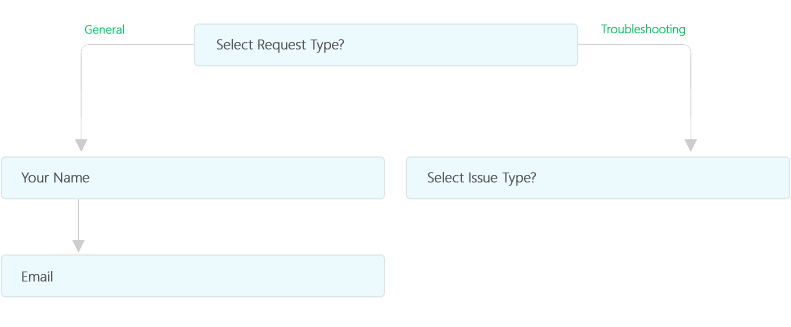
For your convenience, we display each field level in a separate table. So to add third level logic just select second-level field as a parent one and perform the above-mentioned steps. There is no limitation on levels of hierarchy that's why you can organize a comprehensive form structure.
Use breadcrumbs to get back to fields management page where you can preview how a new built form is displayed for customers in the user interface.
Note: You can set several fields to be displayed at once dependent on a specific value of the previous field.
Keep in mind that customers would be suggested to fill out dynamic form no matter which channel they use to submit a request - self-service portal, support center widget, mobile interface or agent backend.
Triggers & Queues
Conditional fields can be used to create automation rules. For instance, you can assign a ticket to a certain department based on customer response entered in a specific dependent input. Find detailed information on how to automate your business workflow using triggers.
You can also organize your own reports and queues based on selected dependent fields, set them as grouping or filtering options for easier ticket management.
Generally using conditional fields helps your agents categorize incoming requests and resolve them much faster based on gathered details.