
Zapier is one of the most widely used tools that allow end-users to integrate web applications they use every day and automate actions between them.

With Zapier you can connect and sync data between OnsiteSupport and popular project management, CRM, marketing tools like Jira, Salesforce, Slack, Trello, HipChat, etc.
Whether you need to add users to Salesforce from OnsiteSupport or post new bugs to Jira once a ticket is submitted in OnsiteSupport, Zapier will help you transfer this data between thousands of applications.

What are Zaps?
All integrations in Zapier are made using ready or custom Zaps - small integration applications within Zapier. Zap performs automation for you and consists of 2 main components: trigger and action.
A new event in one application (trigger) will force Zapier to perform a specific action in another application automatically.
Keep in mind that you are not limited to one action within one zap.
How to connect OnsiteSupport?
To create zaps linking OnsiteSupport to other popular services, log in to your Zapier account and connect OnsiteSupport account.
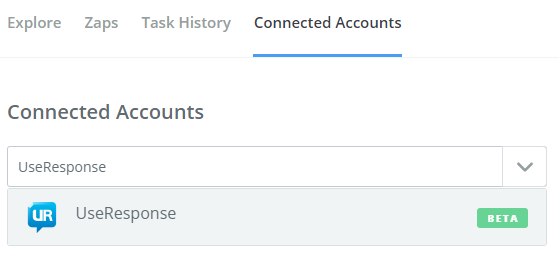
- In Zapier, go to Connected Accounts from the top menu;
- Click Connect a new account and search for OnsiteSupport;
- Enter the domain where OnsiteSupport is installed (e.g. "https://account.OnsiteSupport.com") and API Key of your OnsiteSupport account that could be found in your profile options in the agent Interface;
- Now you can test created connection. If it's successful, you can move on to build a zap.
How to create a ZAP?
Let's review the example of how to automate issue submission in Jira when a new ticket is created in OnsiteSupport:
- In your Zapier account click "Make a Zap" button;
- Choose an application that will be used as a trigger (OnsiteSupport in our example);
- Select "New Ticket" trigger from the list;
- Select one of the connected OnsiteSupport accounts;
- You can define some filter parameters for trigger application, e.g. convert tickets created by specific user into Jira issues;
- Select the application where Zapier performs automation actions (Jira for our example);
- Choose "Create Issue" action from the list;
- Connect your Jira account;
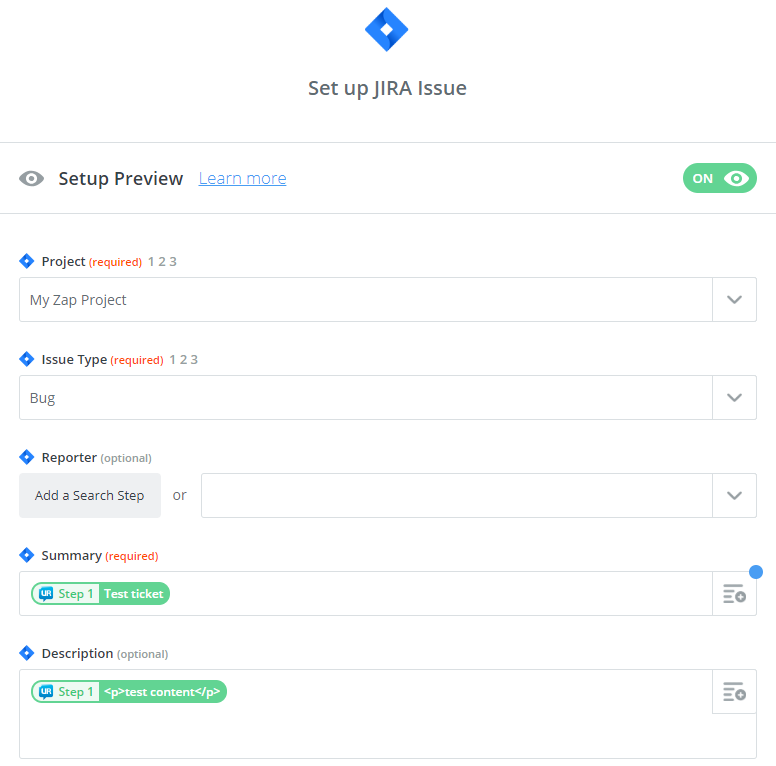
- Set up the Jira issue template by filling out required and optional fields according to the automation you're building. In our example we define Jira project where the issue has to be created, the type of issue and match Jira issue summary and description with OnsiteSupport ticket title and body;
- On the next step, you can test whether Zap is working. Click "Test this Step" button, if you see a confirmation message that your test is successful, just turn your zap on and you are done.
Whenever a new ticket is submitted in your OnsiteSupport account, an issue with the same title and description will be automatically created in the Jira account.
How to access Zapier integration?
As Zapier integration is in beta, it can only be accessed via this the following link:

Once you navigate to the link, click "Start using OnsiteSupport now" and login to continue. If you don't have a Zapier account, you can sign up for a free account and begin using the integration straight away.