
With online chat, you can provide instant help to your customers using popular messengers or placing the widget into your website, web application, and mobile app. This guide will help the administrators to set up Live Chat correctly.
1. Support Channels
OnsiteSupport provides the ability to communicate with clients both in the live chat widget and in popular messengers like FB Messenger, Viber, Telegram, VK (Vkontakte). In order to connect your live chat solution with various messengers, go to Administration » Applications to enable required channels for providing customer support and in Administration » Support Channels set up them. Please refer to the article for more details how to set up messengers in Live Chat.

In Menu » Users you need to define which agents should have the "Access Chats" permission for handling chat requests coming from different channels.
2. Email
In Administration » Support Channels » Email you should set up the outgoing/incoming mailbox and From Name:
- To send email notifications to your customers once they left your website and didn't catch the operator's reply;
- To receive users' replies to your email chat notifications right in the agent interface;
- To send satisfaction surveys via email if CSAT is enabled in the system.
3. Live Chat Widget
Your next step would be customizing the chat widget for integration on your website. Go to Administration » Support Channels, create a new chat widget by clicking New » Widget, and define widget design and behavior according to your workflow:
- Color Scheme - use one of the predefined colors or specify a custom color scheme that would match the design of your site;
- Widget Availability - define the certain period of time when the chat icon will be displayed for your customers. You also have the ability to set up chat availability within specific business hours profiles. You could find more details on how to set up business hours in our knowledge base.
Once you configure live chat settings, grab the code and place it on the web page where you would like the chat icon to appear.
OnsiteSupport allows creating several live chat widget profiles that could be used in different areas of your application with separate behavior and UI. To add a profile, please click New » Widget at the top right in Administration » Support Channels.
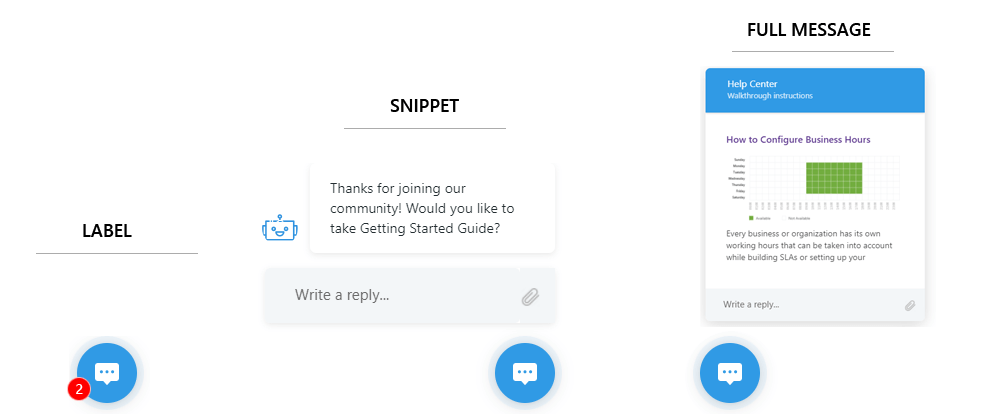
Open Chat Widget on Click or Open By Default
Sometimes you might need to customize the widget behavior according to your specifics. Please refer to Developer Manual for Widgets instructions.
4. Automation Rules
By default, if your team is offline and the customer contacted you in chat, all operators would get Chat Notification that could be modified in Administration » Support Channels » Email » the Email Templates option.
To override system automation settings based on user behavior on pages, user clicks, you can set your own triggers in Administration » Automation & Notifications using Chat: On Click or Chat: User Activity events.
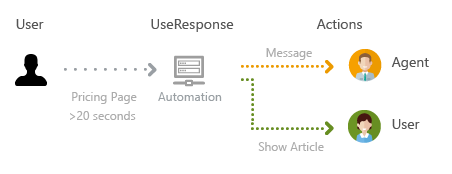
You can also send both targeted messages and specific articles from Knowledge Base based on tracking users' activity, keywords in the message, or clicking some elements of your page. More details could be found in the live chat automation article.