
It's essential to link your support email address with Onsite. This integration ensures that you receive all your emails within Onsite, consolidating customer requests in one convenient location for maximum efficiency.
After confirming your Email and DNS provider and identifying Outlook as your email service, proceed with the following steps to integrate your Support Email Address into Onsite.
Step 1: Add Outlook to Onsite
- Click on Administration (Setting Gear Icon)
- Click on Support Channels
- Click on Add New "or" New > Mailbox

1) Email: Type in your Support Email
2) Name: What customers see as email's name
3) Customer Portal: The default community portal for all tickets.
4) Click on Continue

Step 2: Setup Email Forwarding
Once you've clicked on Continue from the previous steps, you'll be directed towards the Forwarding section:
1) Copy the Forwarding Address from Onsite

2) Sign into Outlook
3) Click on Setting Gear Icon
We will proceed towards the Rules and Forwarding setup.
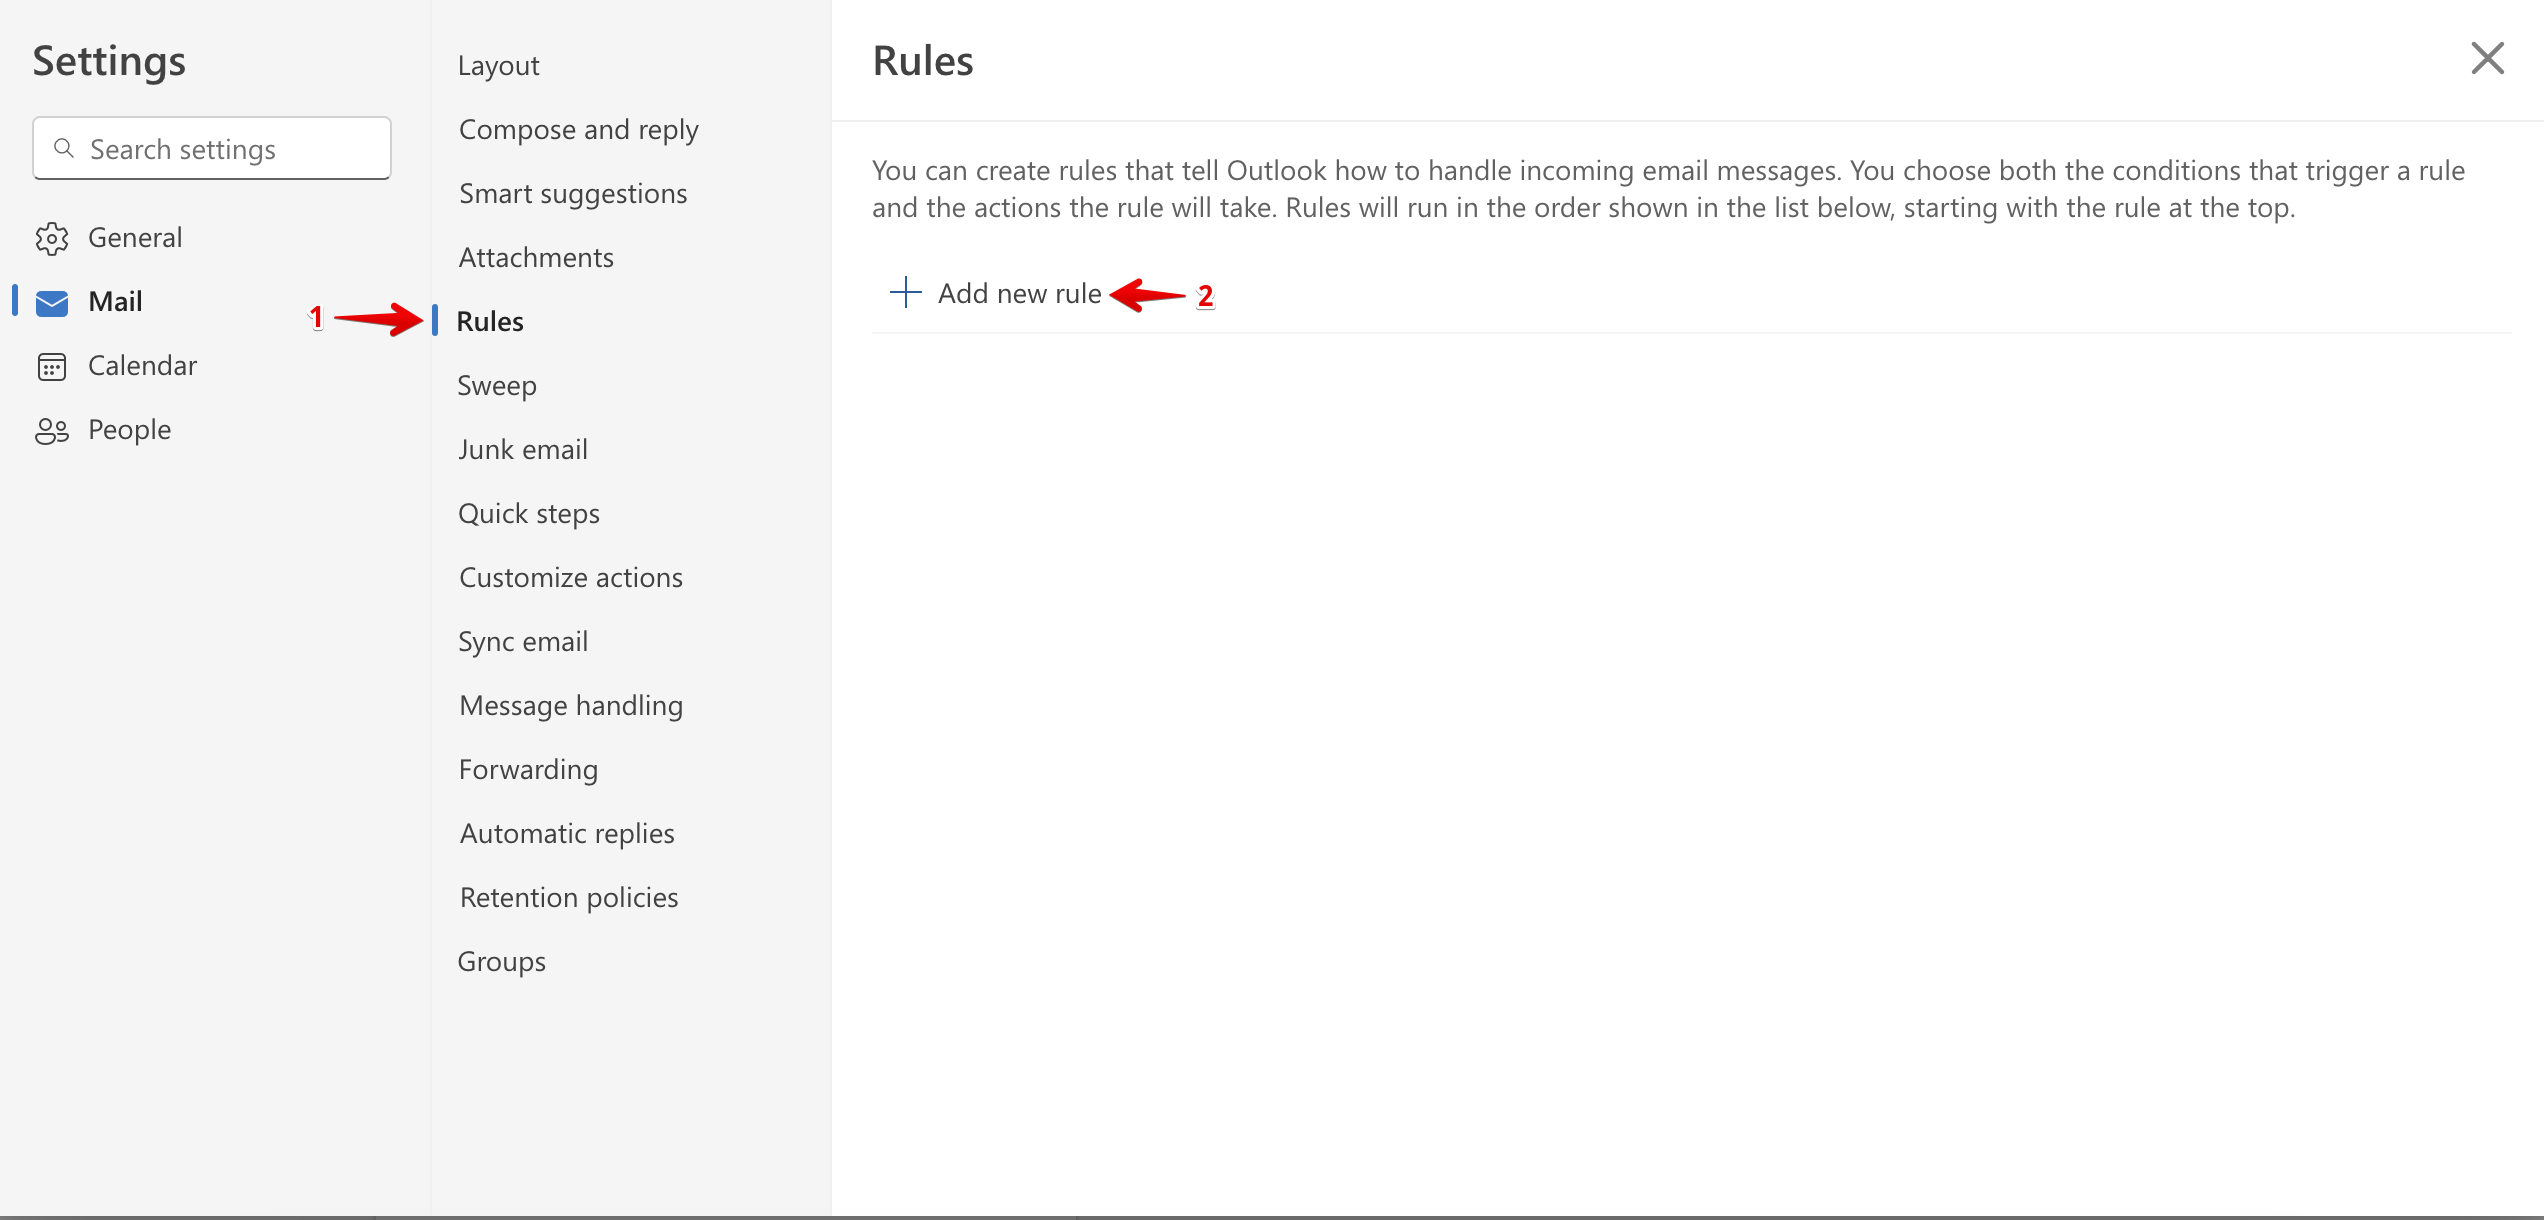
To set-up Rules:
1) Click on Rules
2) Click on Add New Rule
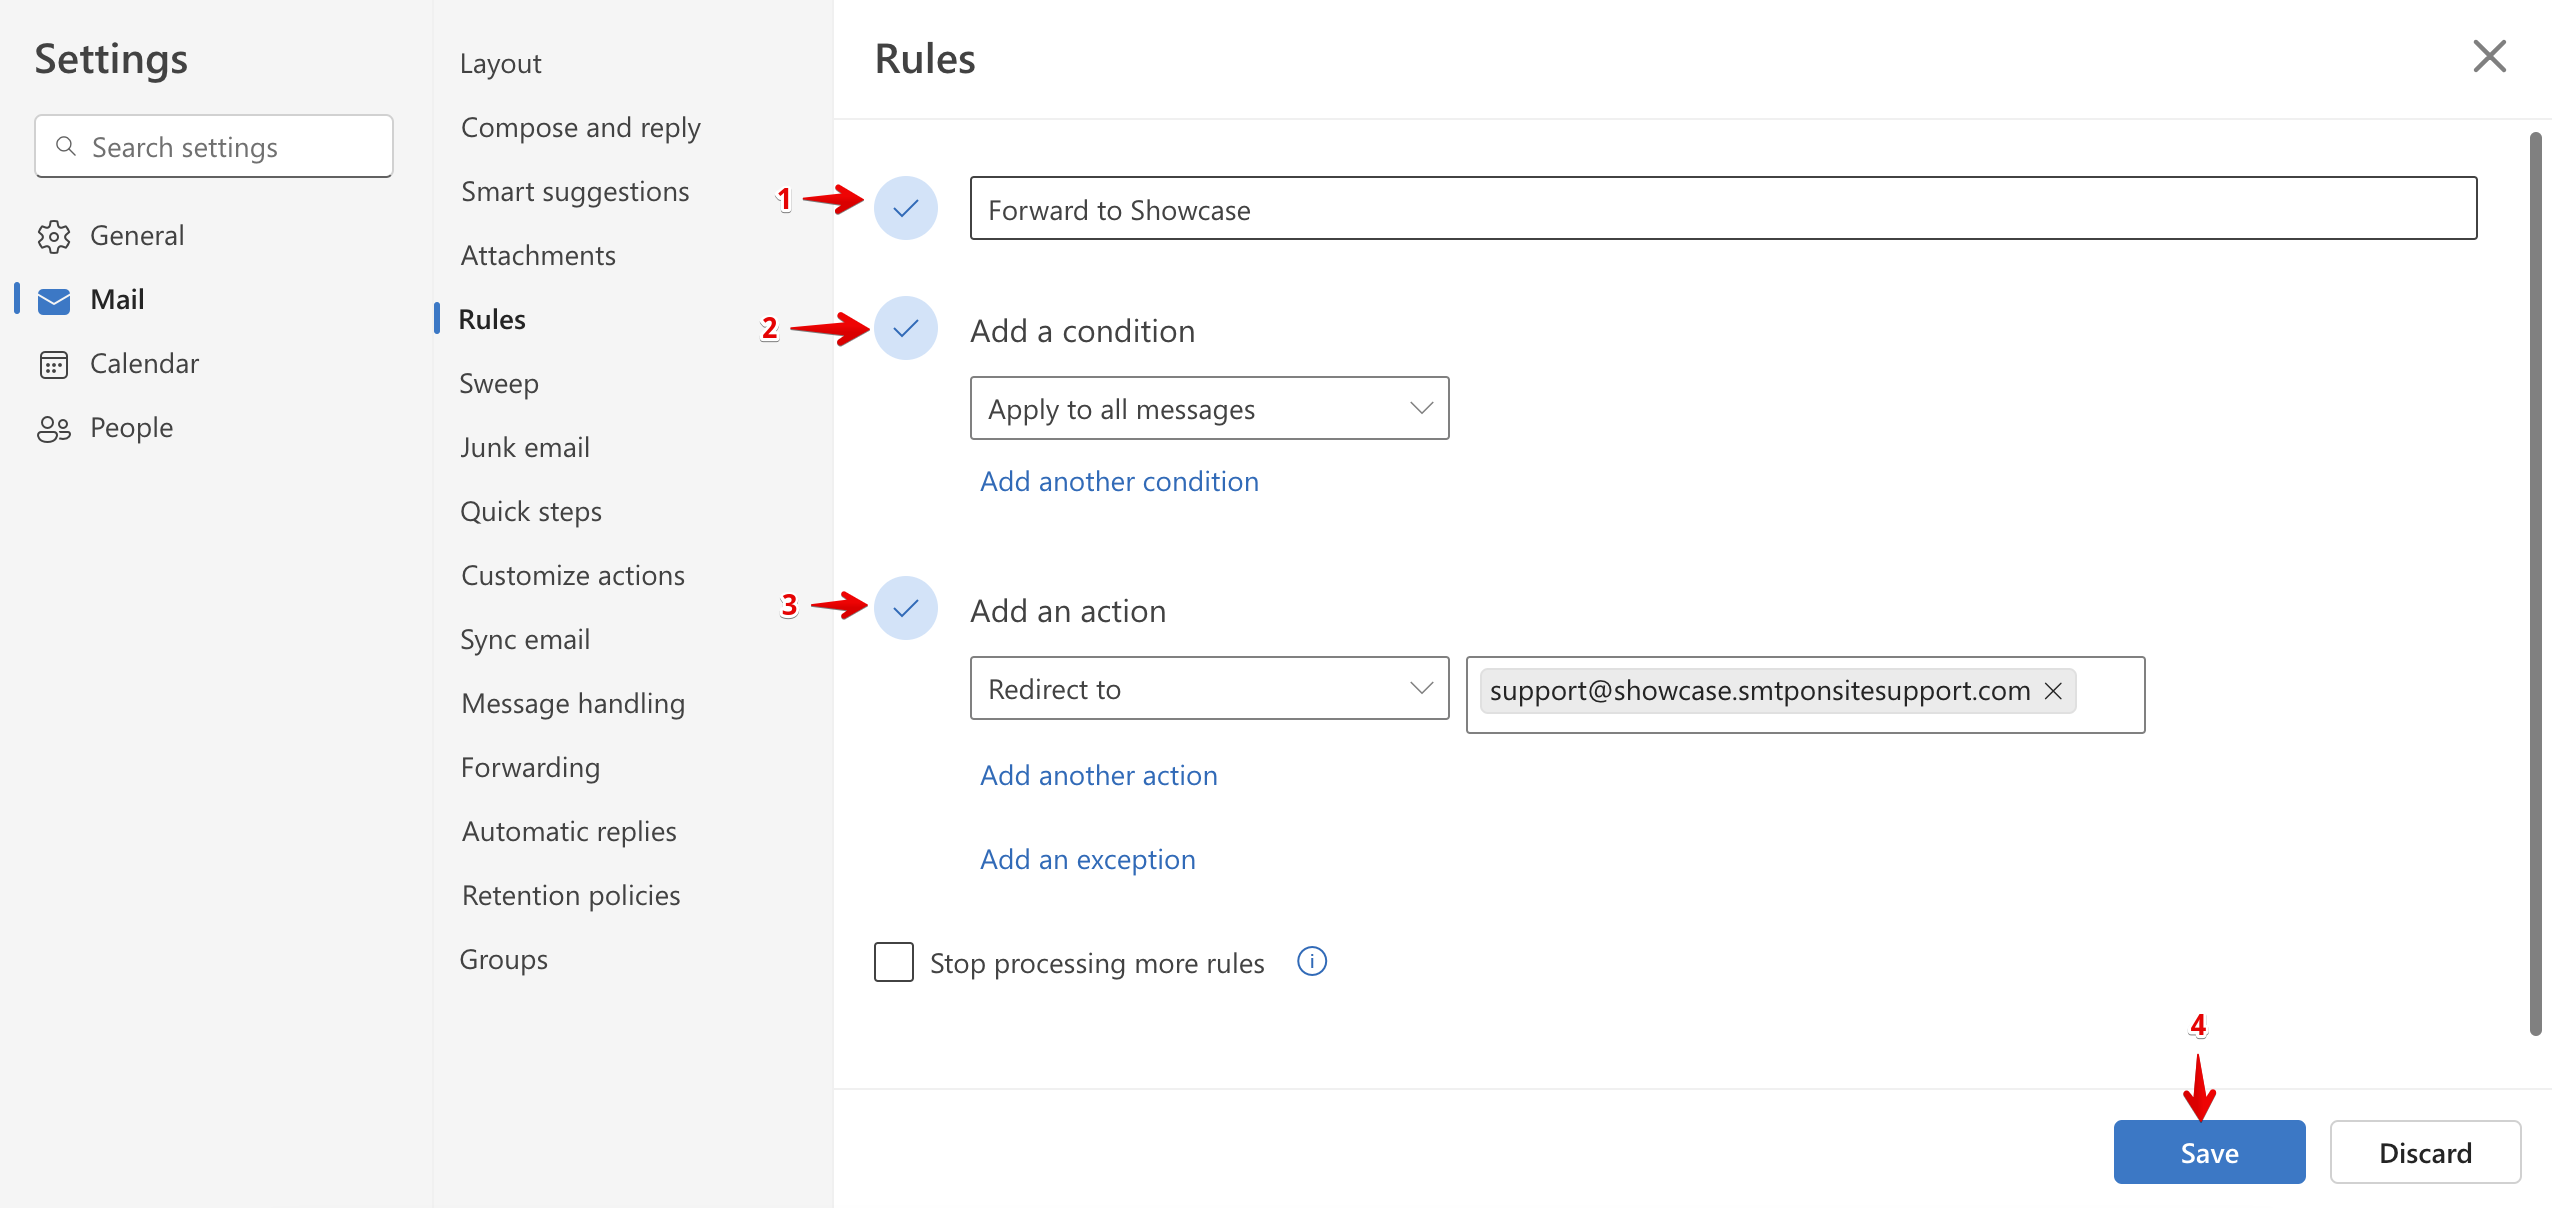
The Rule Setup Pop-up would appear:
1) Name: Setup the rule name (Example: OnsiteSupport Forwarding)
2) Add a condition > Apply to all messages
3) Add an action > Forward to > Paste the copied email from the previous steps.
4) Click on Save
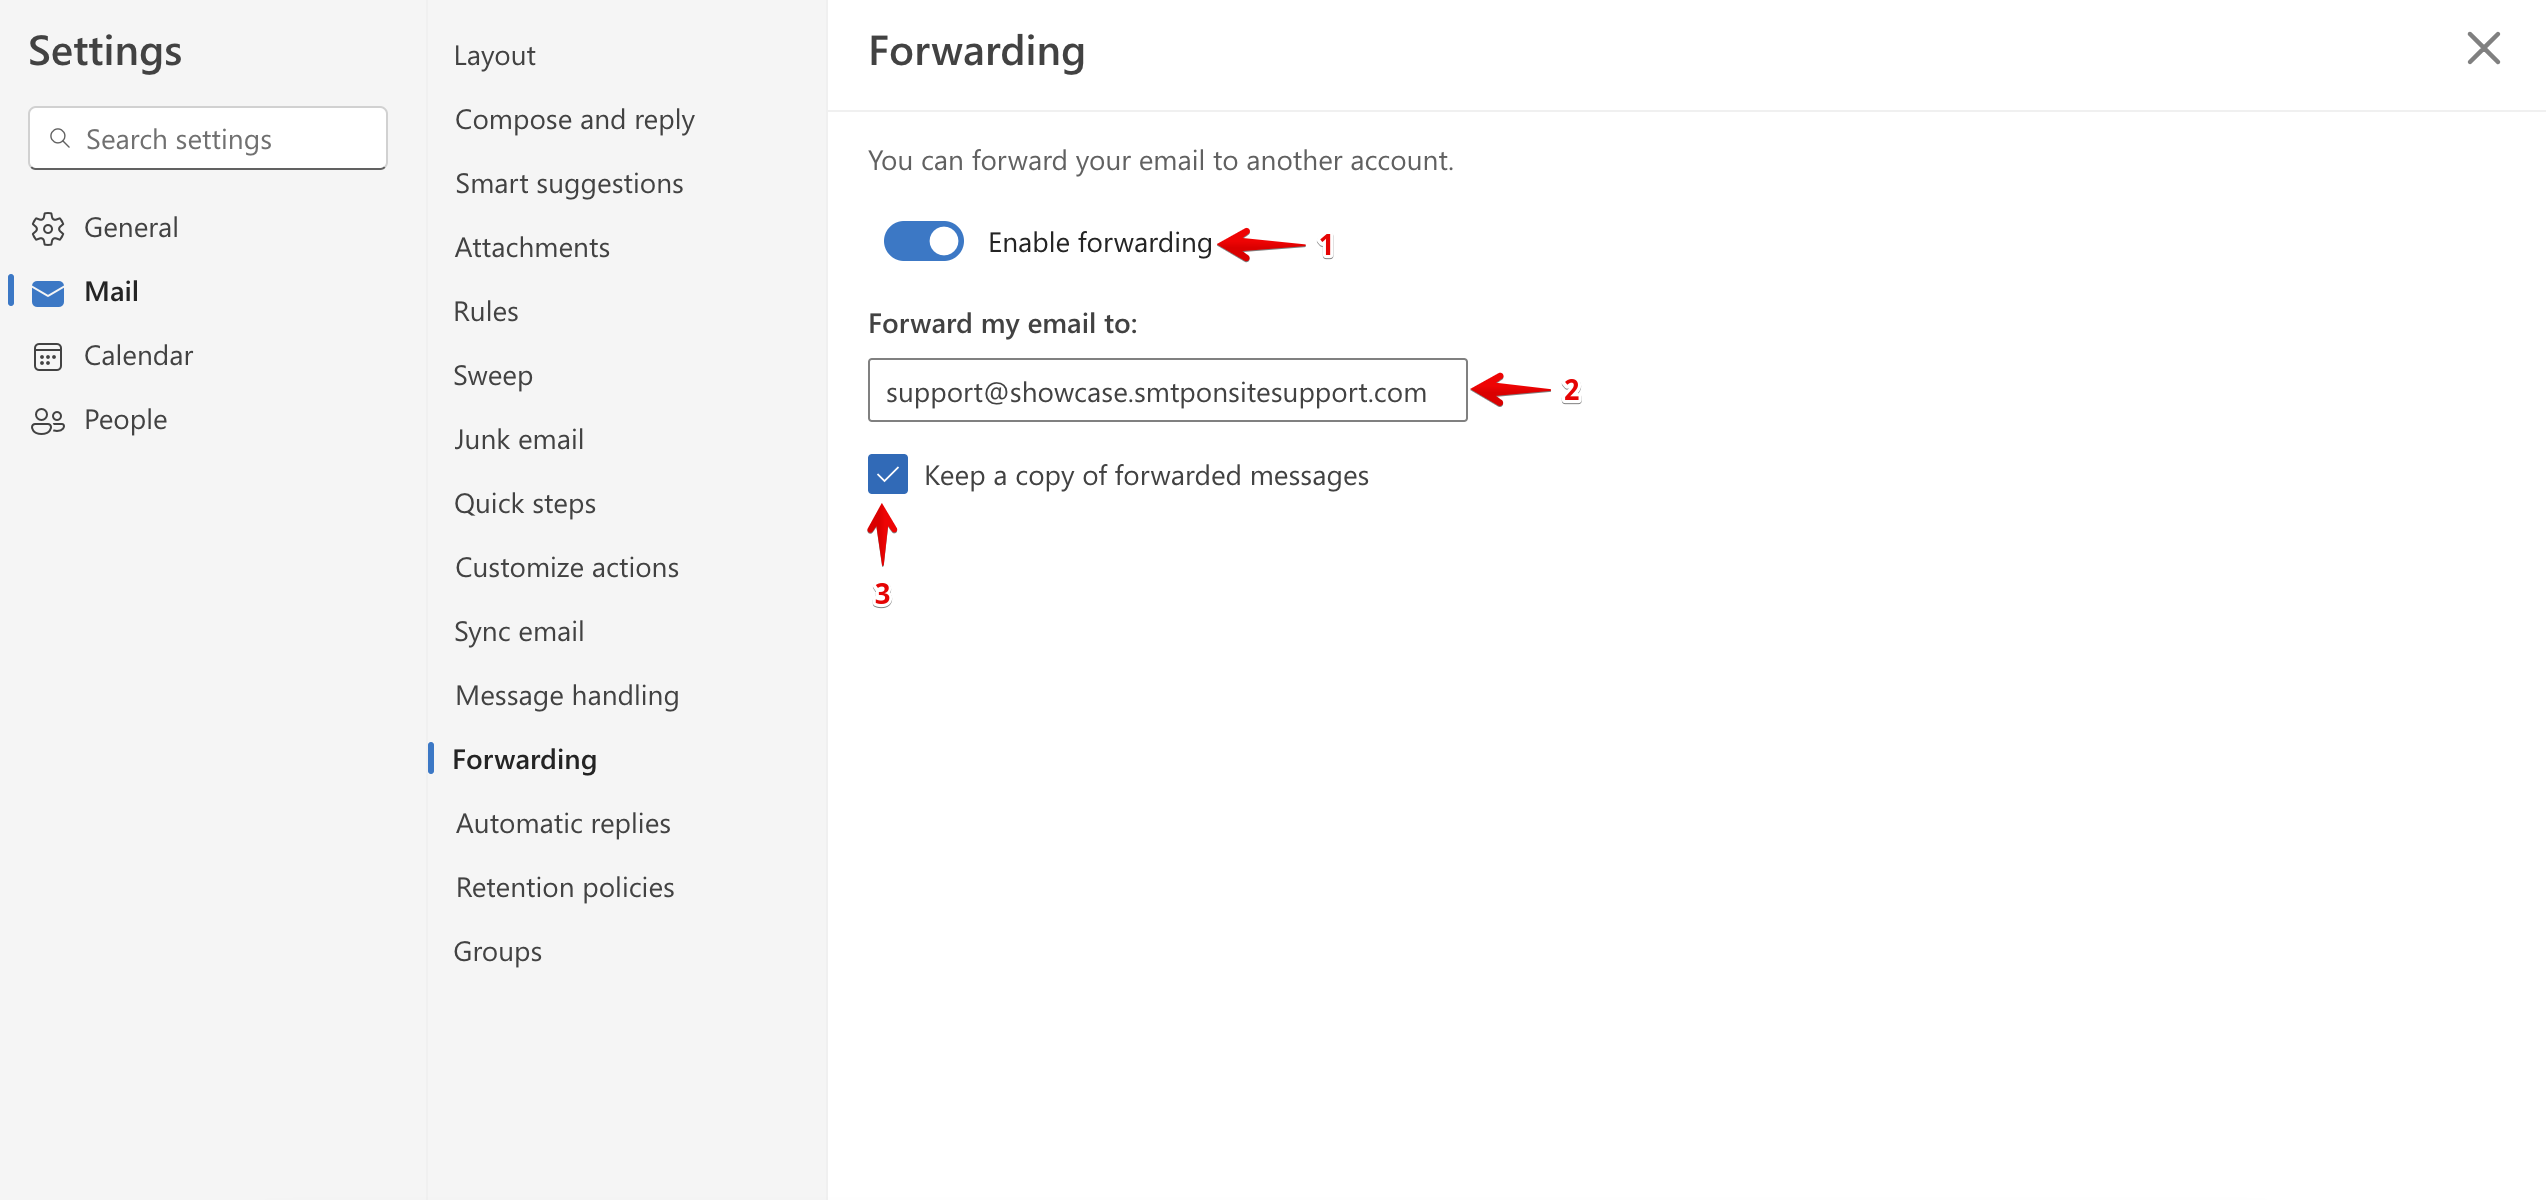
To set-up Outlook Forwarding (GoDaddy Only):
If your DNS provider is GoDaddy, you have to set up Outlook Forwarding as well. For other DNS providers, you can skip the Outlook Forwarding.
1) Click on Forwarding > Enable
2) Paste the forwarding email again
3) Enable Keep a copy of forwarded messages
Once done, please access Onsite and click on Verify email forwarding.

Once you see
Success! please click on Continue.

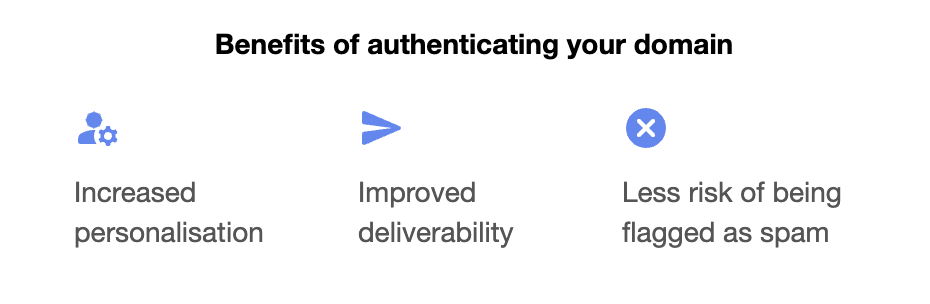
Step 3: Authenticate your Domain
Authenticating your domain helps make sure your carefully created emails reach your customer's inbox and results in better engagement.
Setup DNS via GoDaddy
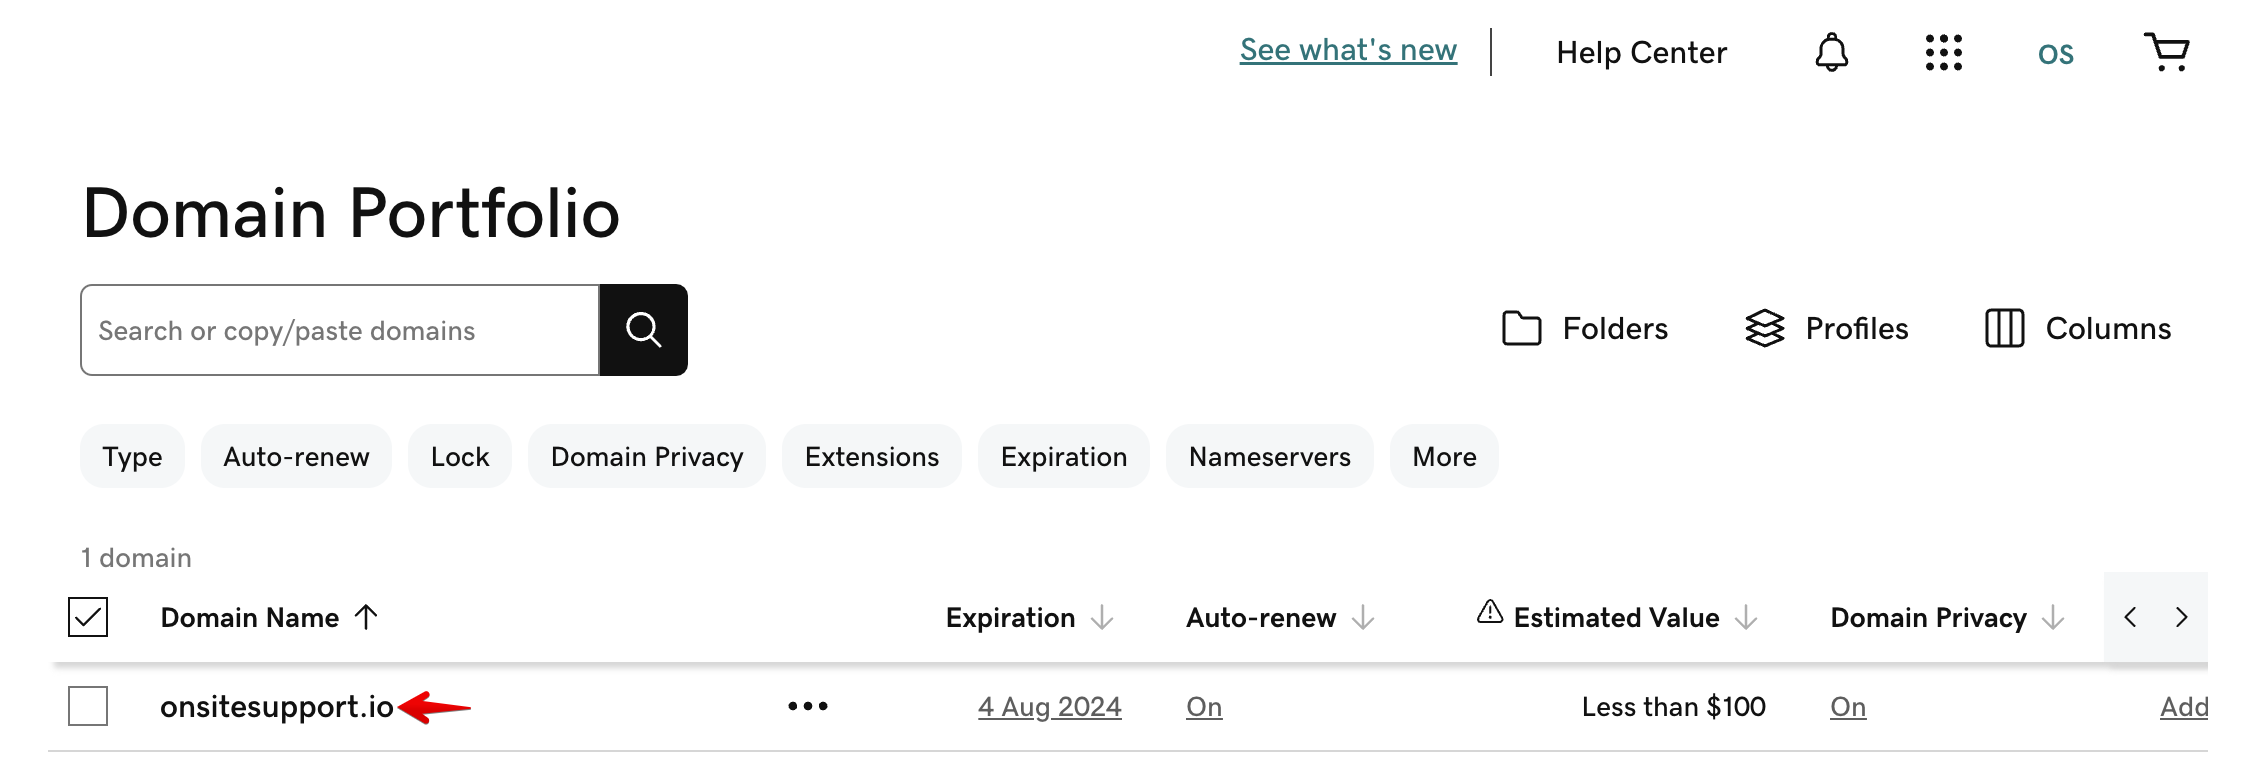
1) Sign in to your GoDaddy Domain Portfolio.
2) Select an individual domain to access the Domain Settings page.
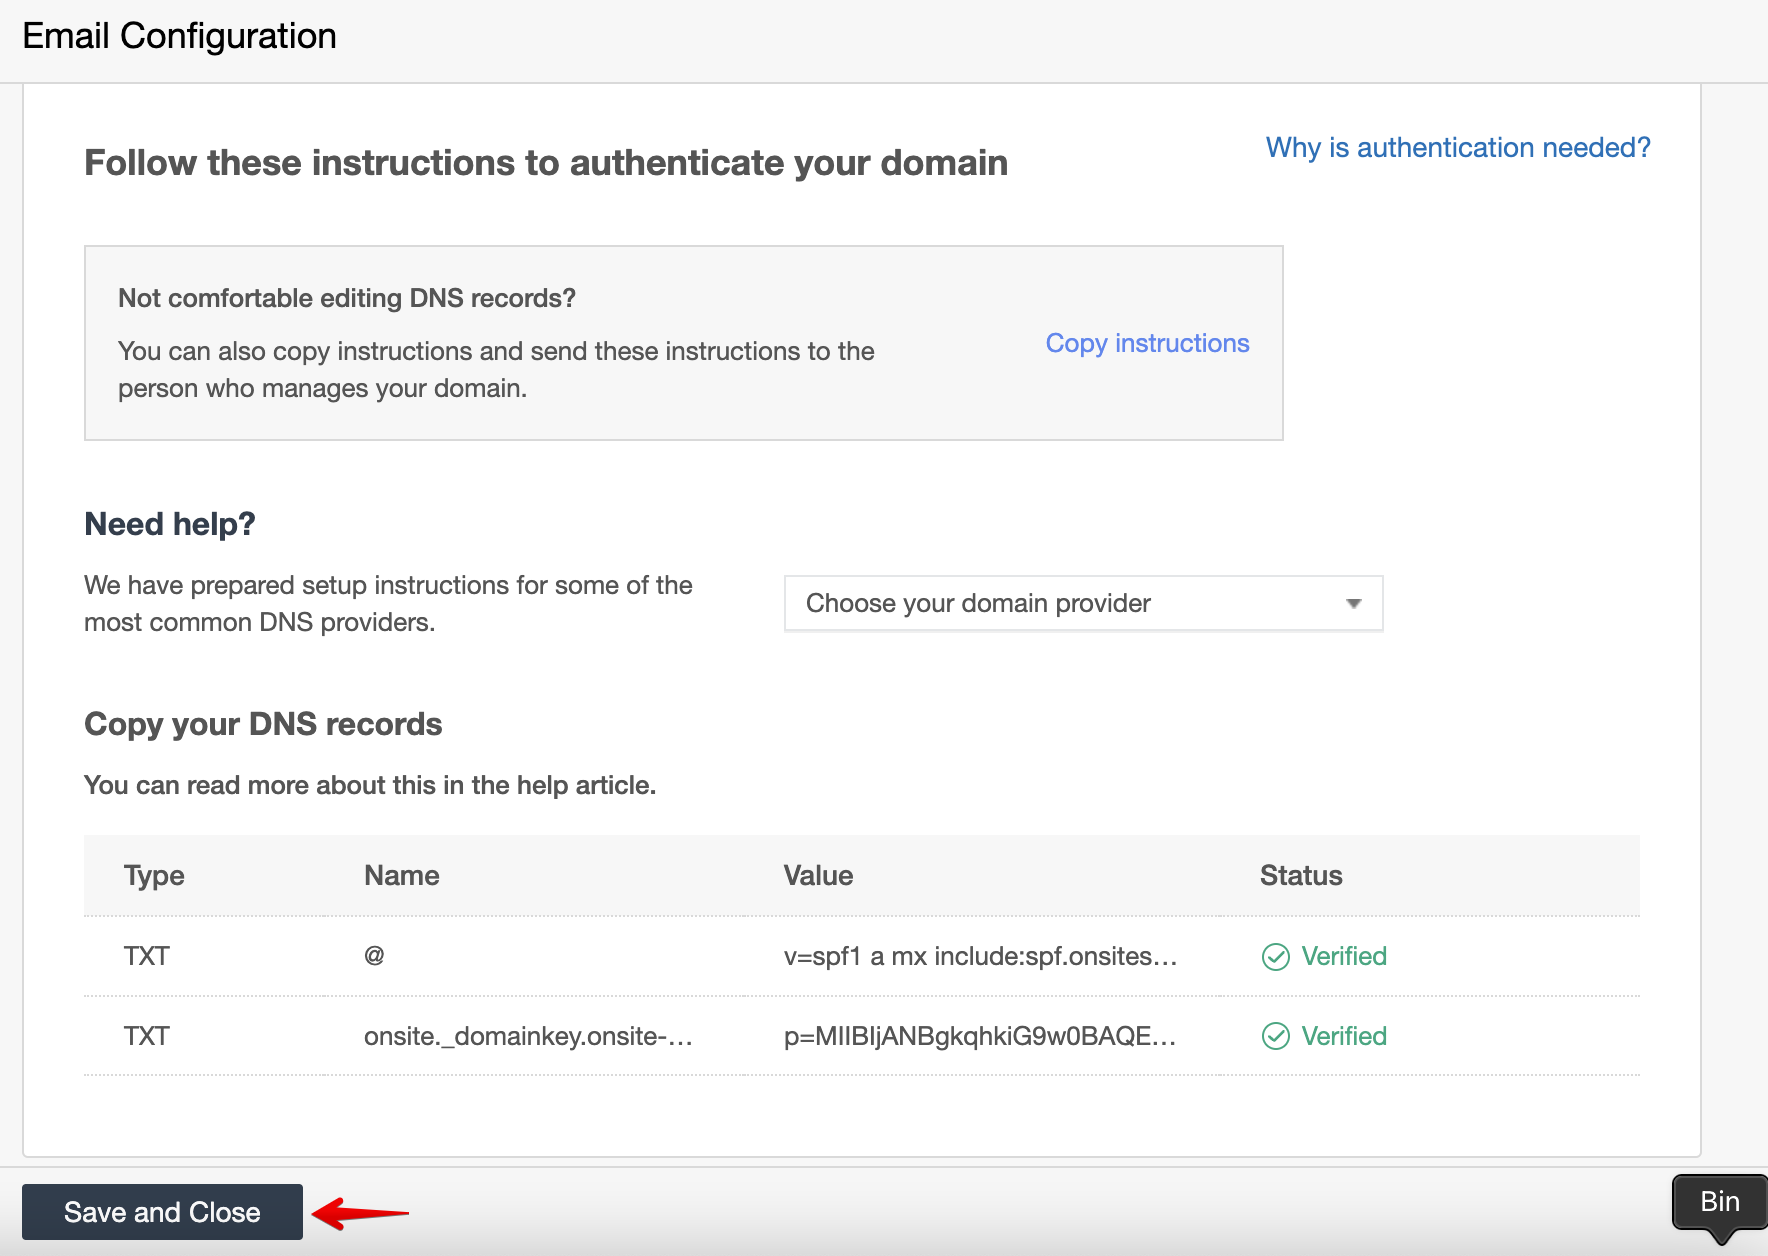
3) Select DNS to view your DNS records.
4) Select Add New Record

5) Click on Add more Records
6) From the Type menu > Select TXT
7) Name > Copy from Onsite and paste (Shouldn't have extra spaces)
8) Value > Copy from Onsite and paste (Shouldn't have extra spaces)
9) Click on Save All Records

Typically, DNS records take up-to 24-hours to apply and you may benefit from our guide on checking your DNS Configuration.
Once you see Verified for Authentication, click on Save and Close.
Congratulations! Your support email address is now connected with Onsite and you should be receiving all of your emails within Onsite.
If you have any questions at all, please feel free to reach out to us by sending an email at support@onsitesupport.io