
It's essential to link your support email address with Onsite. This integration ensures that you receive all your emails within Onsite, consolidating customer requests in one convenient location for maximum efficiency.

After confirming your Email and DNS provider and identifying Gmail as your email service, proceed with the following steps to integrate your support email address into Onsite.
This article covers both multi-email and single email setup options. Navigate easily with our Table of Contents (upper right) to find the setup that suits your needs.
Set Up Gmail (Multiple Email Addresses)
If your email provider is Gmail and you intend to use multiple support emails, you can either follow along with this Interactive Setup Guide or follow the complete written guide below.
Create an Email Support Channel
- Click on Administration (the settings/gear icon).
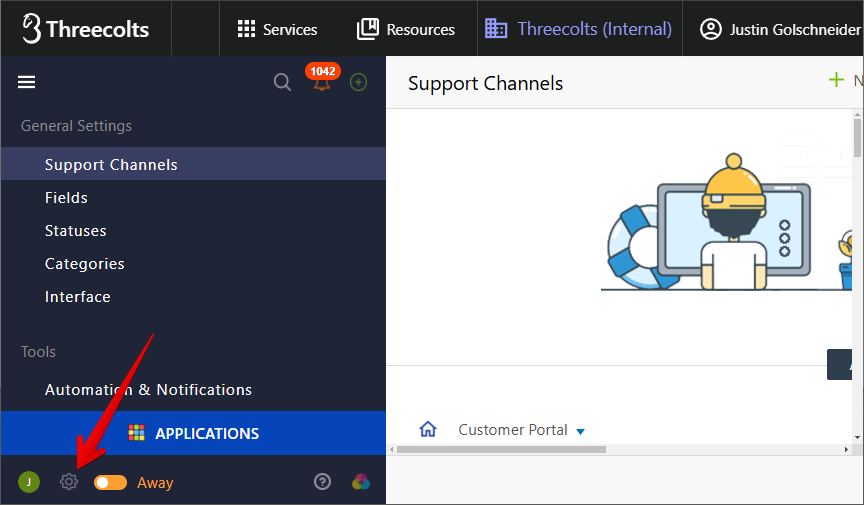
- Go to Support Channels.

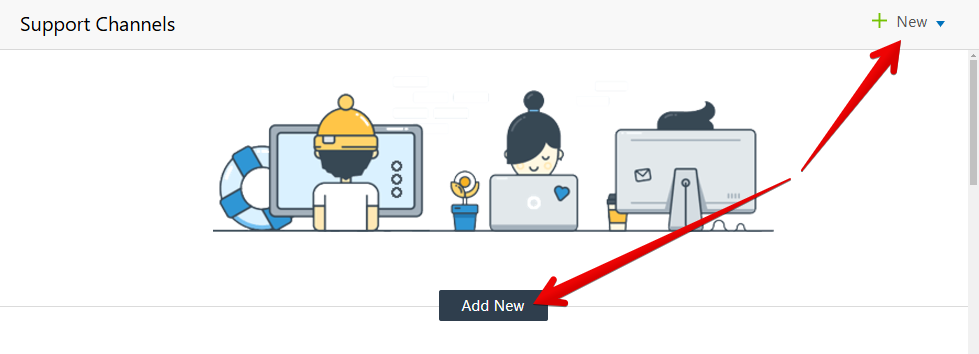
- Click Add New or + New.
- Choose Email from the menu you opened.

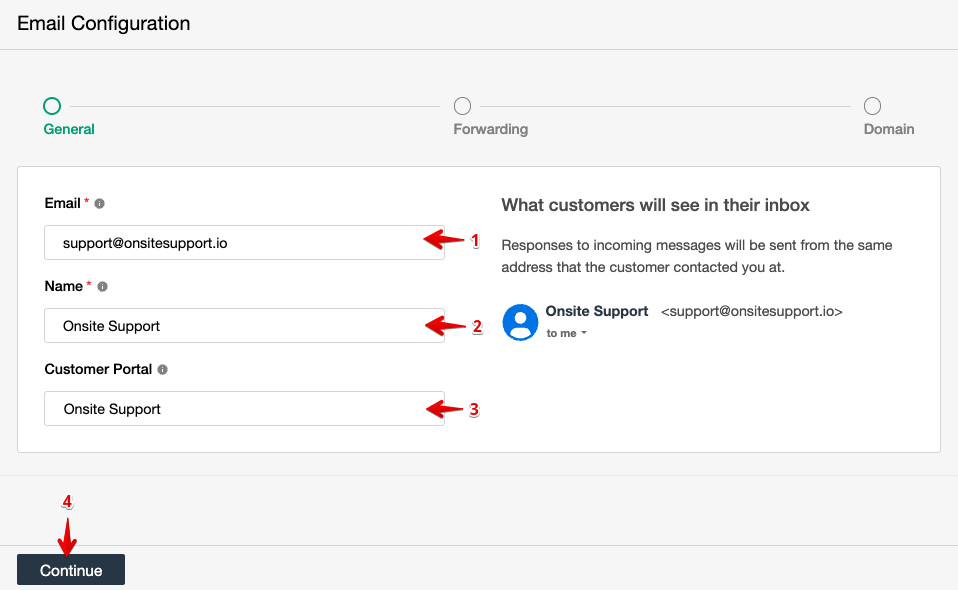
- Fill out the form that appears:
- Email: Type in your support email.
- Name: Enter what you want customers to see as the email's name.
- Customer Portal: Select the default community portal for all tickets.
- Once the form is complete, click Continue.
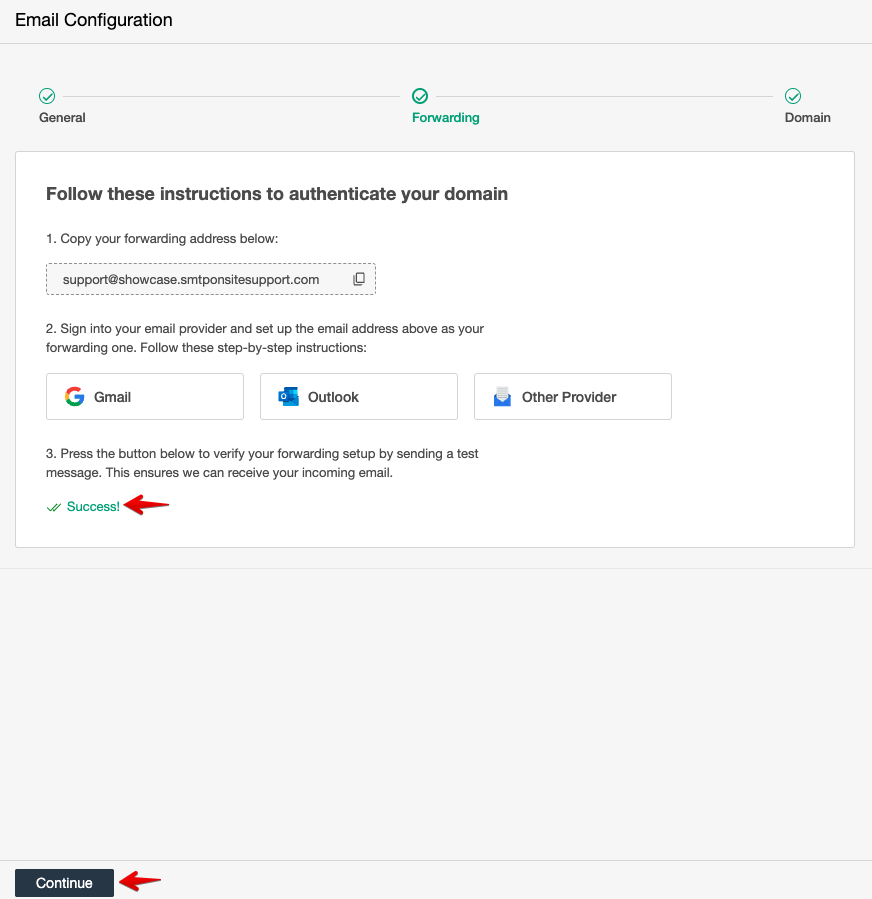
Configure Email Forwarding
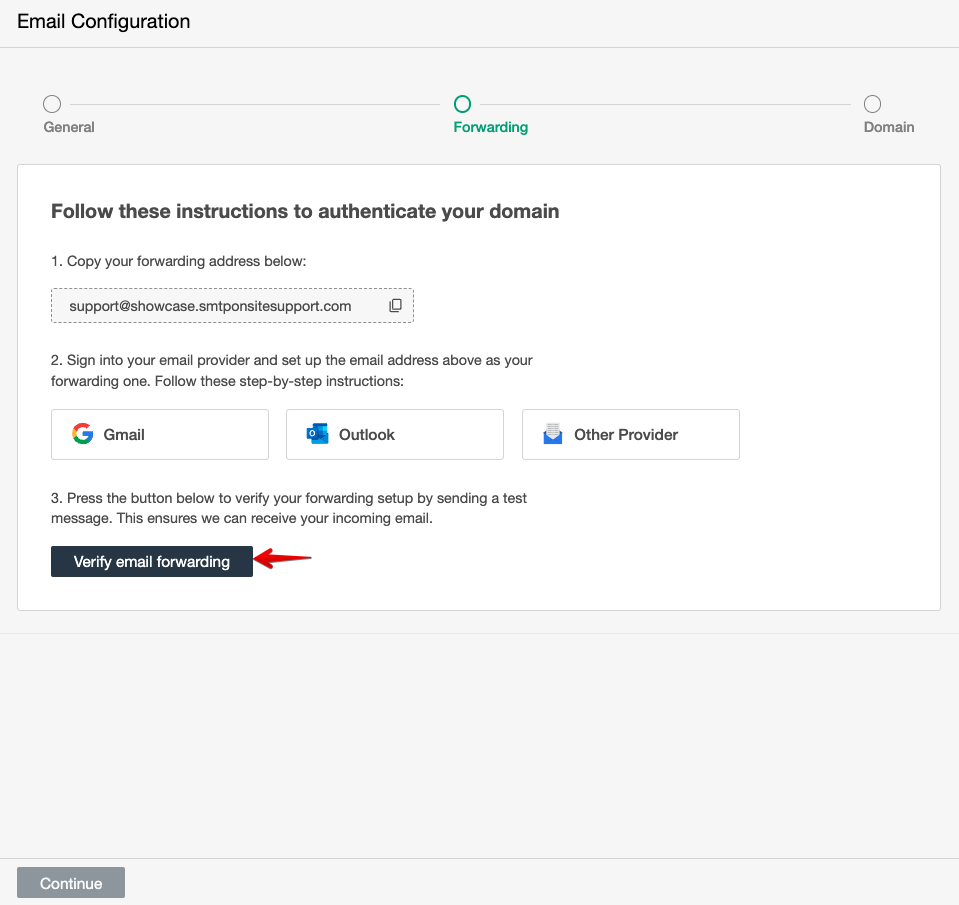
- Copy the forwarding address that appears in Onsite.
- Sign in to Gmail and set up the forwarding address from Onsite as your forwarding address in Gmail.
- Click on Verify email forwarding in Onsite.
- Once you see Success!, email setup has been completed. Click on Continue.
Establish DNS Records
Establishing DNS records will authenticate your domain. Every DNS provider will offer its own panel and distinct instructions for creating or editing the SPF, TXT and DMARC record. Below, we've compiled links to help articles from some of the most commonly used providers:
- Amazon AWS
- Bluehost
- Cloudflare
- Dreamhost
- DNS Made Easy
- GoDaddy - Add SPF
- GoDaddy - Edit SPF
- Google Workspace
- Hover
- Host Gator
- Microsoft Azure
- Namecheap
- Rackspace
- Site5
- Wix
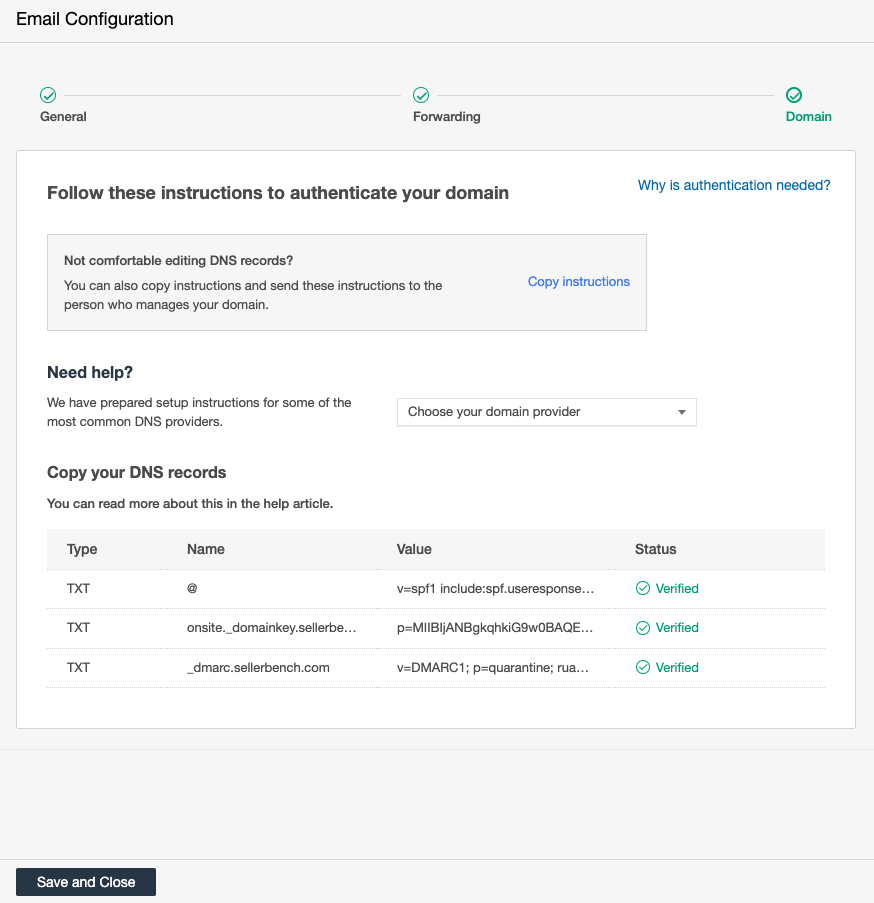
Once the Authentication shows as Verified, hit Save and Close.
Congratulations! Your support email address is successfully connected to Onsite, ensuring that all your emails are received within the platform.
Read Next: Checking Email Configuration
Set up Gmail (One Email Address Only)
If your email provider is Gmail and you intend to add a single Support Email, you can either follow along with this Interactive Setup Guide or follow the complete written guide below.
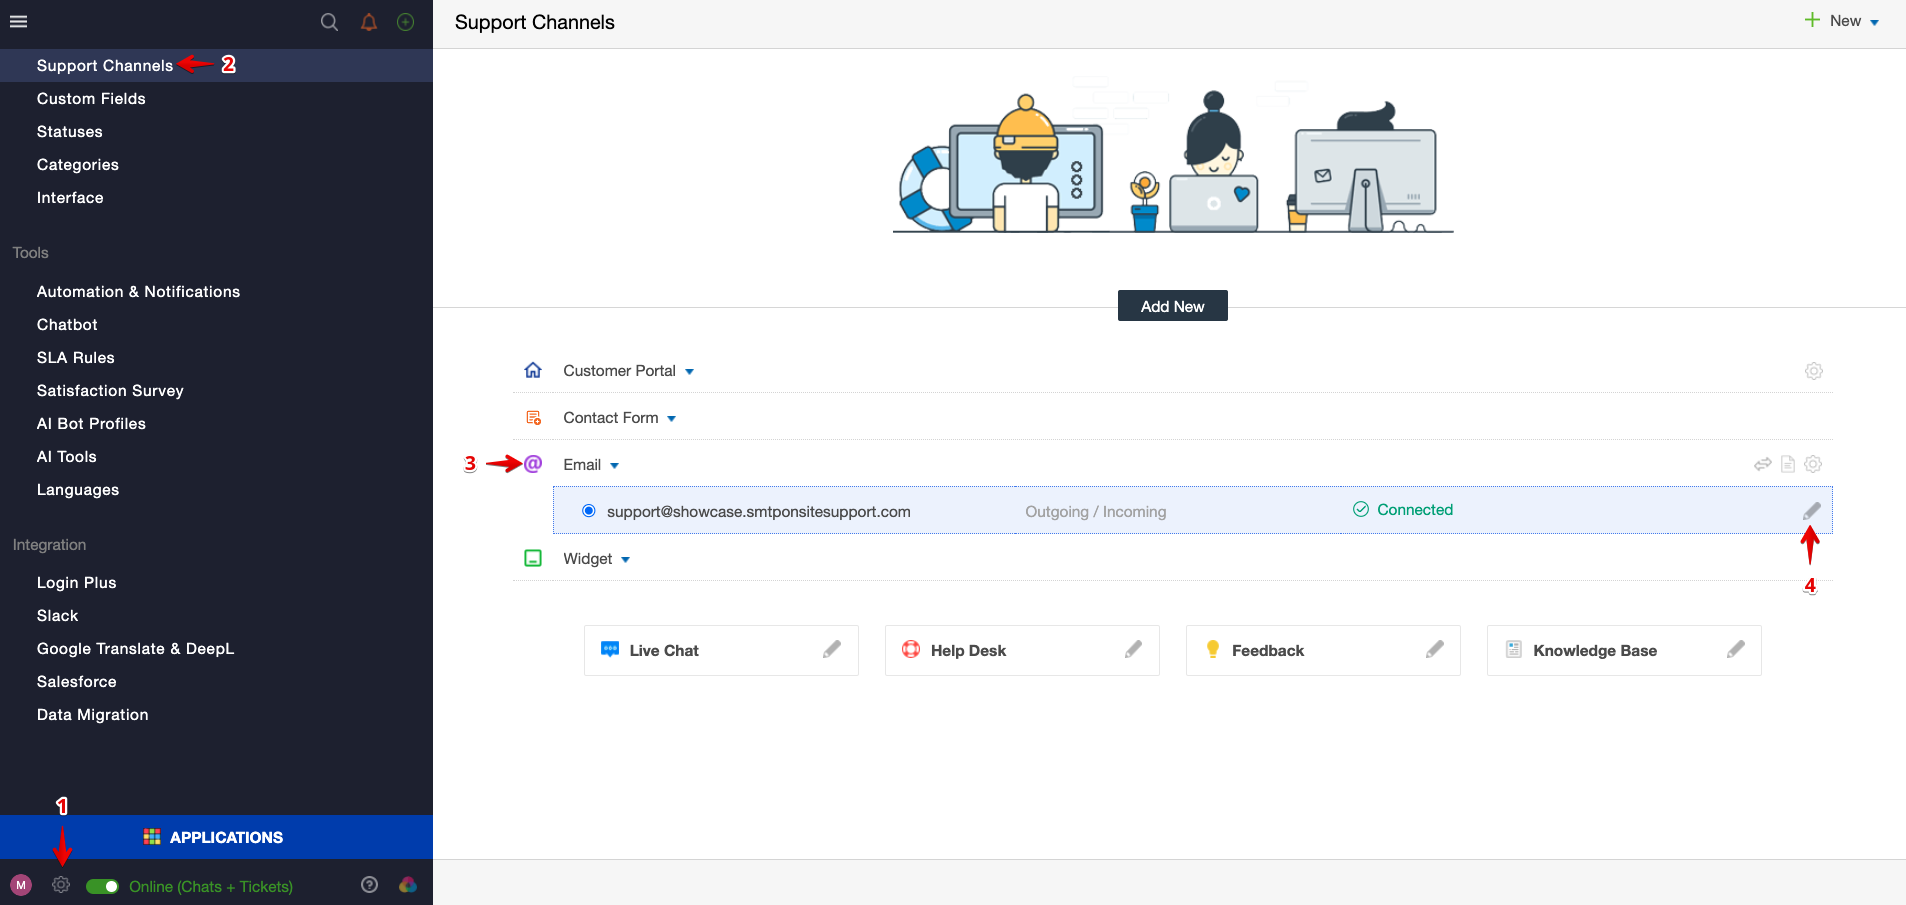
- Click on Administration (the settings/gear icon).
Go to Support Channels.
-
- Click on the Email dropdown.
- Click on the Pencil Icon to the right of your default support email address. (This should be the only email address you have here, and it should be marked Outgoing / Incoming.)
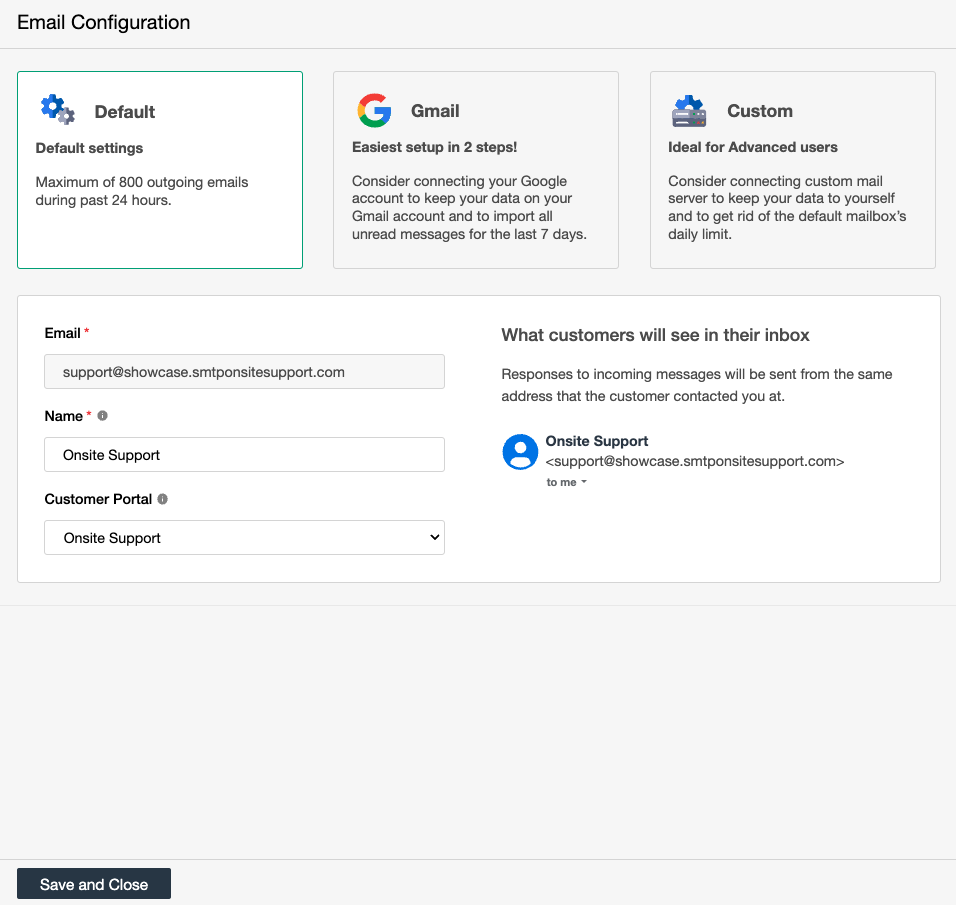
You’ll see the Email Configuration pop-up that shows your default Onsite Support Email as shown below.
Click on Gmail, then hit Sign in with Google.

You'll see a pop-up to sign in with Google. Select the email address you want to connect, or choose "Use another account" if the address you want isn't listed.
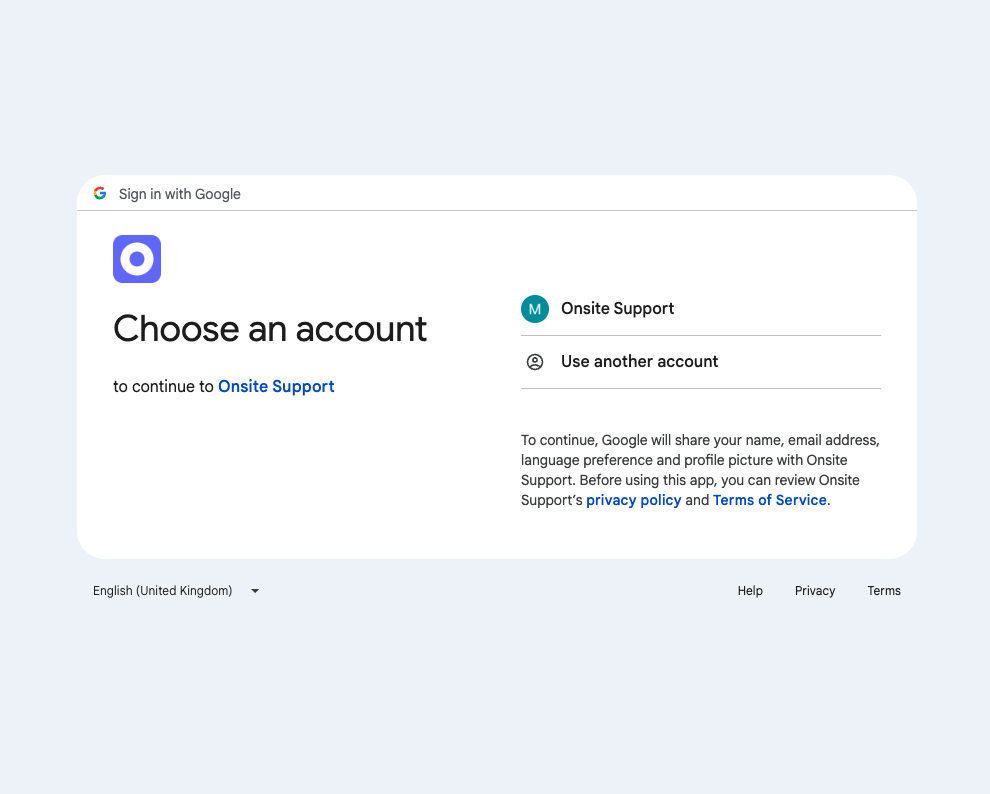
Once you've chosen your preferred address, click Continue.

You should receive an access request from Onsite Support. You can accept it, as this is a standard procedure to ensure smooth email delivery.

You should now see Gmail as Connected. The email address should already be filled in, and you will just need to fill in the following:
Name: What customers will see as the email address's name.
Customer Portal: The default community portal for all tickets.

Congratulations! Your support email address is now connected with Onsite, and you should start receiving all of your emails within Onsite.
If you have any questions at all, please feel free to reach out to us by sending an email to support@onsitesupport.io