
We have an inbuilt migration feature to enable our customers to migrate data from Zendesk, Gorgias and Help Scout to Onsite.
Looking to migrate data from any other helpdesk that we don’t support yet? Don’t worry, we’d love to hear about that as we plan to keep adding more migration options with time.
Benefits:
- Migrate data between Onsite and other helpdesk platforms automatically
- Easy testing to see how the tool works and how the data migrates
- The tool keeps the relations between tickets and other records
- Out-of-the-box ticket field value mapping
- Quick and knowledgeable customer support
Let’s dive right into this.
What data migrated?
- Customer’s conversations (tickets, chats, and its associated info: fields and attachments)
- Customer’s fields and its values
- Agent’s fields and its values
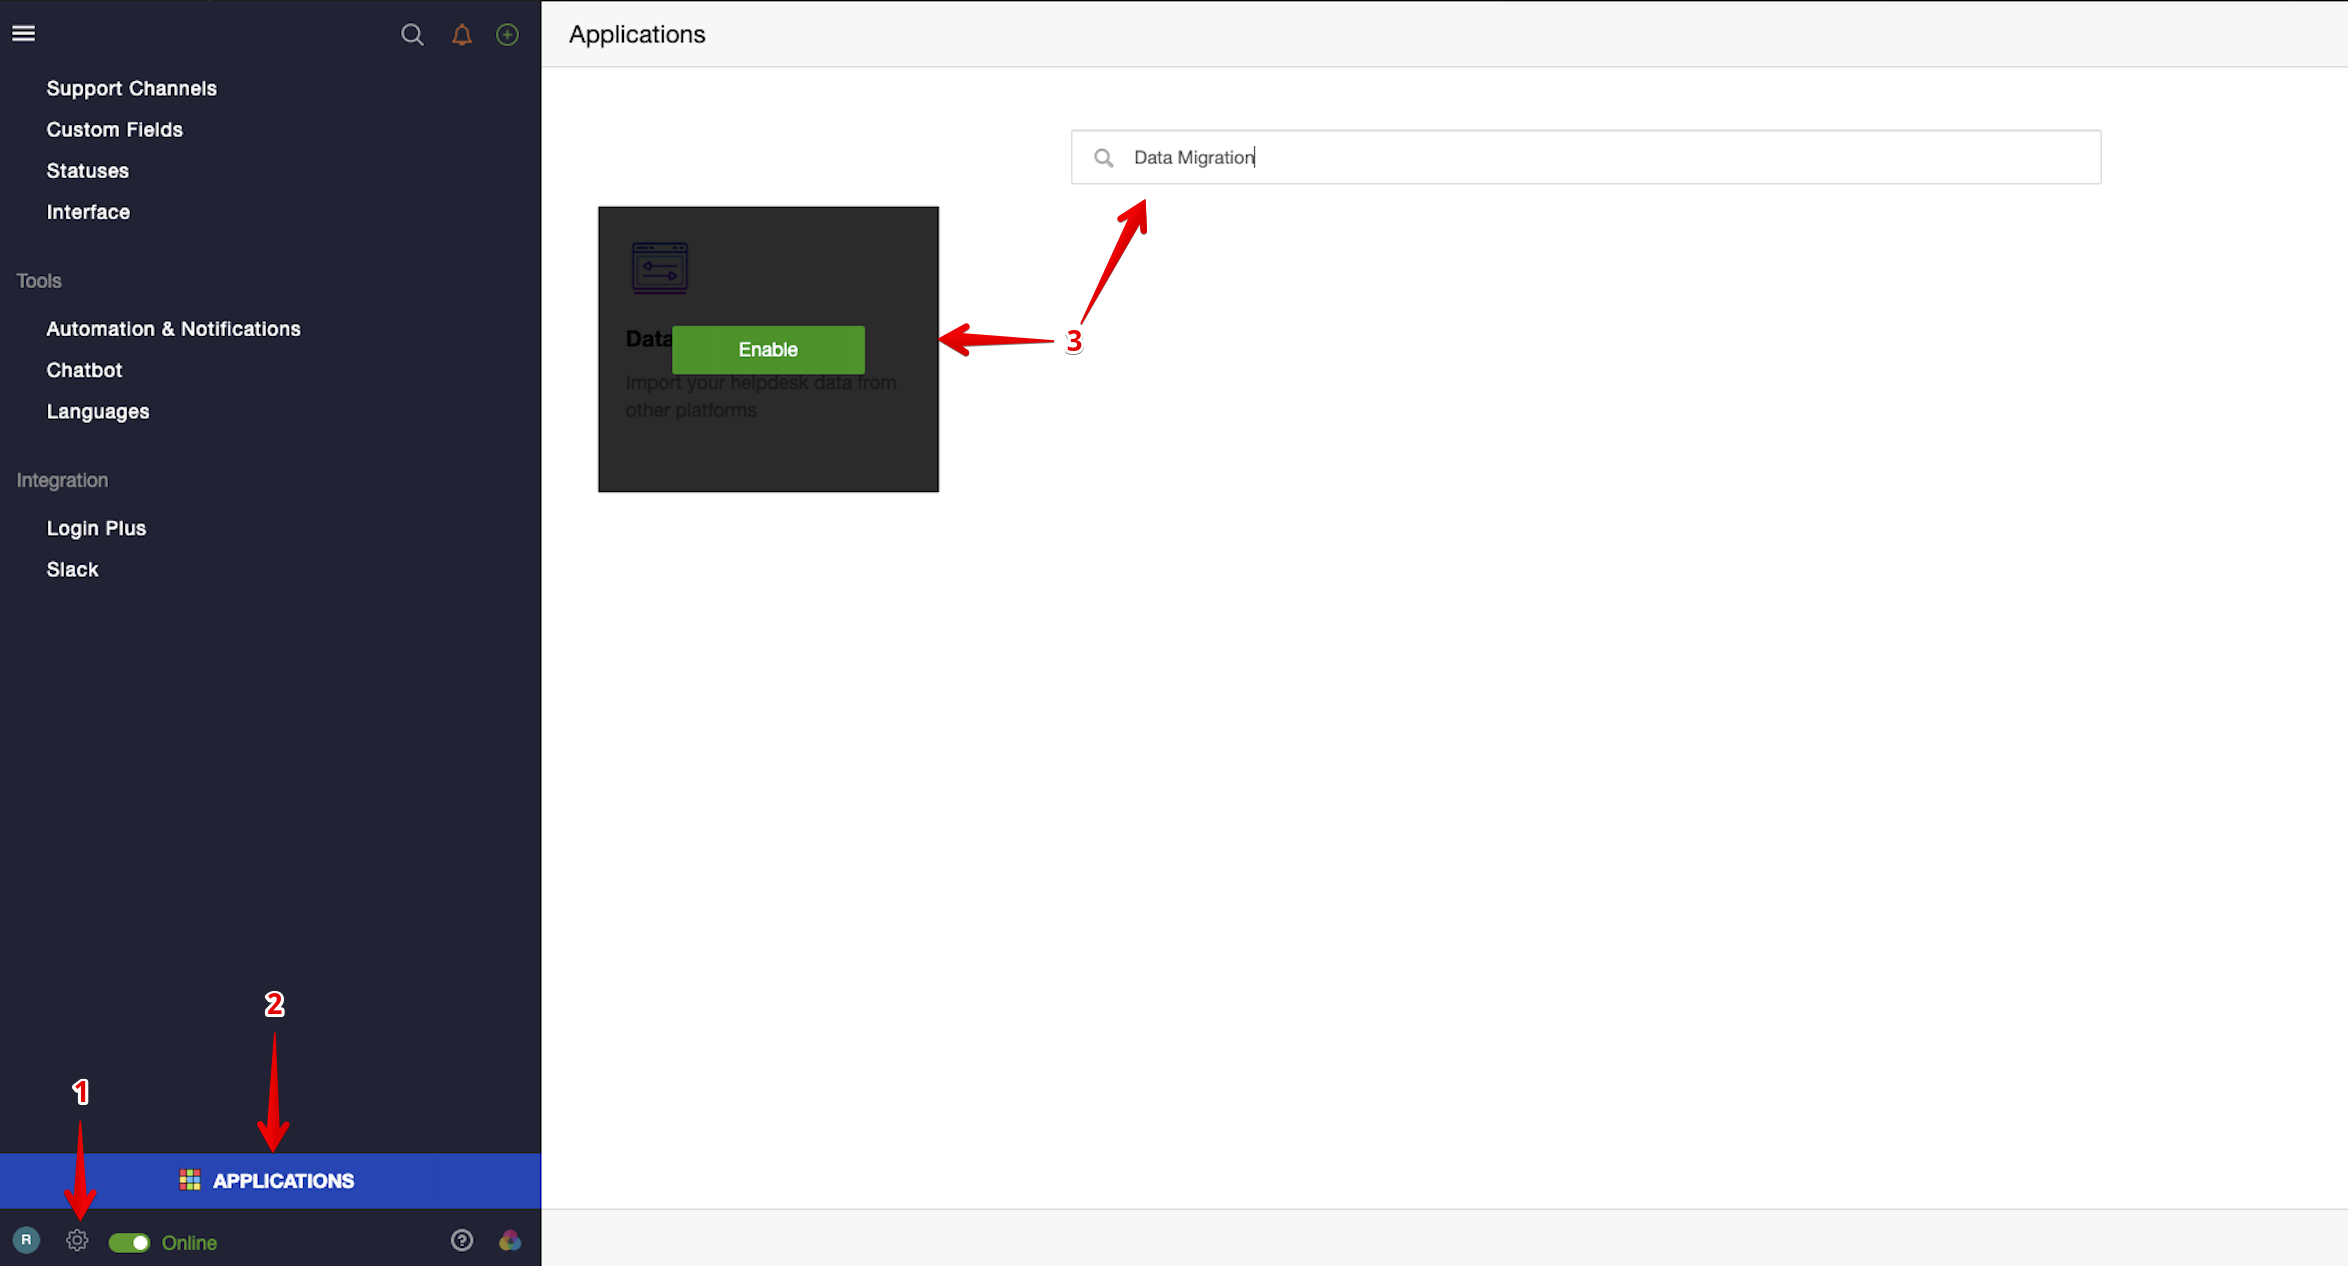
Enable Data Migration
To begin with, please Enable Data Migration via the below steps:
- Click on Administration (Setting Gear Icon)
- Click on Applications
- Search for Data Migration and click on Enable
Migrating data from Zendesk to Onsite
First, let’s go to Administration (the gear icon) in the bottom left and click Data Migration.

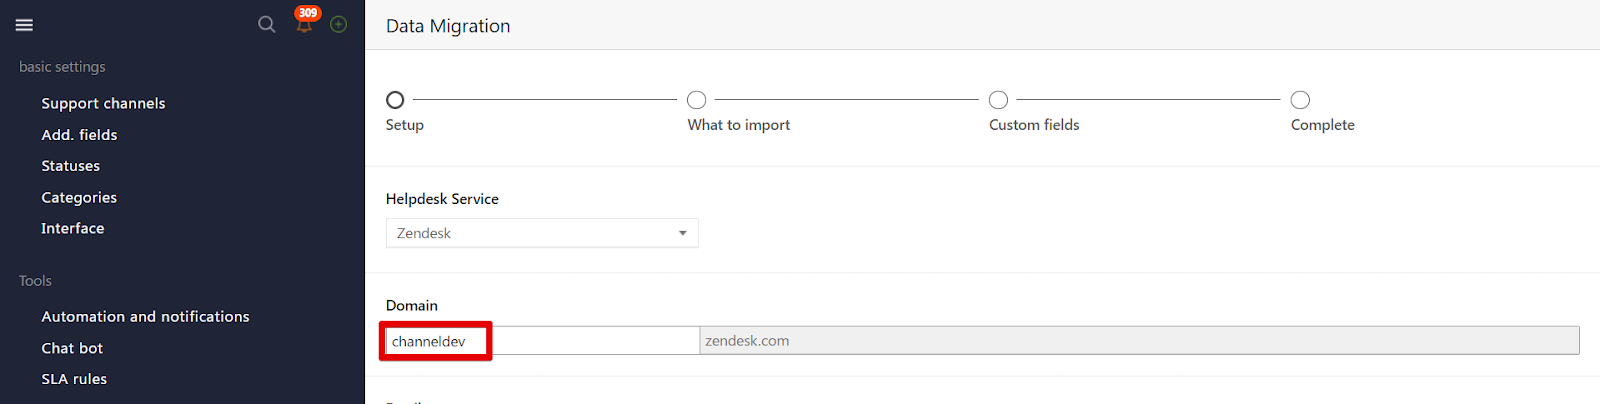
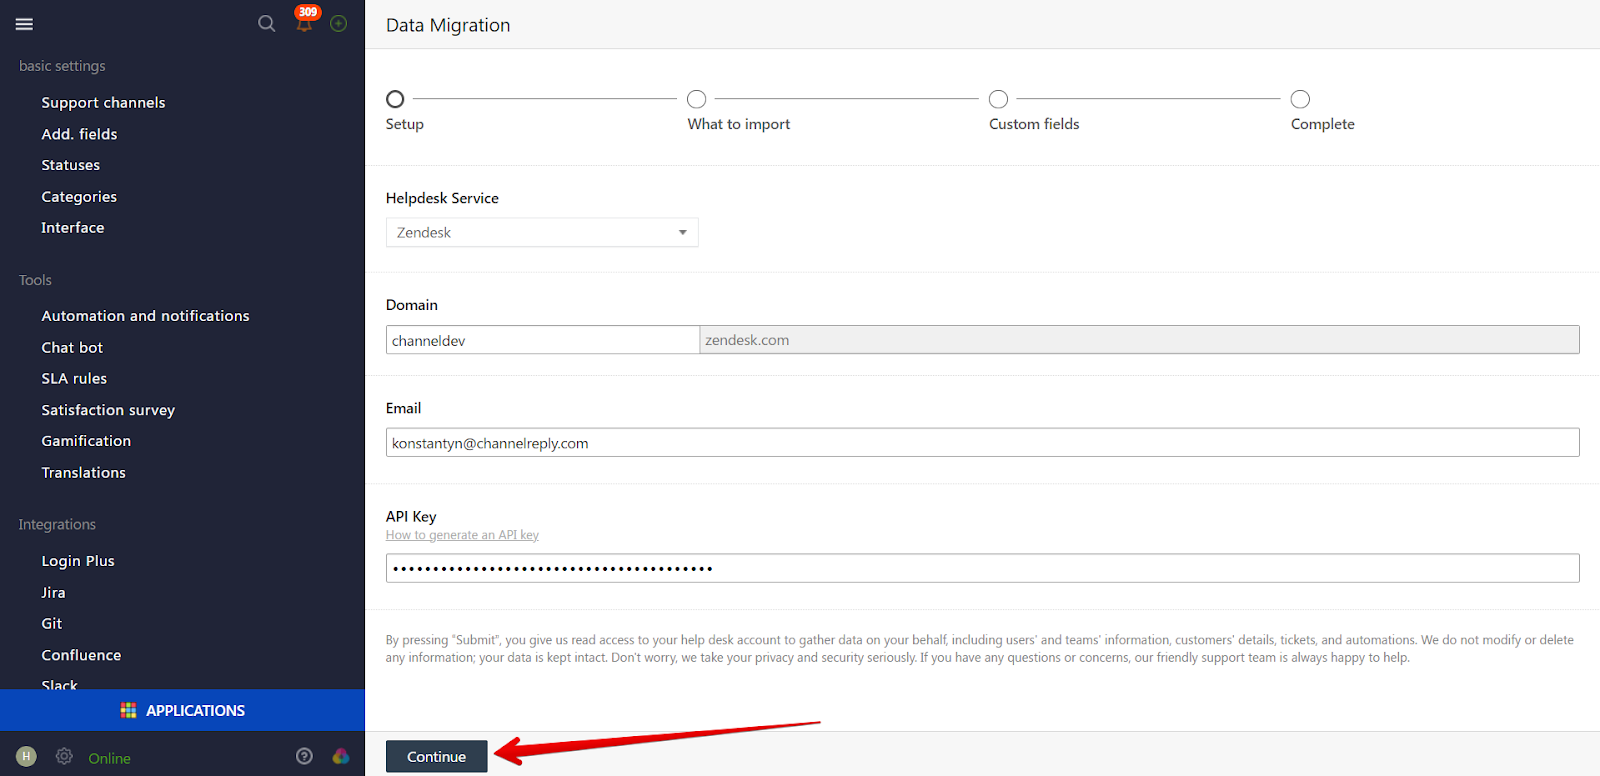
Now you need to fill in these fields to begin the process: domain, email and API key. Log in to your Zendesk account in a separate tab and copy your Zendesk domain name from the URL.
Here’s a demo URL for clarification: channeldev.zendesk.com. So we’ll copy only the “channeldev” part from this and paste it into the “Domain” field in Onsite.
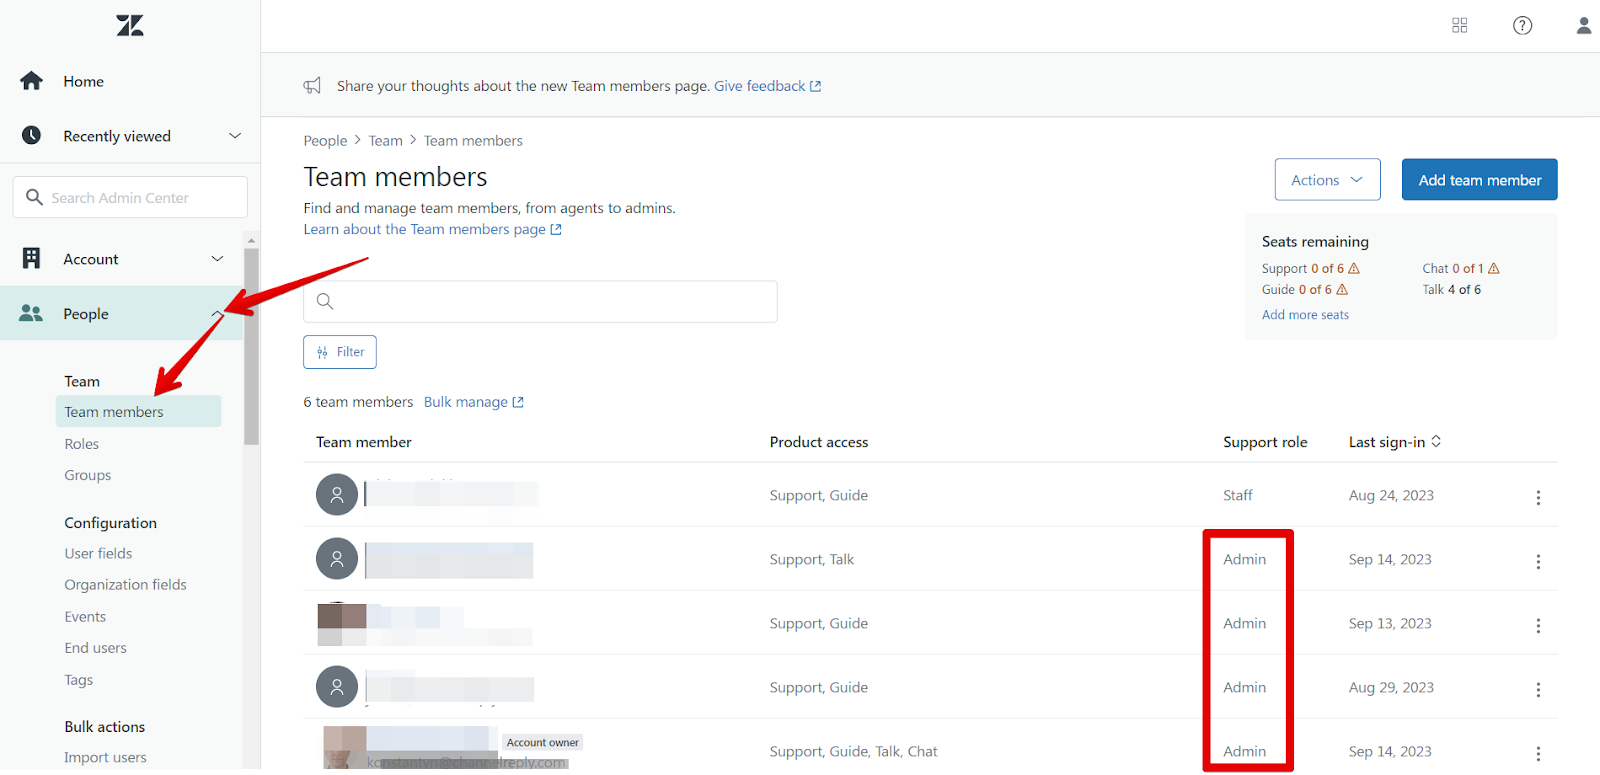
Now you need the email of an administrator in your Zendesk. If you don’t know the administrator’s email, you can find it in your Zendesk Admin Center. From there, click People > Team members and copy the email address of any admin.
Paste the email into the “Email” field in Onsite.
Last thing that’s needed is a Zendesk API key. Either click “How to generate an API key” or continue reading below to learn how to generate one.
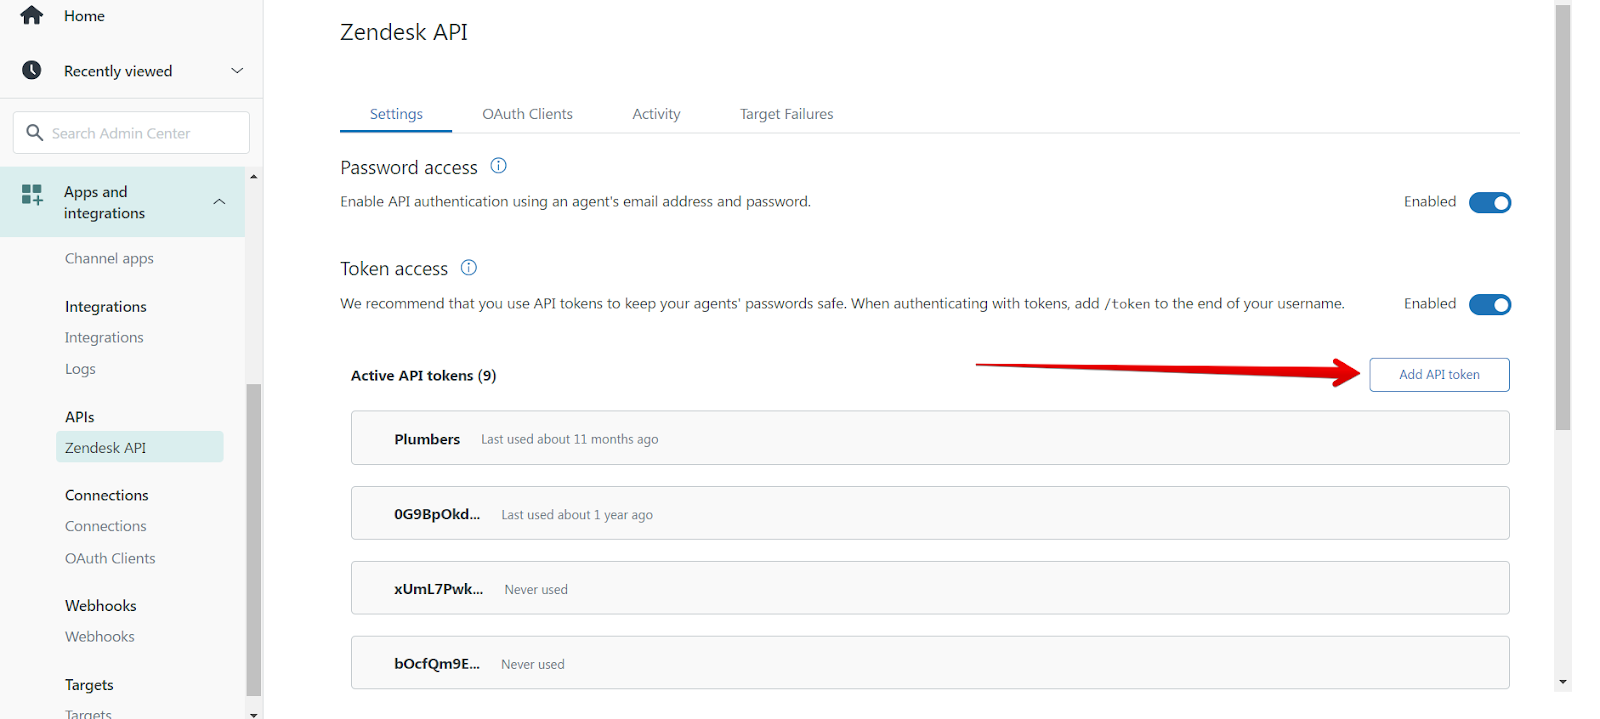
From your Zendesk Admin Center, click Apps and integrations > Zendesk API.

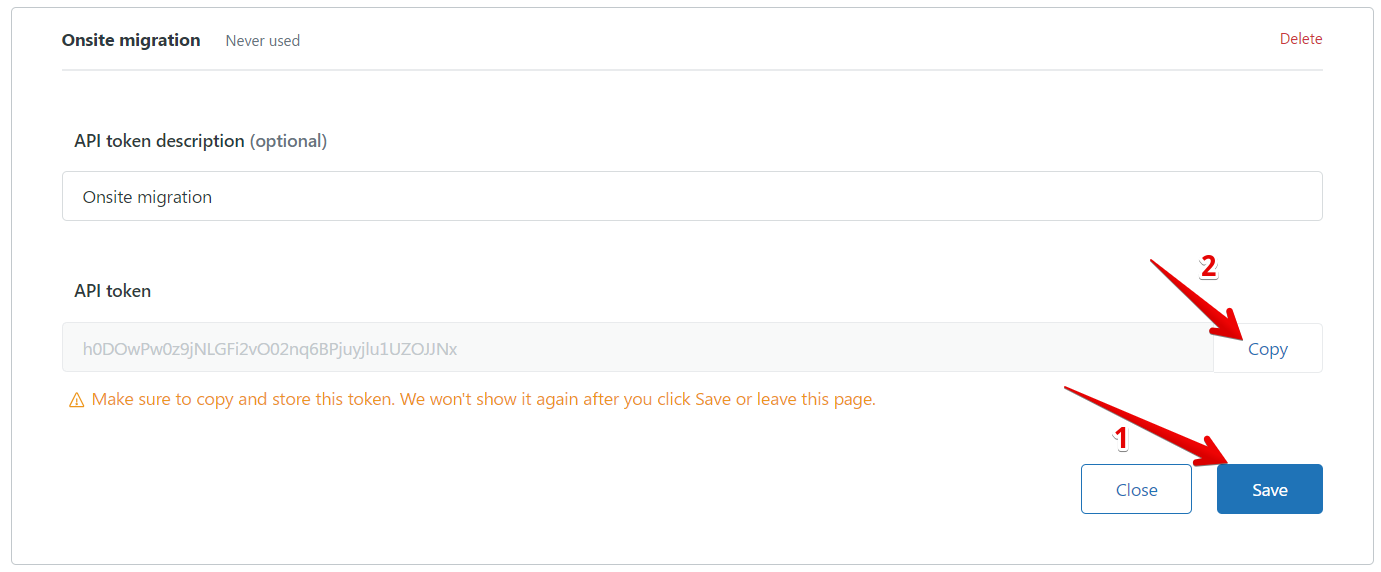
Click Add API token.
Enter a name e.g. “Onsite migration” and click Save. We recommend saving this API key separately in a safe place in your computer because Zendesk won’t show this to you again.
Once done, click Copy and paste it into the Onsite “API Key” field.
Once all fields are filled in, click Continue at the bottom of the screen.
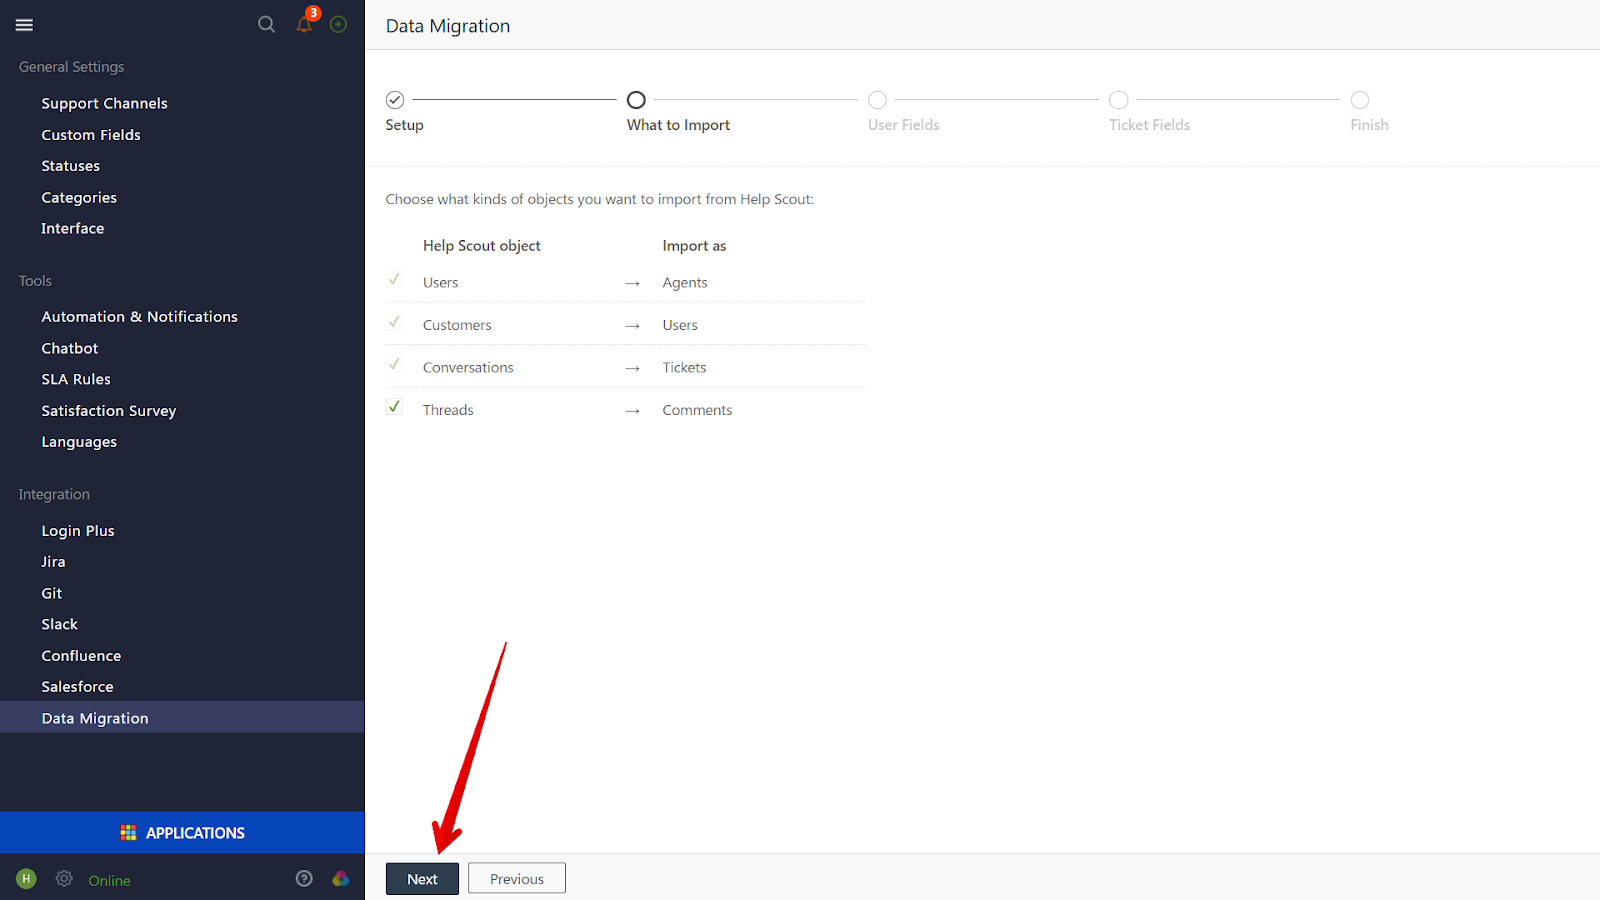
By default, Agents, Customers and Applications are selected by default but you can check or uncheck “Ticket Comments” to import or skip. Click “Further” or “Continue”, whichever is visible to you.

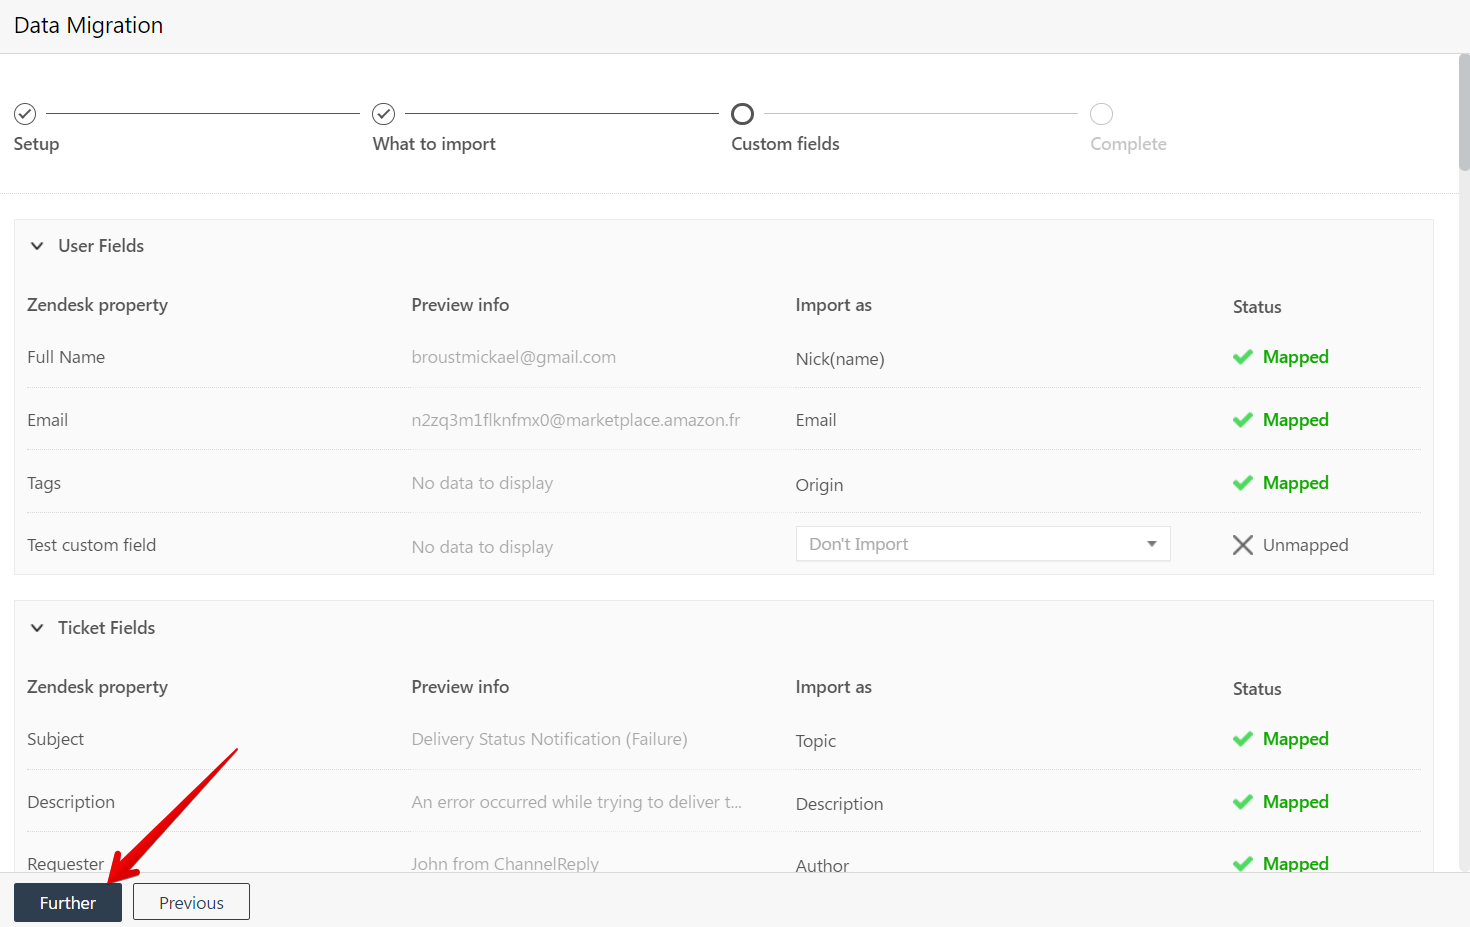
Next, select the user fields and ticket fields to import and click “Further” or “Continue”, whichever is visible.
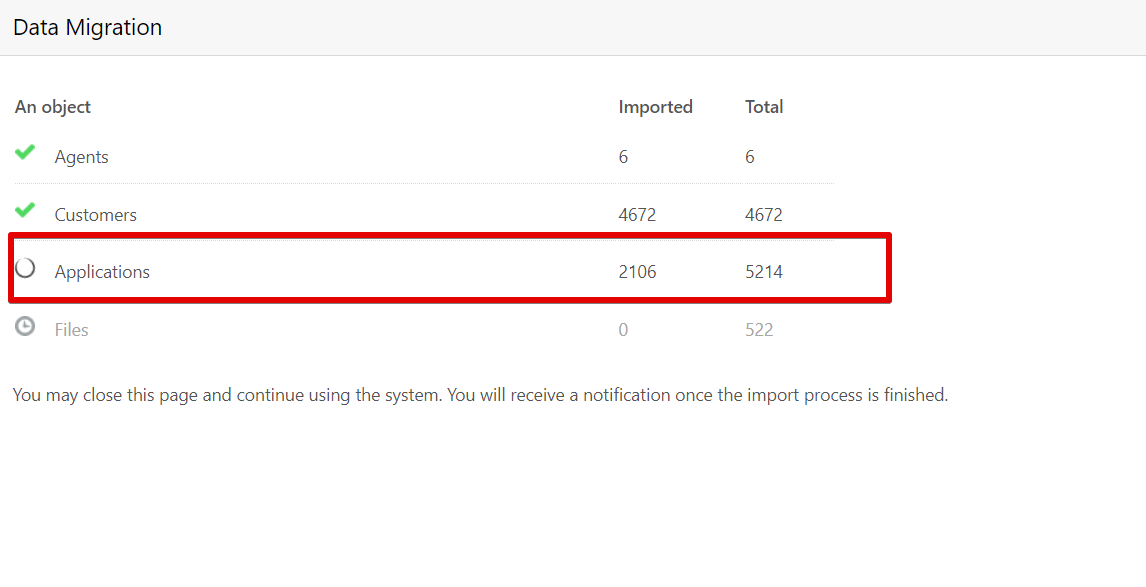
You’ll be brought to a screen where you can take a moment to review/change the settings you just selected. When ready, click “Launch” and the migration process will start. Depending on the number of tickets/data to be migrated, it’ll take some time but the whole process will take some time.

Hit complete when done and all your data will be migrated successfully to Onsite. The tickets will be created into a new report so you’ll have all your data organized.
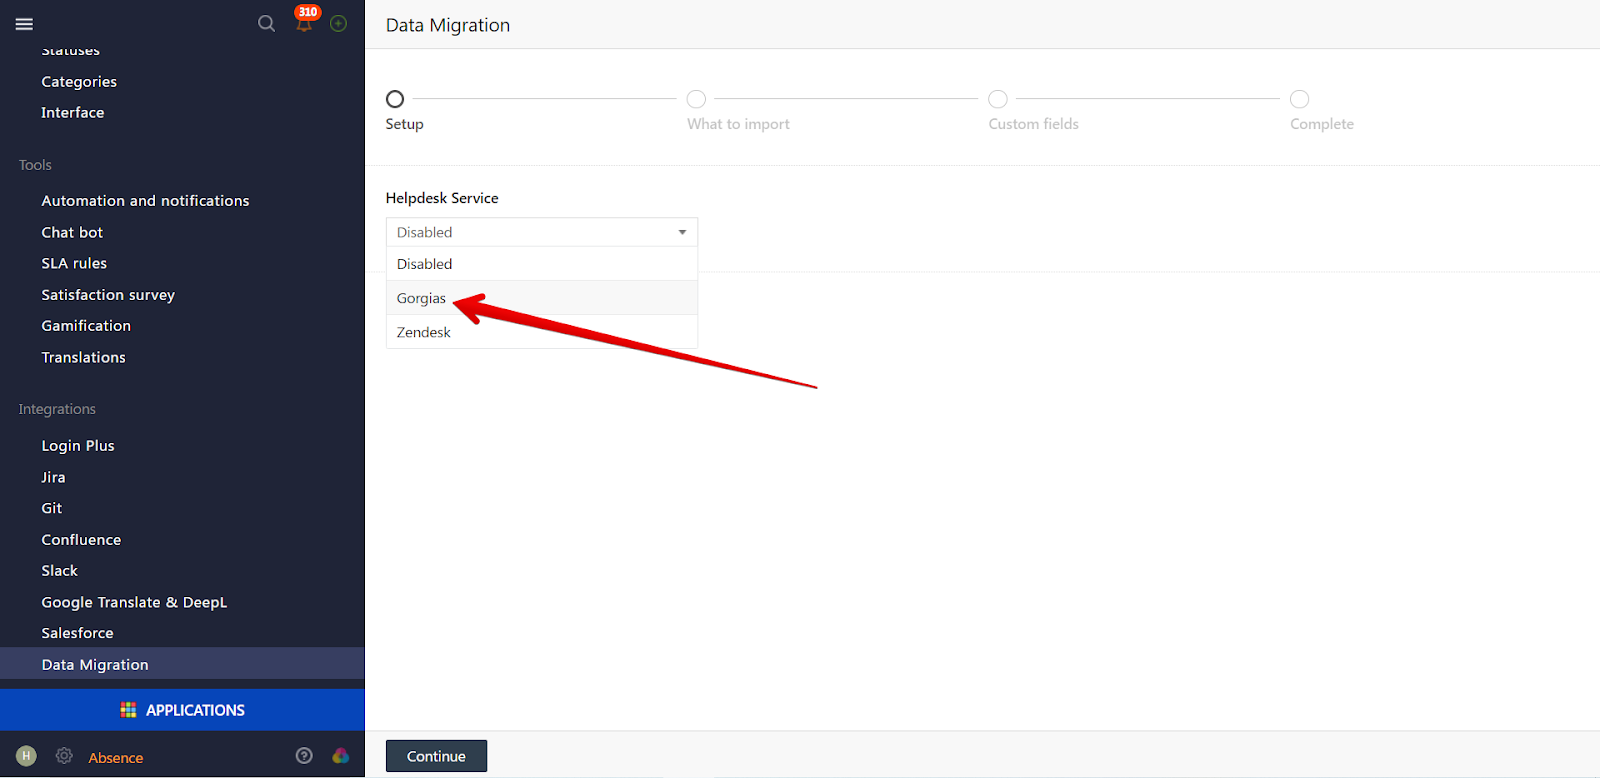
Migrating data from Gorgias to Onsite
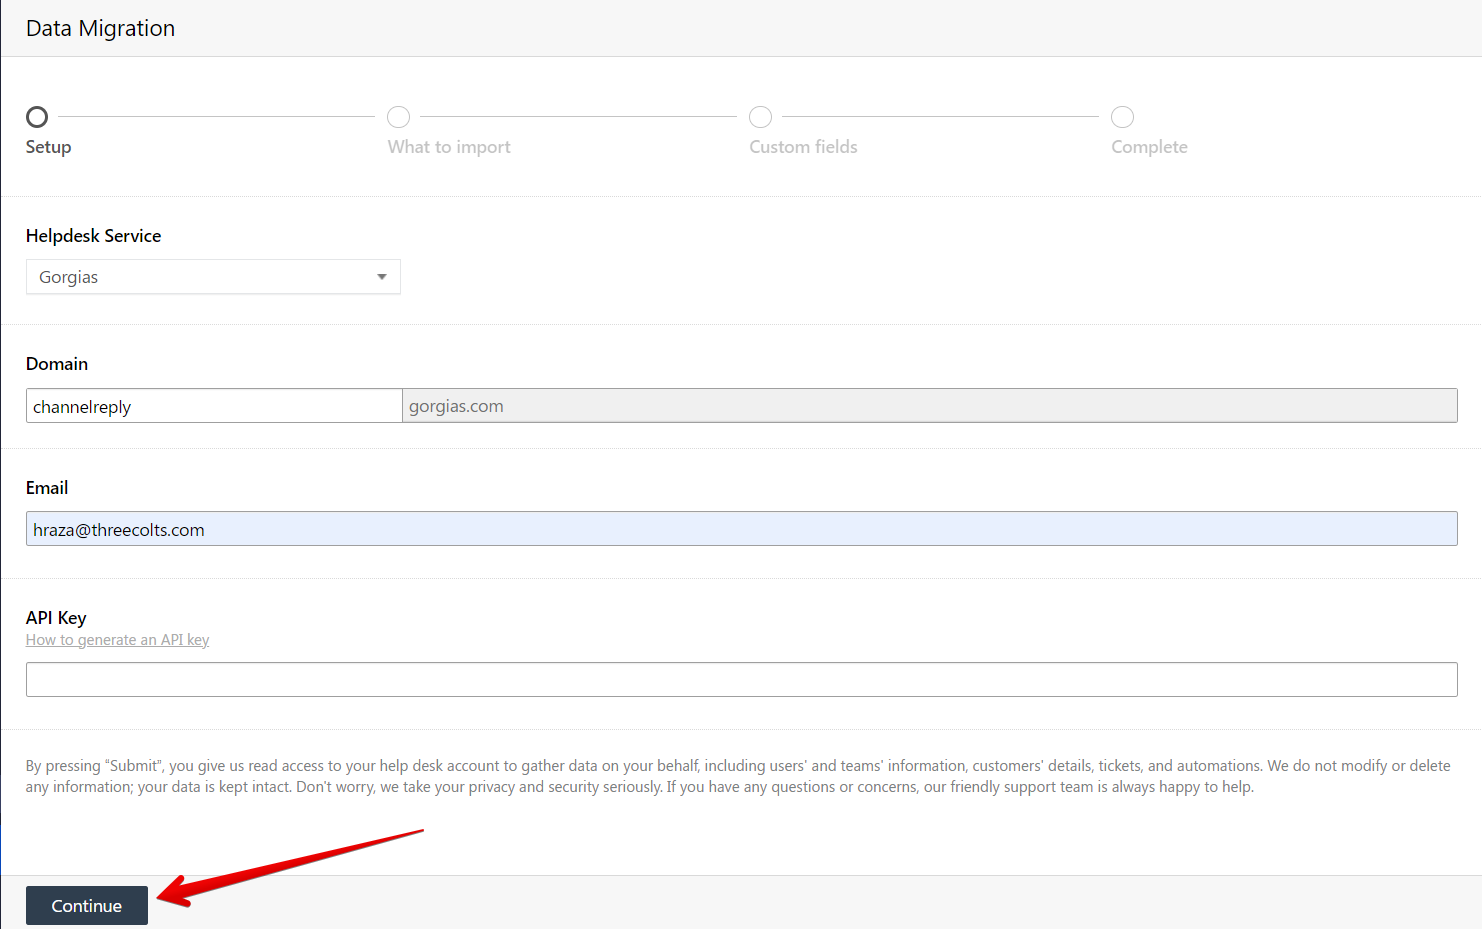
Onsite supports migrating your data from Gorgias to Onsite. To begin, log in to your Onsite account and click Administration (the gear icon in the bottom left) and choose Data Migration.
Next, choose Gorgias from the dropdown menu and hit Continue from the bottom.
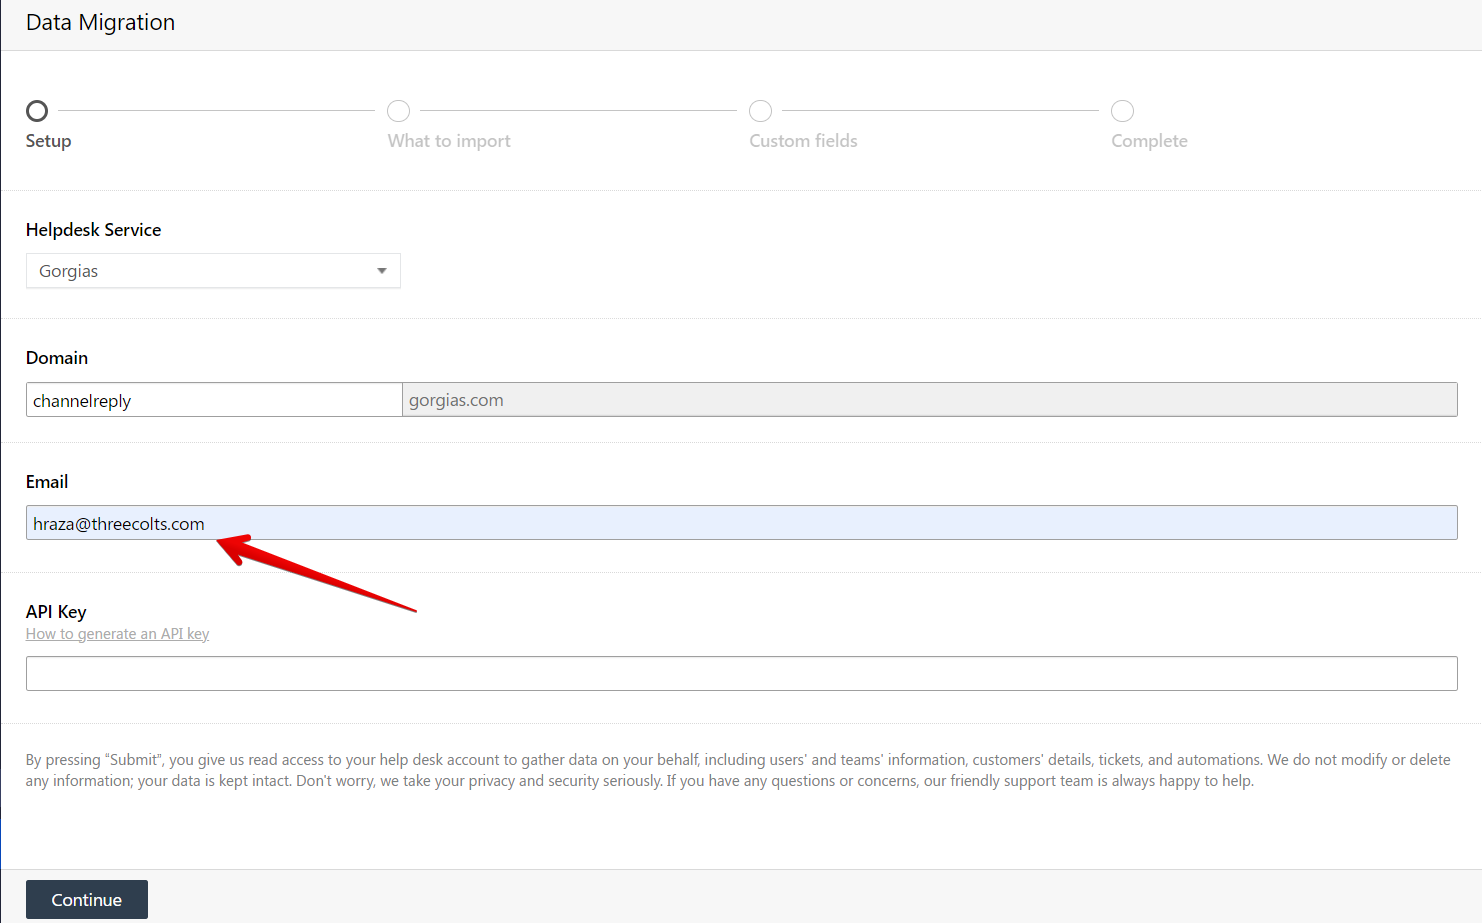
Right after choosing Gorgias from the dropdown list, you’ll be asked to enter these three values in the three fields: Domain, Email and API Key.
To get the domain, log in to your Gorgias account in a separate tab and copy the domain part from the URL. Paste the domain name in the “Domain” field in Onsite.
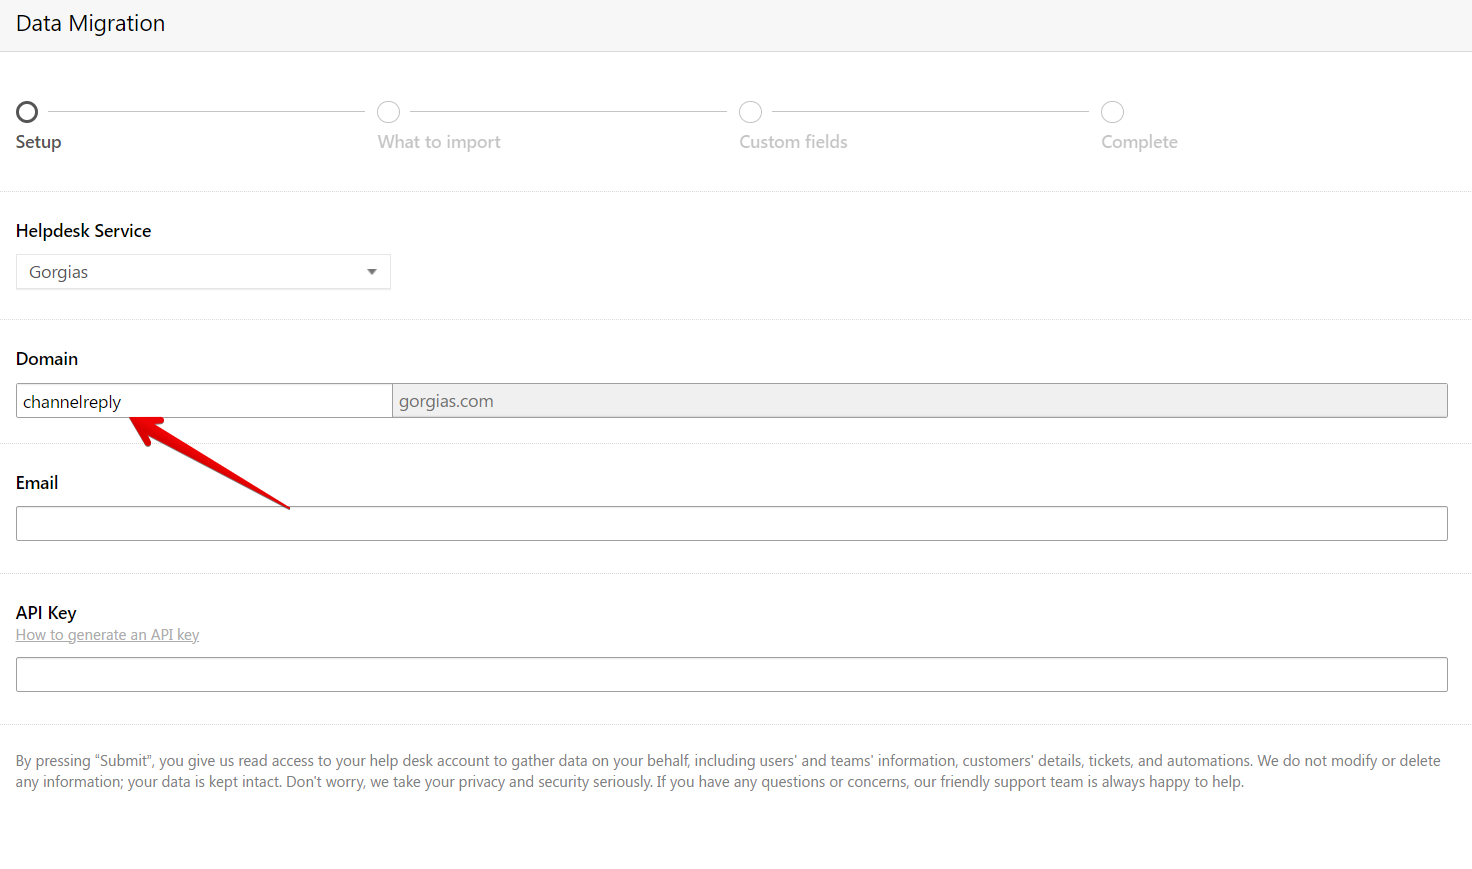
Enter the email address of the admin in your Gorgias account.
Finally, the API Key which you can get from this article or continue reading below to get one.
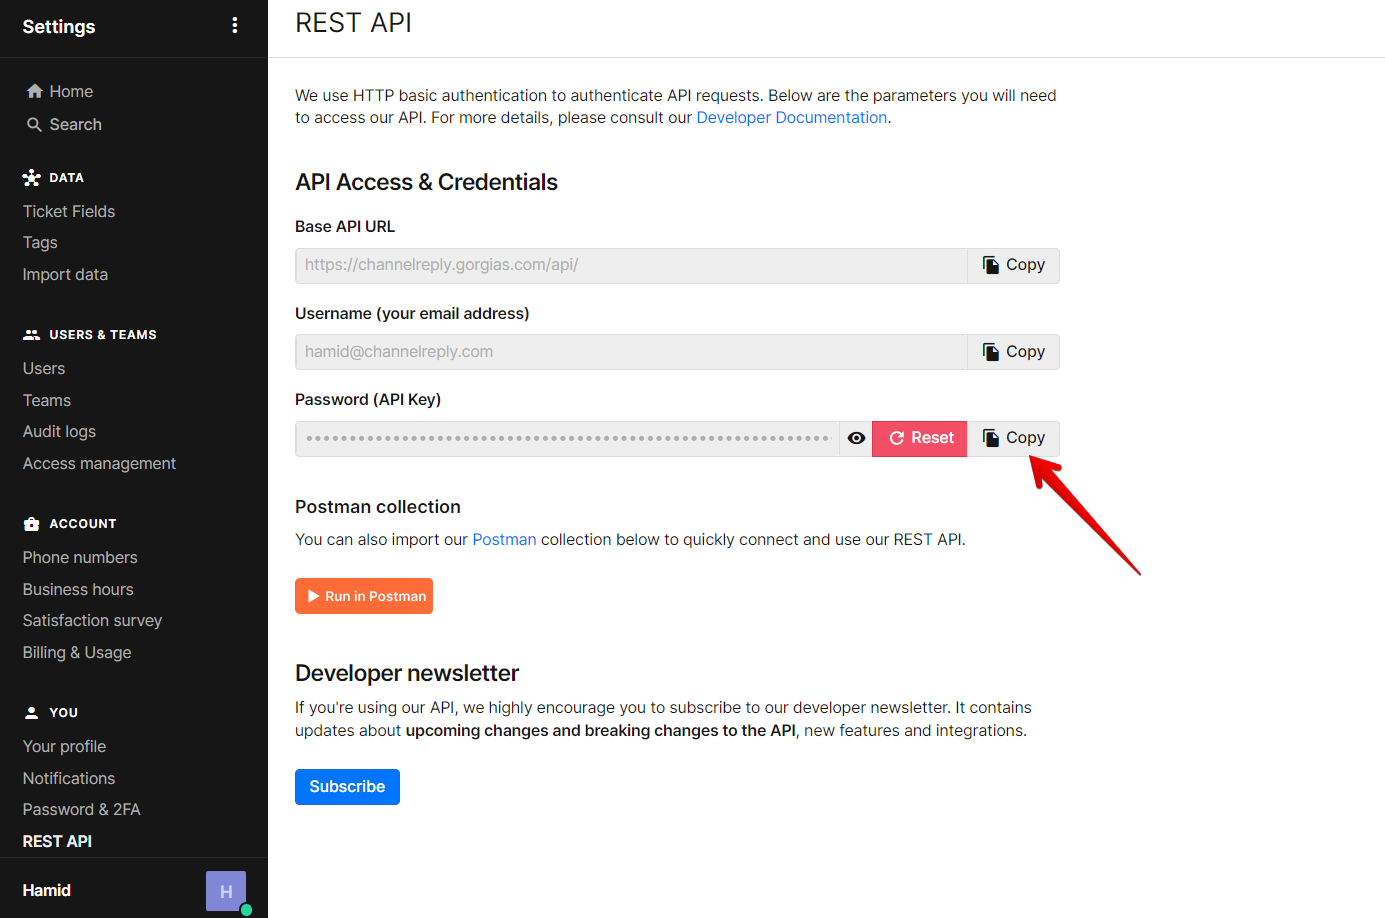
Log in to your Gorgias account and navigate to Settings → REST API
Click the Copy button and paste it into the Onsite “API Key” field.
Hit Continue to proceed forward.
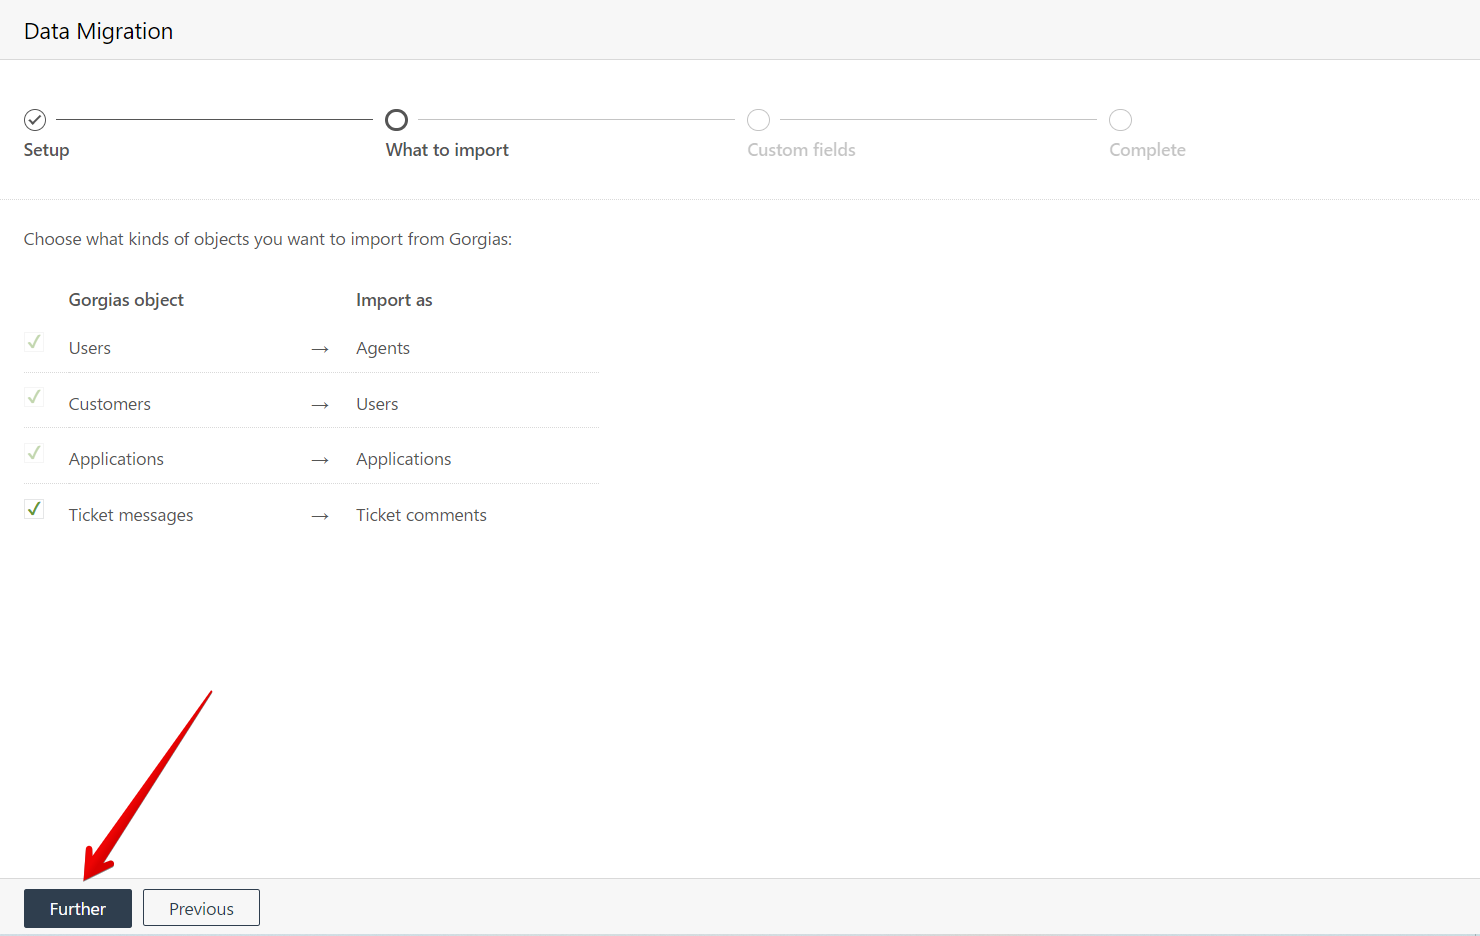
Select which metrics to import and hit “Further” or “Continue”, whichever is visible to you.
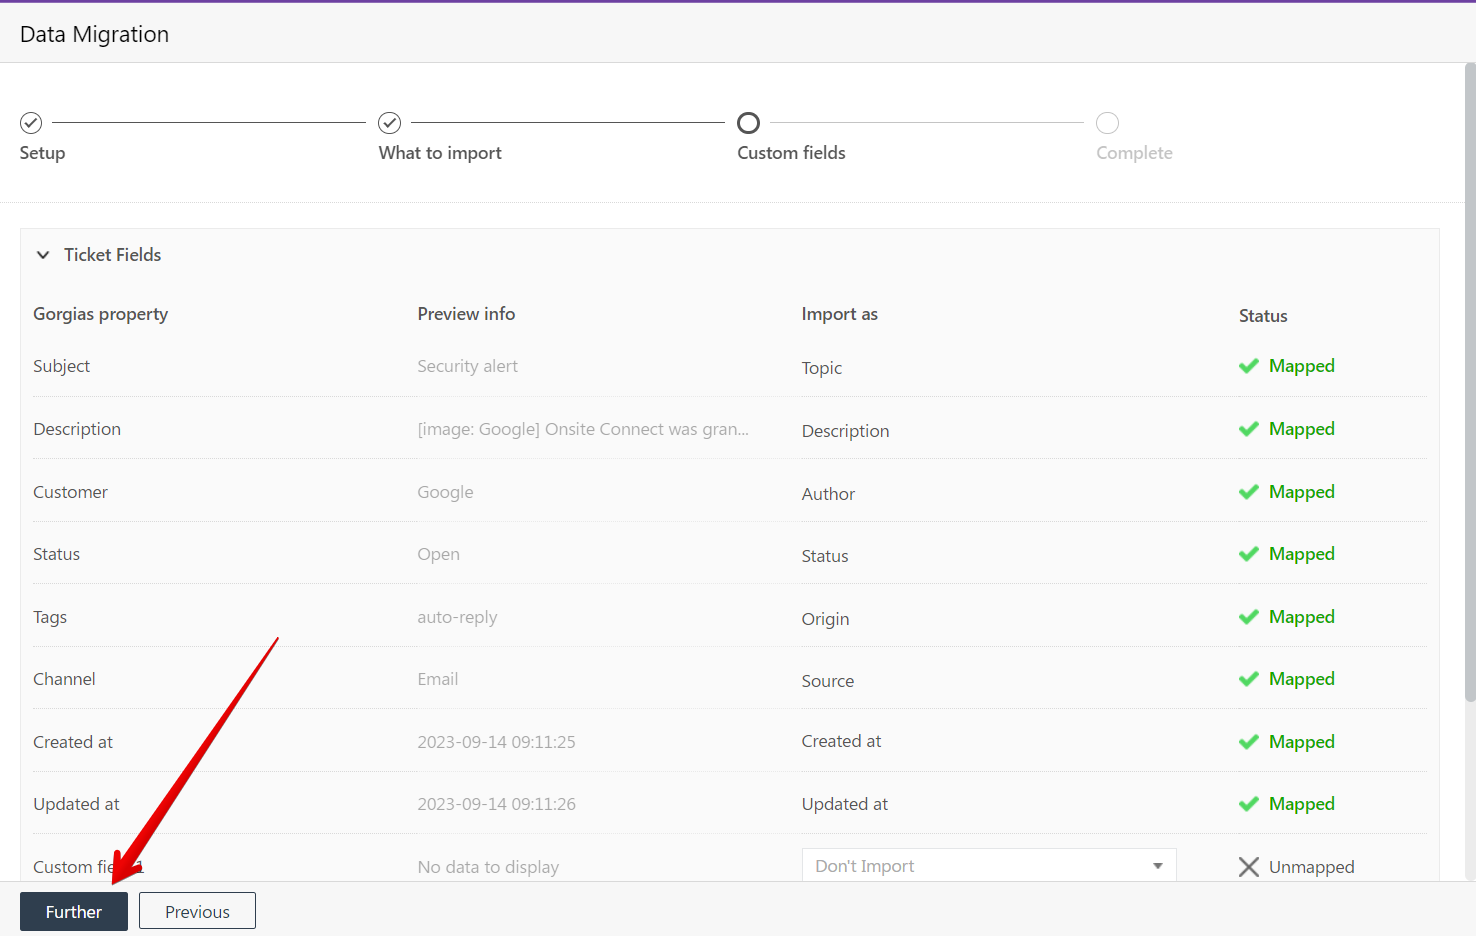
Next, you’ll get to choose the ticket fields to import. Choose as per your preferences and hit “Further” or “Continue” to proceed forward.
Time to review the settings you just made. Click “Launch” when ready to start the migration.
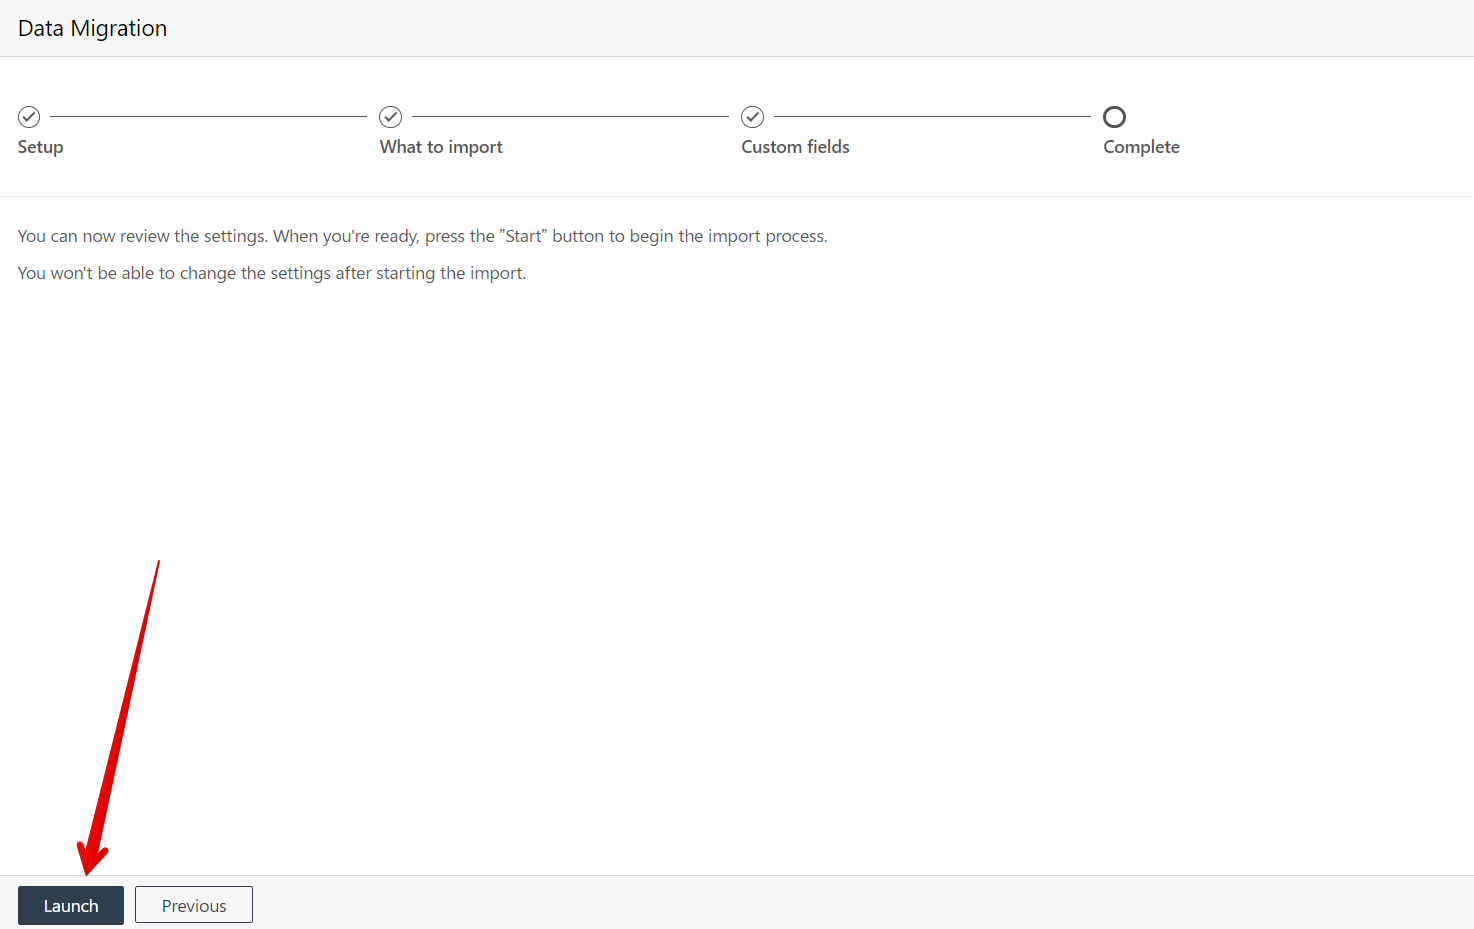
Depending on the amount of data to be imported, the process will take some time and you can keep track of the progress on the same screen.
Migrating data from Help Scout to Onsite
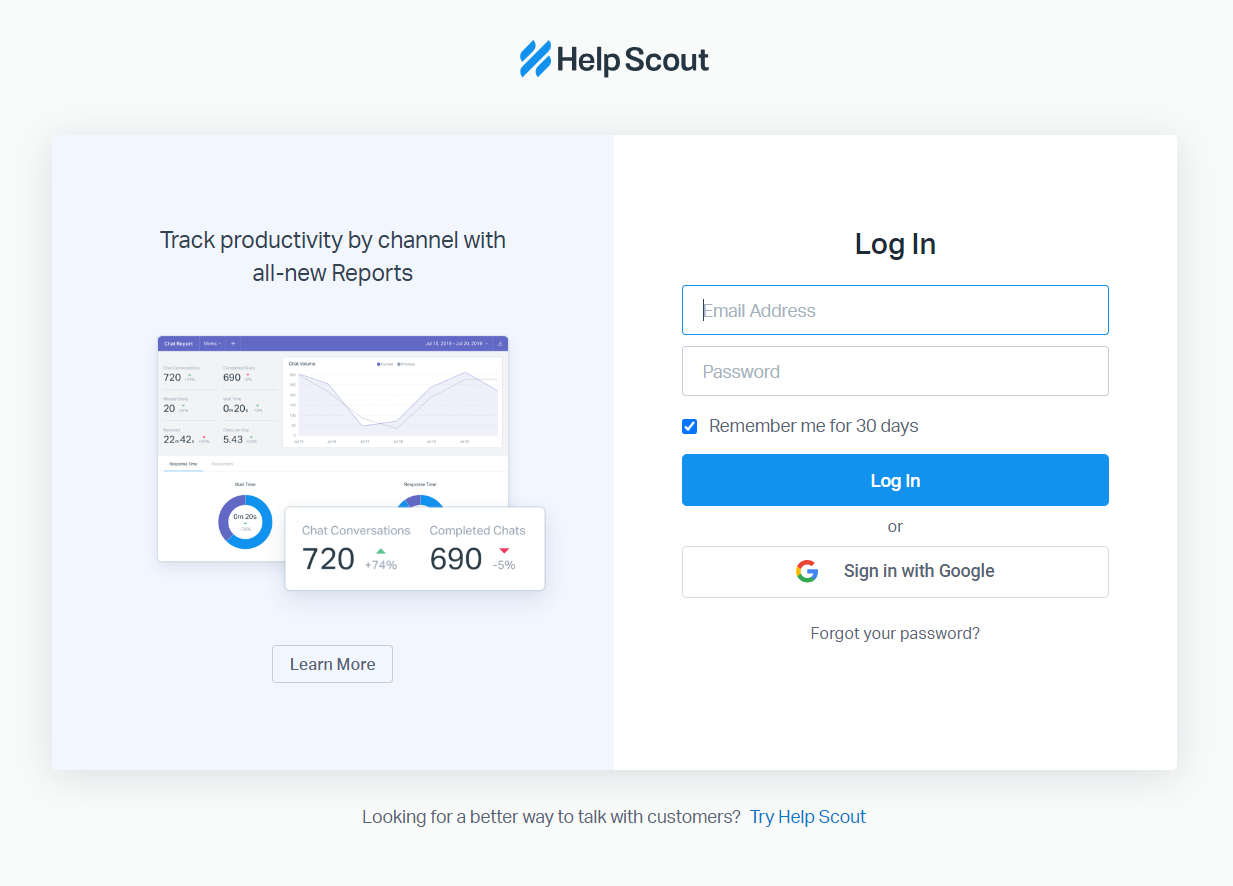
To migrate your data from Help Scout to Onsite, log in to your Onsite account. Click Administration (the gear icon in the bottom left) and choose Data Migration.
Choose Help Scout from the dropdown menu, and it’ll automatically redirect you to the Help Scout login page.
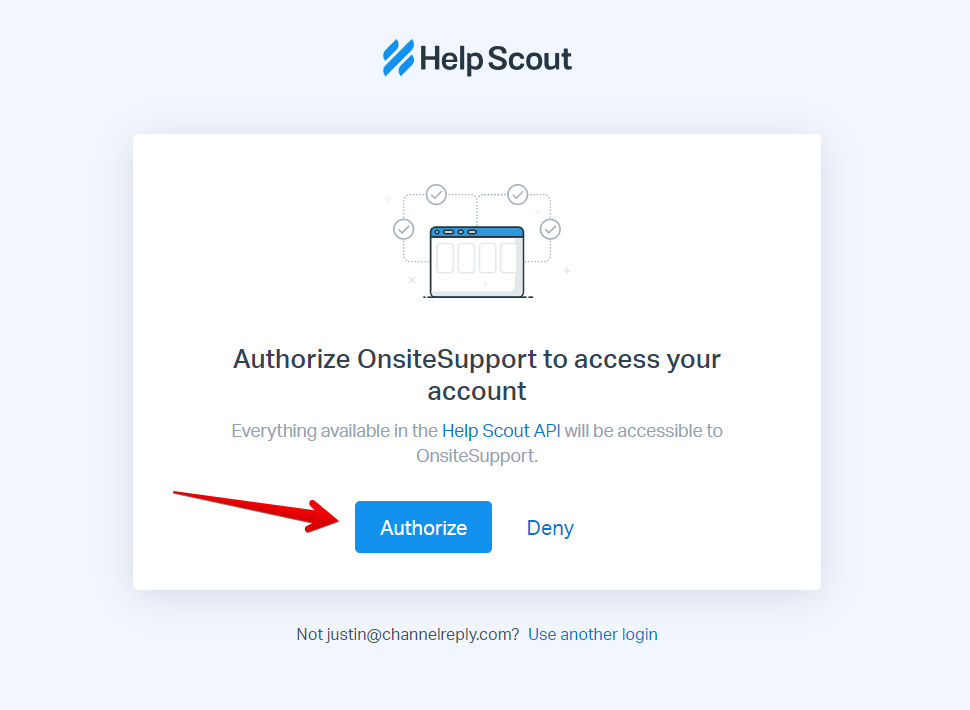
Once you log in successfully, it’ll ask you to authorize Onsite to access your account. Click Authorize to continue.
Select which metrics you’d like to import from Help Scout to Onsite, and click Next to continue.
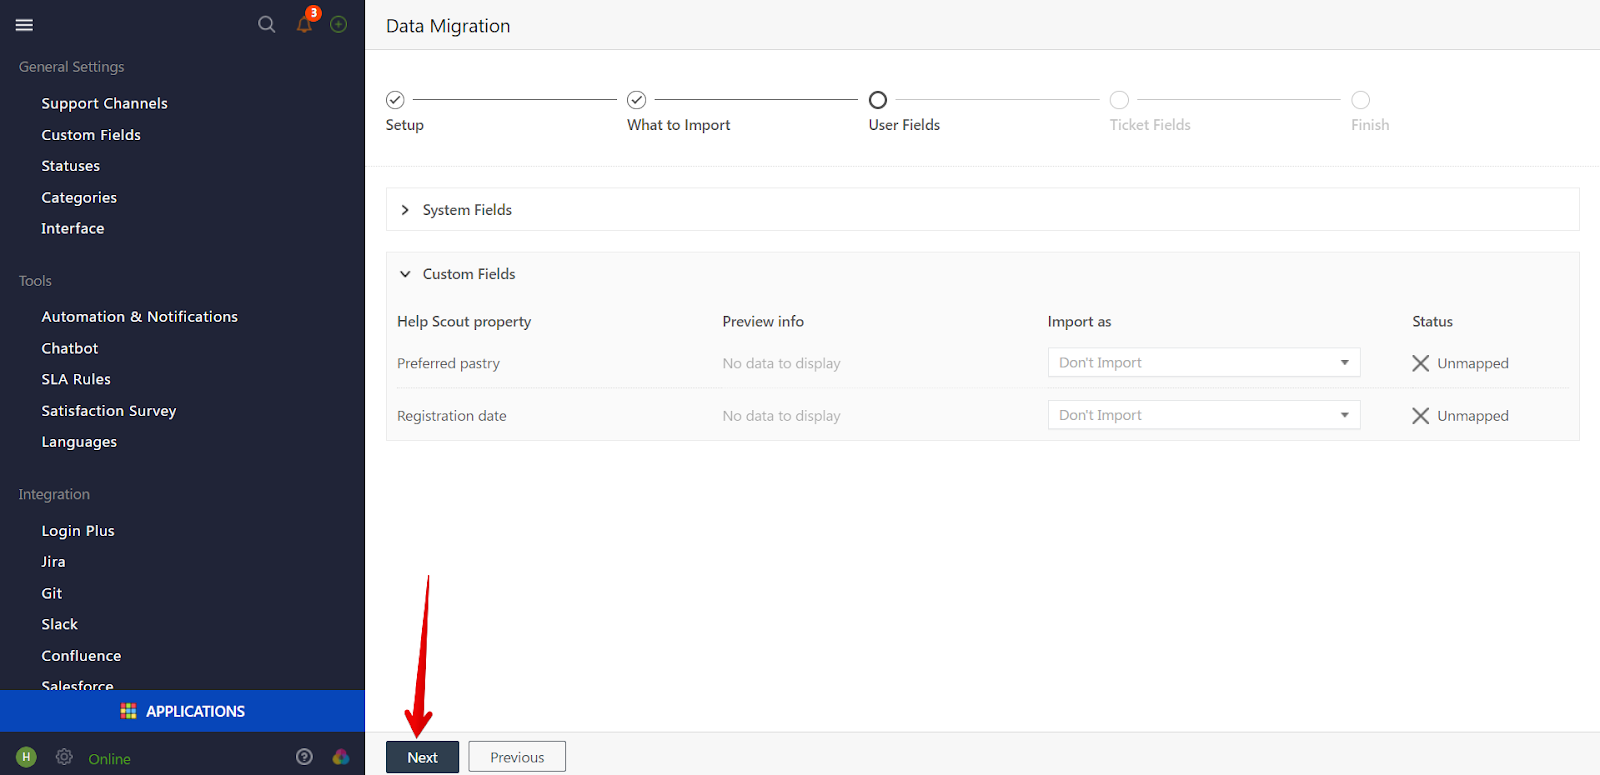
Select which system fields and custom fields to import and click Next to proceed.
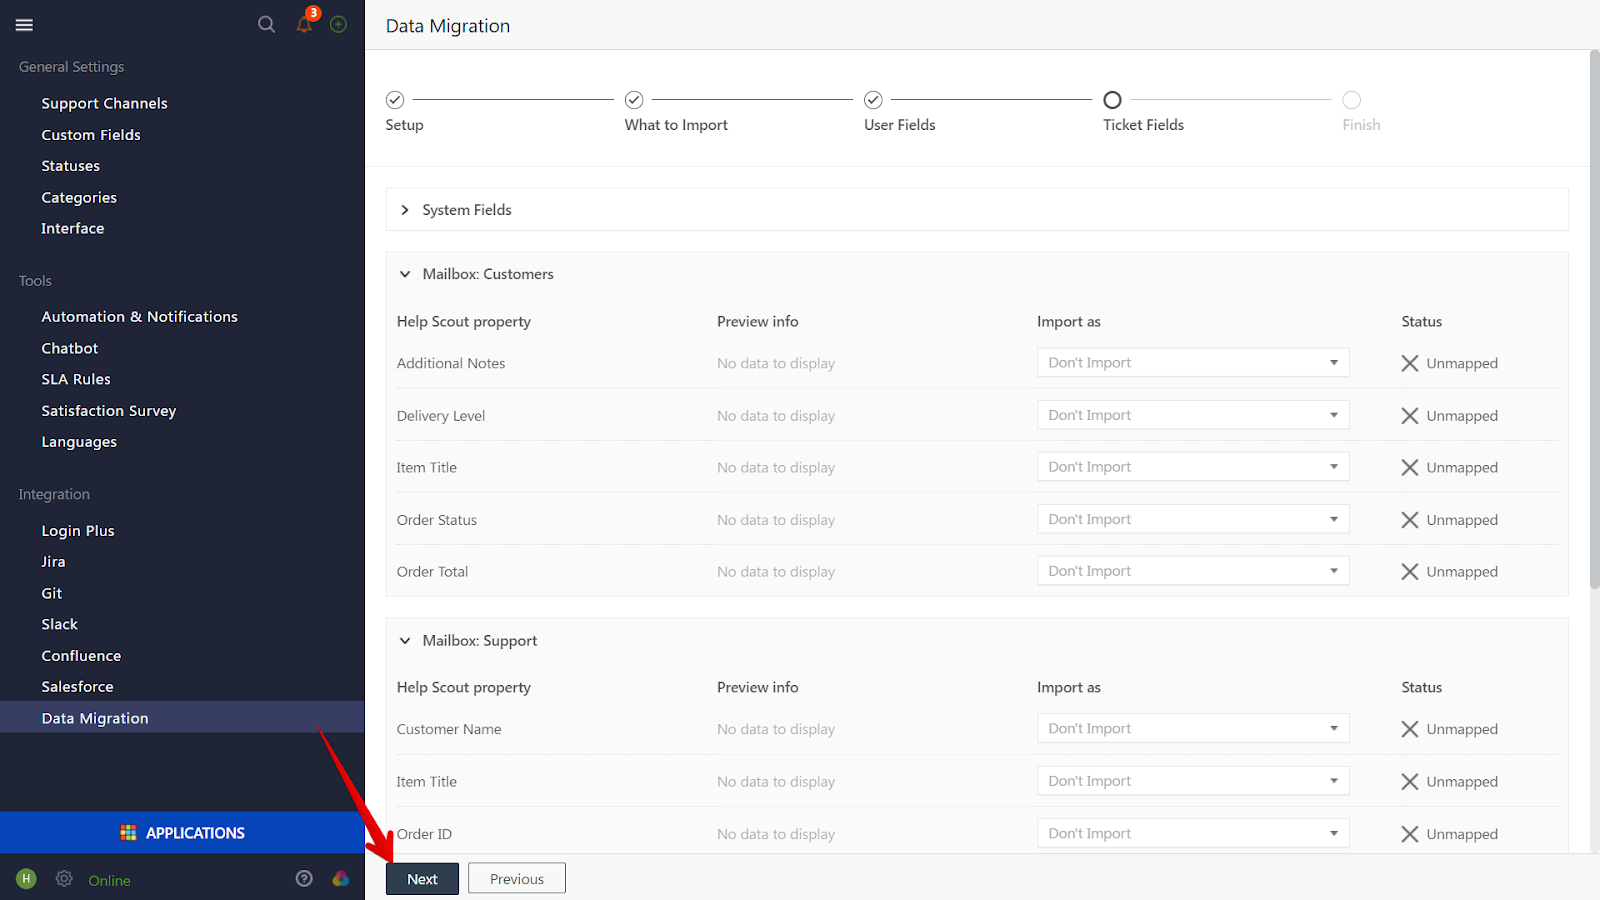
Check and verify your mailboxes and click Next.
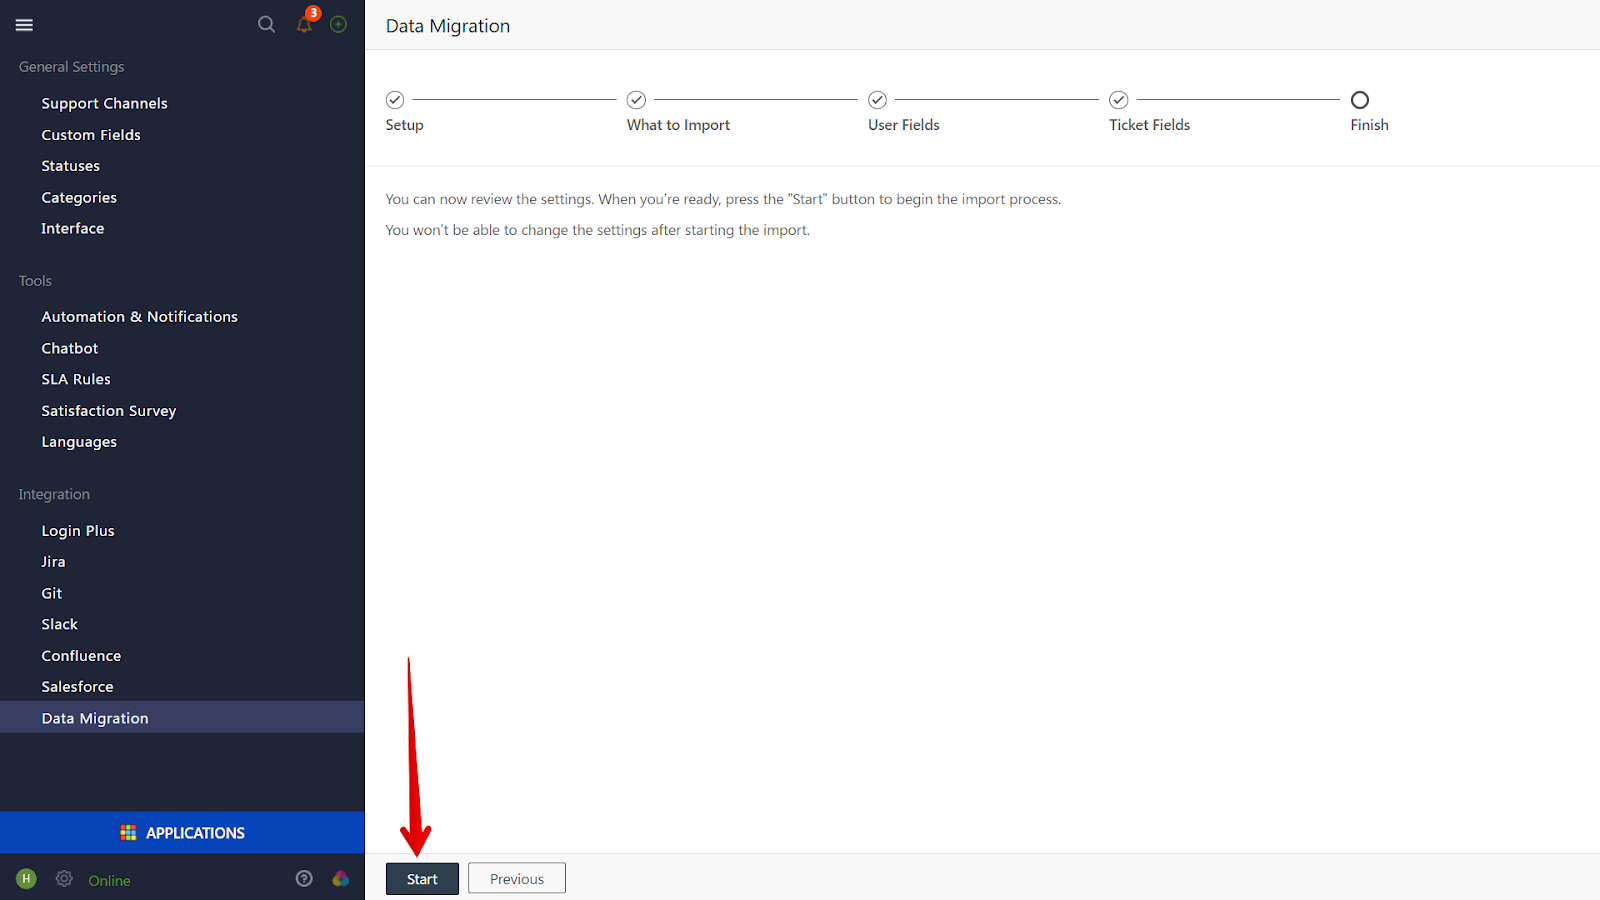
That’s it! You’ll land on a page asking you to verify the settings you just made. It’s a chance for you to go back and change any setting, if you wish. When ready, click Start to launch the migration process.
Depending on the amount of data to be imported, this would take some time but the process will keep running in the tab.
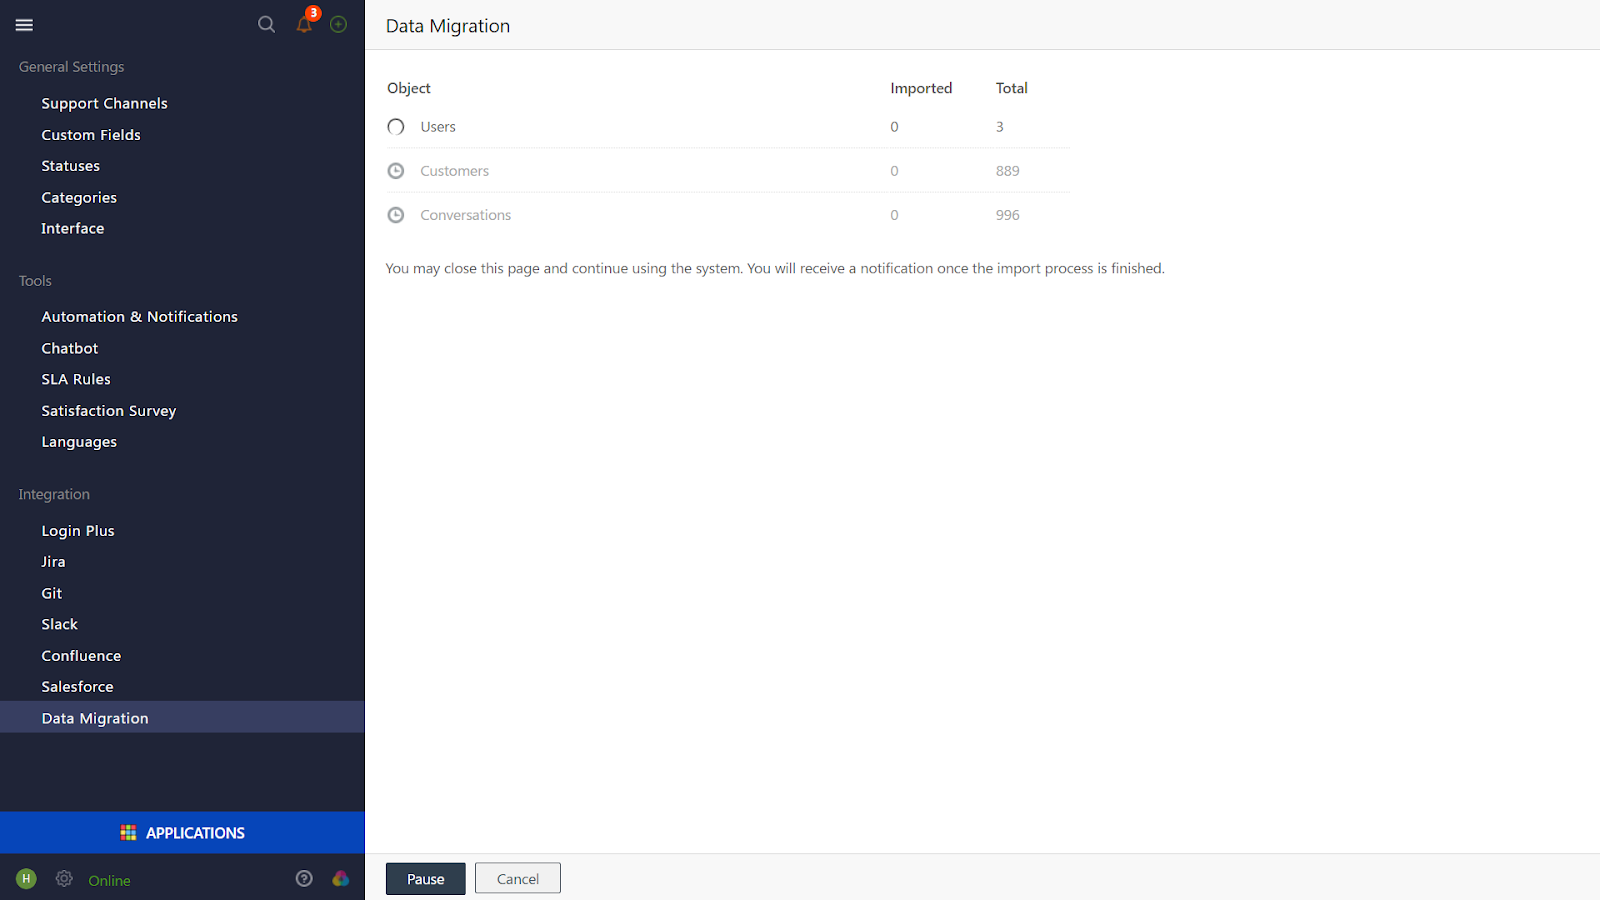
Be sure to check back later to see how’s the process going. Once done, you’ll be able to see a button that says “Complete”. Pressing this button will finish the migration process and move all the migrated tickets to a separate ‘view’ or ‘report’ in your Onsite account.
Should you have any questions or concerns, please feel free to reach out to us at support@onsitesupport.io