
Service Level Agreement (SLA) is a contract between you and your customers that defines standards of performance for your support team. It means you can determine policies for the time within which agents should respond to customer requests or spend to resolve their issues.
This way SLA rules will help you to prioritize one customer over others by providing quicker support and set your support agents targets on ticket resolution or reply time.
Onsite Support allows the use of SLAs not just in the Ticketing system but also in the Feedback solution. Here are all the places where SLA is used:
- Dashboard & Analytics.
- Automation - assign SLA when an object is created.
- User Profile - assign other than default rule to user.
- Build custom queues / reports based on SLA condition and show timer in objects list page.
- On full object page to display SLA timer and current SLA status as timer;
- SLA Management - create custom notification when the rule is breached;
- Team Profile - assign user company specific SLA so all users within that company have it.
Enable SLA in Onsite
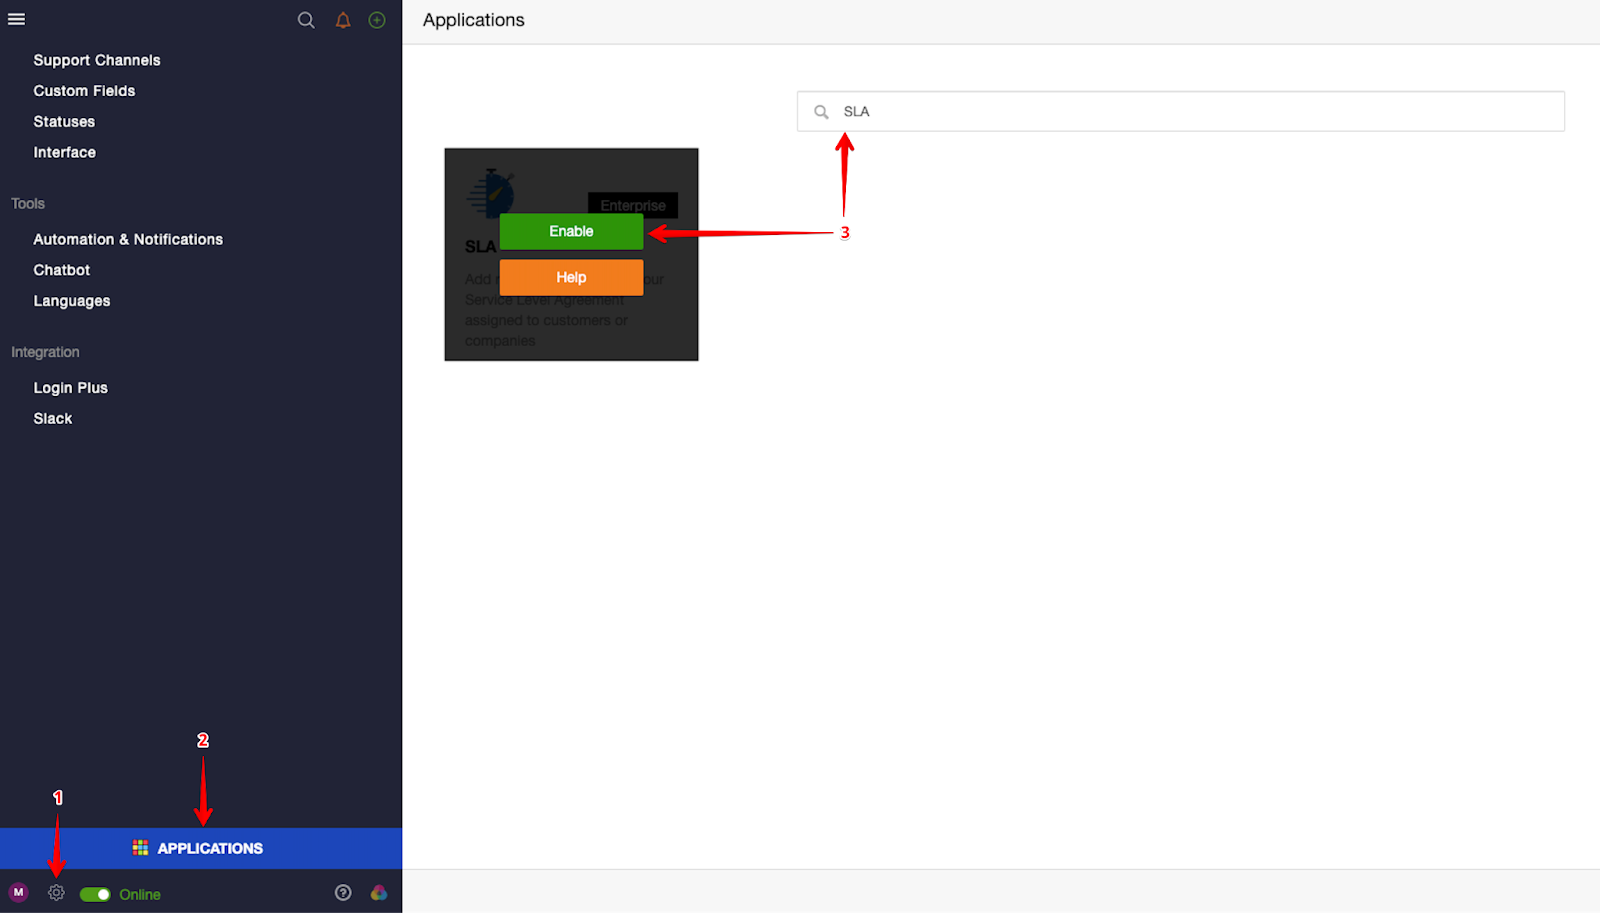
To enable SLA within Onsite, please follow the steps below:
- Click on Administration (Setting Gear Icon)
- Click on Applications
- Type in SLA within Search Field and click on Enable
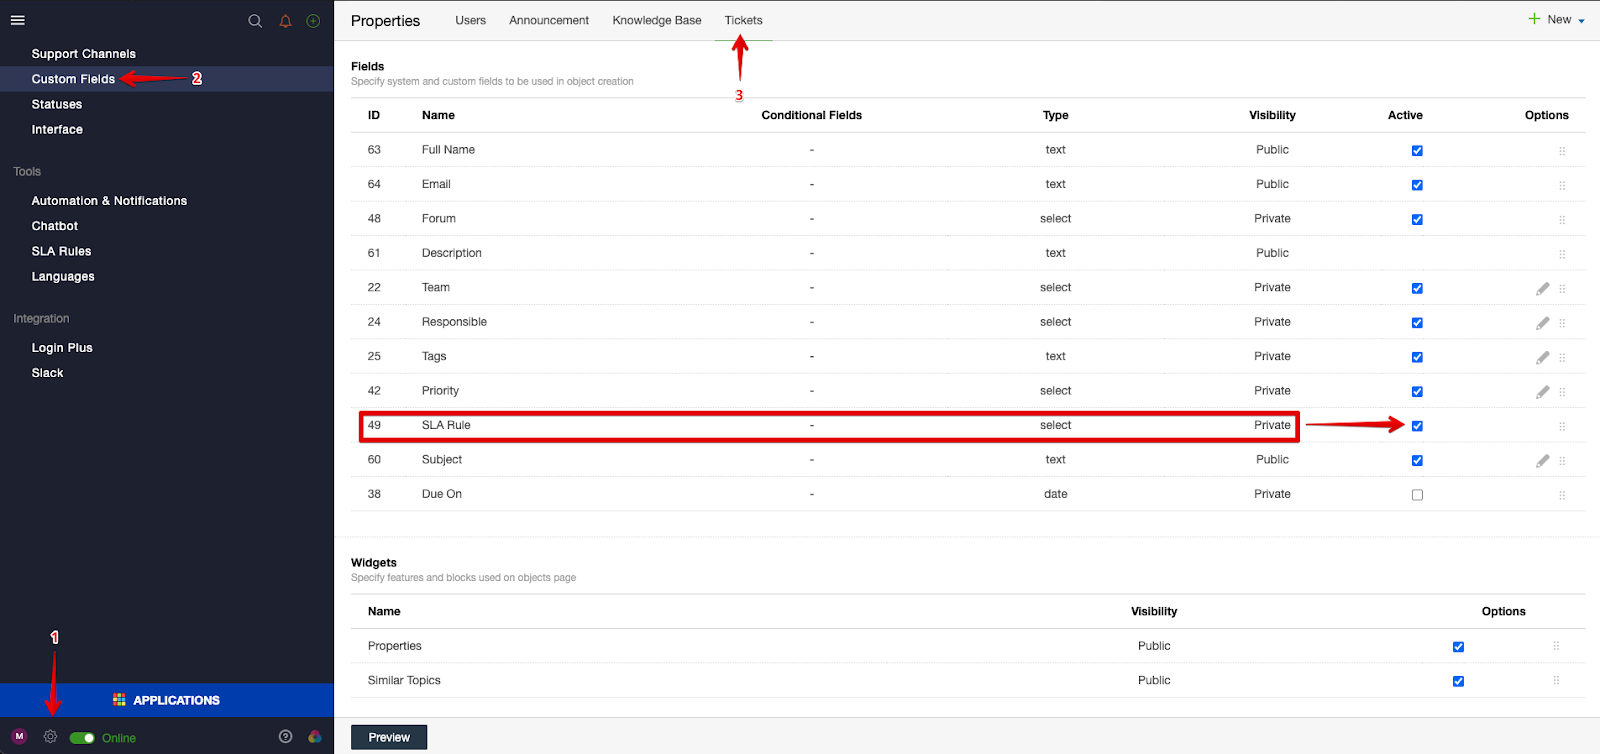
Once this is completed, please ensure the SLA Rule custom field has been enabled as well via the following steps:
- Click on Administration (Setting Gear Icon).
- Click on Custom Fields
- Click on Tickets
- Enable SLA Rule
Creating SLA Rules
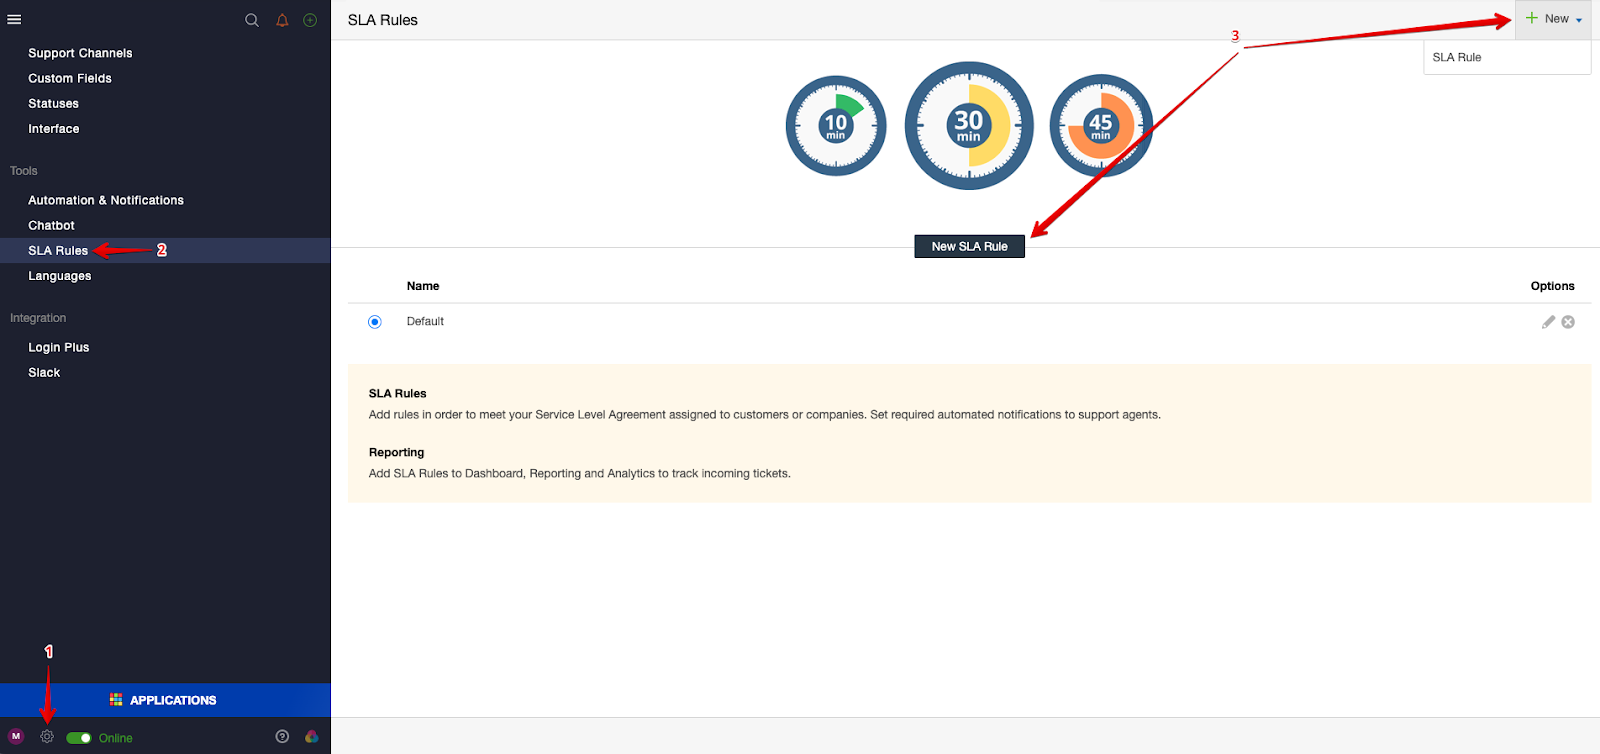
To create an SLA rule, please follow the steps below:
- Click on Administration (Setting Gear Icon).
- Click on SLA Rules.
- Click on the New SLA Rule button orDefault SLA - that is automatically applied to the author of the ticket;
- New » SLA Rule in the top right.
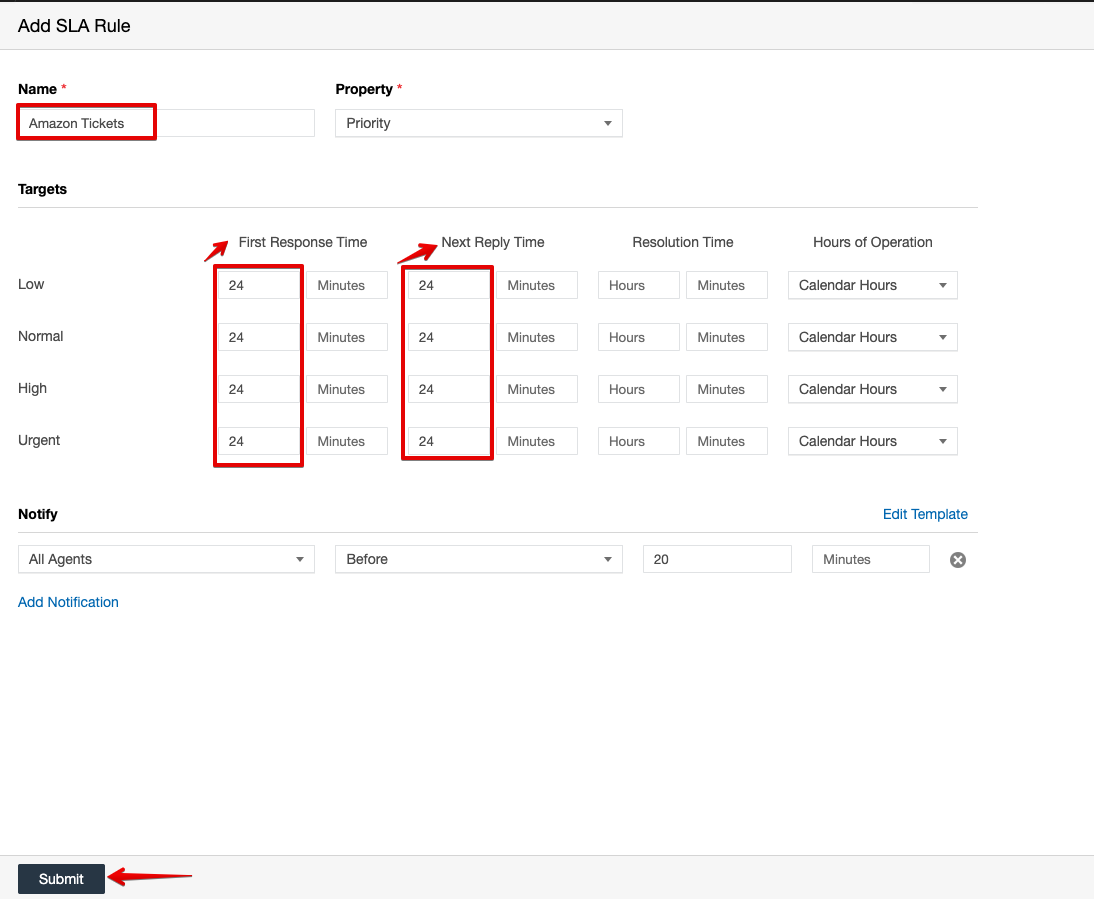
Enter Rule Name and select the Property your SLA policy is going to be driven.

If Property Type is “Priority”:
You can define your service levels for Low, Normal, High and Urgent ticket priorities.
Then you need to fill out the time target for each of the following metrics:
- First Response Time - the period of time between ticket creation and first agent reply to the customer;
- Next Reply Time - the time between the latest unanswered customer comment and agent reply to it;
- Resolution Time - the total time spent for opened object state except for On Hold status when SLAs are paused.
You must choose whether SLAs should be calculated within Business or Calendar hours. More information on how Business Hours affect SLA policy could be found in the article.
You can also set reminders to notify agents in case service levels are breached or going to breached.
When a new rule is created, you can make it default and it will be assigned to all users except support agents.
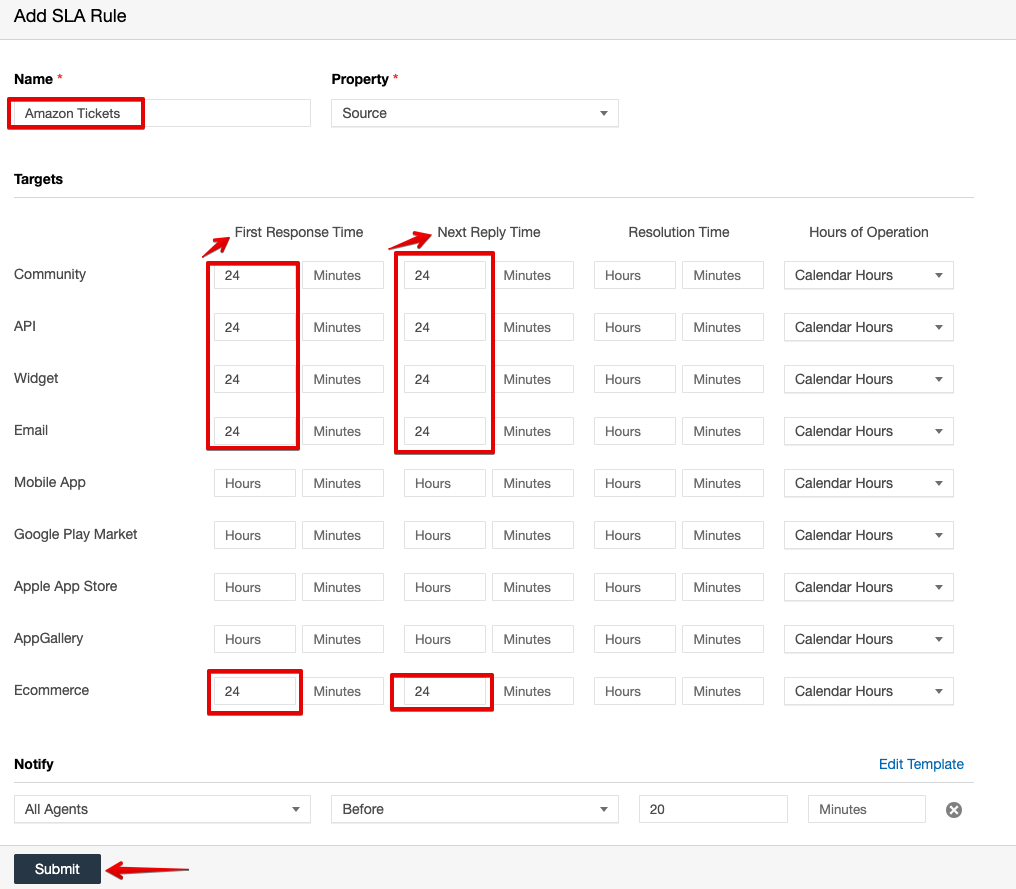
If Property Type is “Source”:
You can define your service levels for Community, API, Widget, Email, Mobile App, Google Play Market, Apple App Store, AppGallery, Ecommerce ticket sources.
Then you need to fill out the time target for each of the following metrics:
- Community / API / Widget: there tickets are sent via your Onsite Community Portal / Amazon Yellow Button.
- Email- these tickets are sent via your support email address that you’ve added within Onsite.
- Ecommerce - these tickets are sent via the ChannelReply Integration from your marketplace accounts to Onsite Support.
You must choose whether SLAs should be calculated within Business or Calendar hours. More information on how Business Hours affect SLA policy could be found in the article.
You can also set reminders to notify agents in case service levels are breached or going to breached.
When a new rule is created, you can make it default and it will be assigned to all users except support agents.
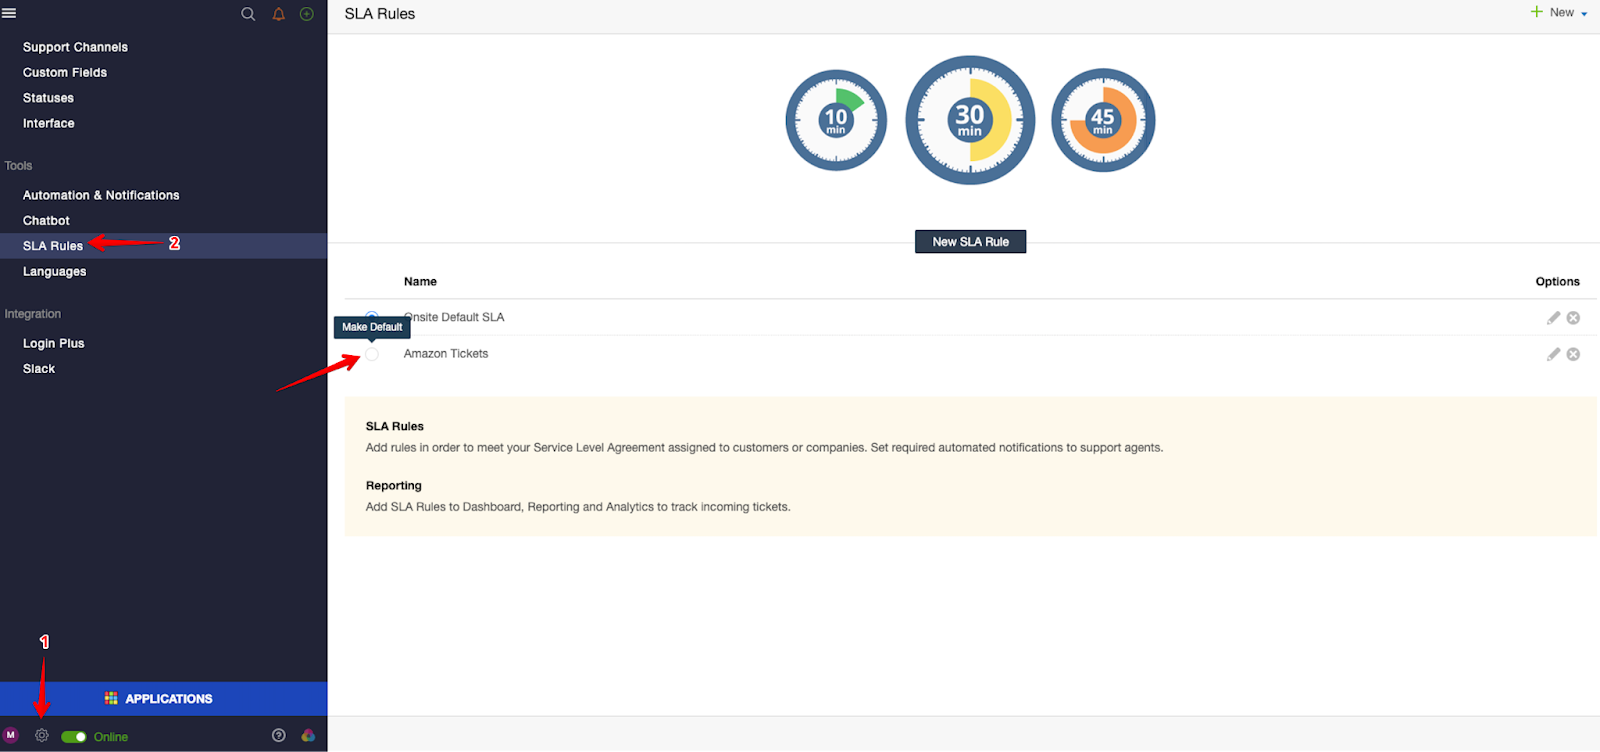
Change Default SLA
To change the default SLA rule, please follow the steps below:
- Click on Administration (Setting Gear Icon).
- Click on SLA Rules.
The Blue Circle represents which of these are the Default SLA for all tickets.
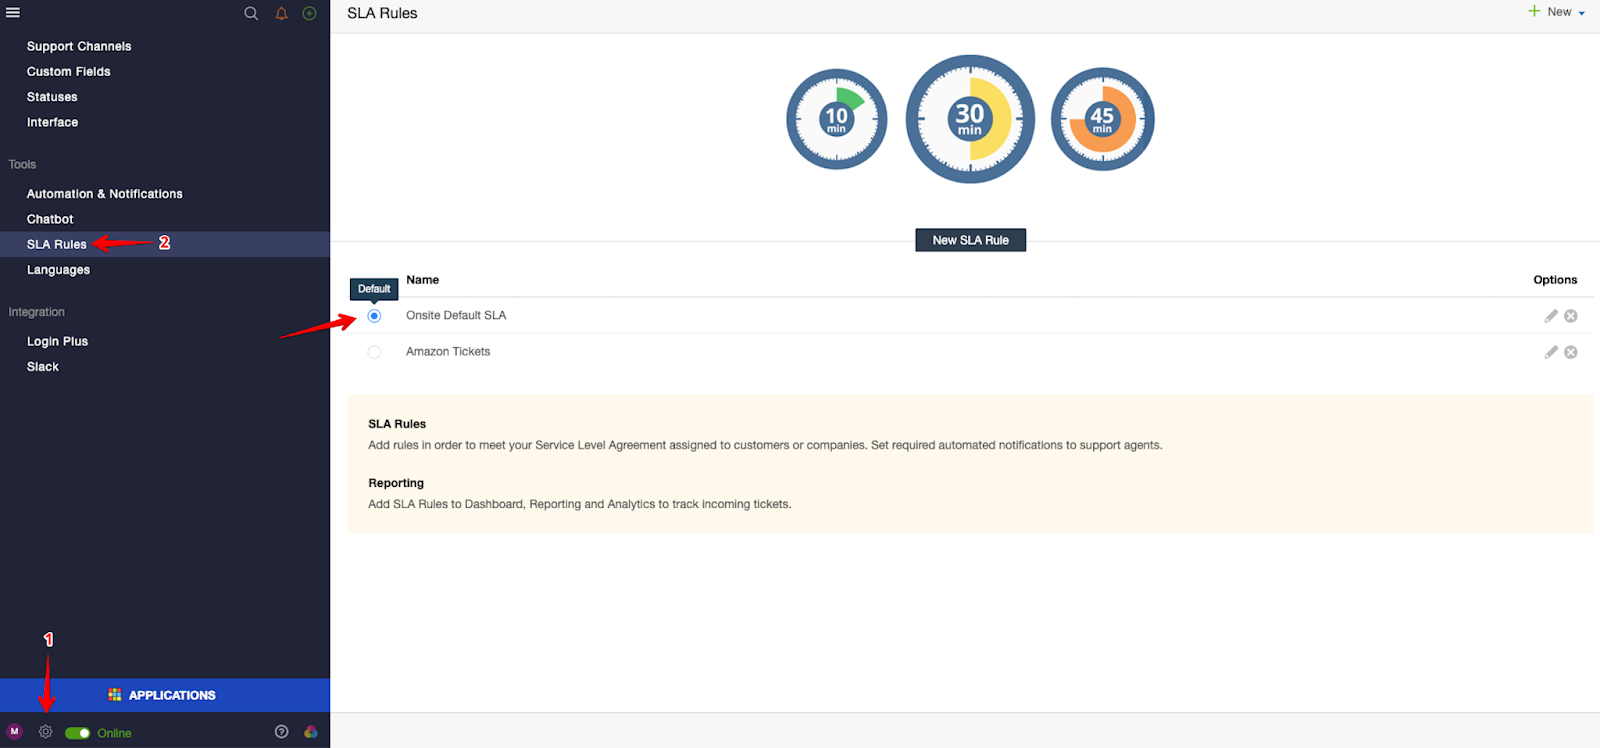
Click on any of the newly created SLA Rule to select it as the default SLA Rule.
Understanding of Metrics
There are 3 metrics to use connected to first replies, next replies by agents and overall resolution time of ticket or topic.
Each time one of the above metrics is triggered, SLA timer switches from one metric to another. For example, the ticket is submitted and initial SLA is set to 2 hours for the first reply time. So the timer would show you 2 hours on timer. If a customer replies, the next metric will trigger with the next reply time.
So a closer metric will be used in order for support agents not to breach the SLA applied to the object.
We should take into consideration that when the ticket is on hold, SLA will be paused or when an internal note is added it won't affect any SLA.
Set up “Statuses” to pause SLA Calculation
Due to company workflow you might need to pause SLA on requests if they require third-party participation or team discussion and the agent doesn't need to resolve the issue at the moment.
To set up “Statuses” to pause SLA Calculation, please follow the steps below:
- Click on Administration (Setting Gear Icon).
- Click on Statuses
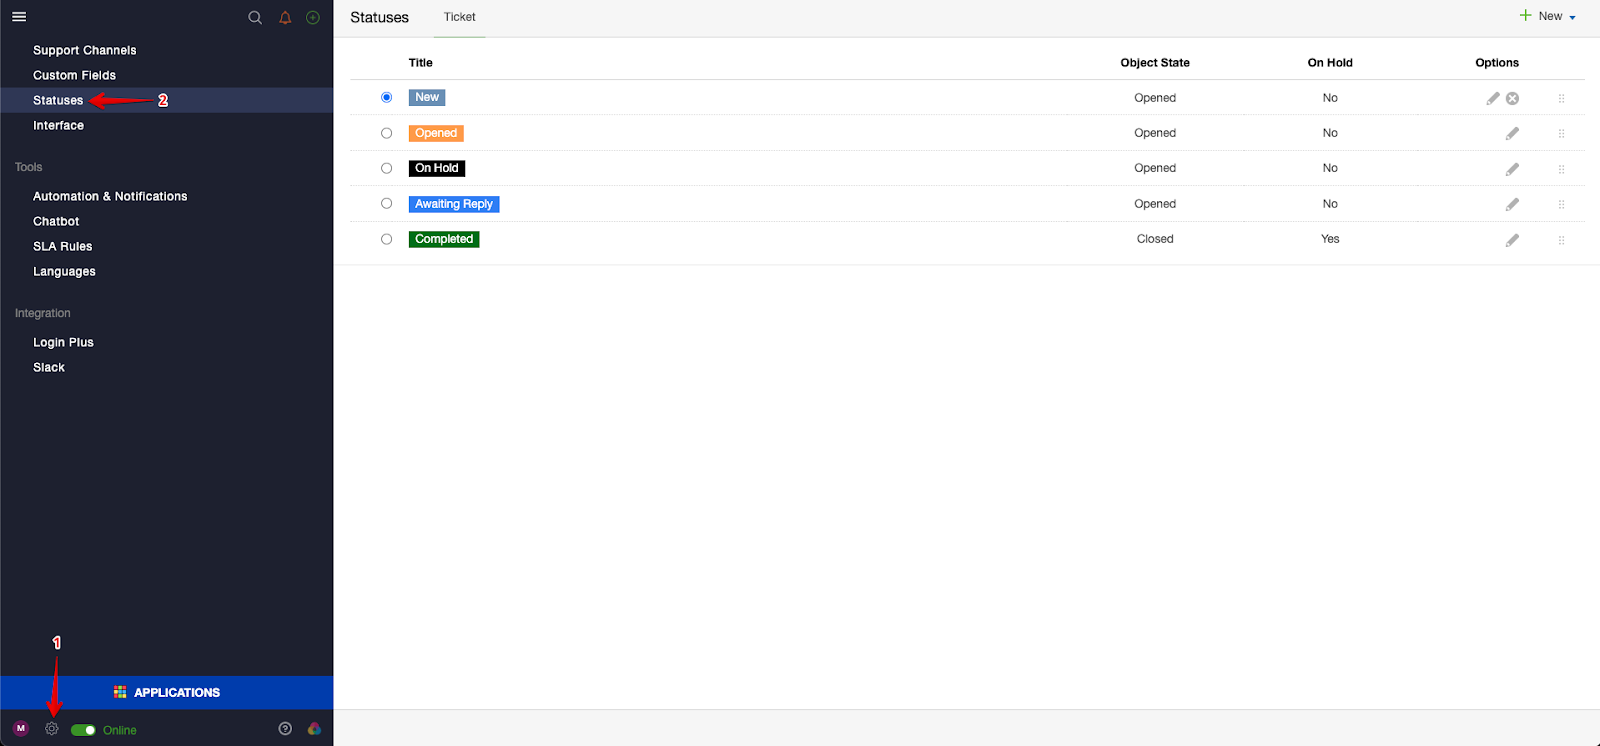
Here, we can change the default and custom statuses (only those that set objects in open state) and enable the option so tickets in this state could pause the SLA timer. Anything that shows No for the On Hold section means tickets with these statuses will count towards the SLA Calculation.To change the SLA Rule:
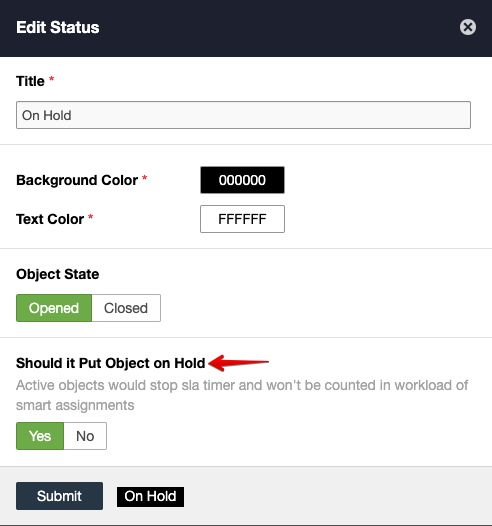
- Click on the Pencil Icon.
- For the option Should it Put Object on Hold select Yes
Note: Any Statuses with an Object State as Closed will not affect the SLA metric calculation.
Apply SLA Rule
In case you have multiple SLA policies, a single ticket can only have one policy applied to it. There are several ways to assign SLA policy to a ticket:
- Default SLA - that is automatically applied to the author of the ticket;
- Manual Assignment of the rule to the object in the system by support agent;
- Team's Rule - a ticket will run through the SLA applied to the user's team which the author of the ticket belongs to.
Note: if a user belongs to the team and both the team and the user have different rules, users' SLA will be priority to be applied
- Rule according to the triggers set up in the system. In automation choose the action to change SLA rule based on the conditions in Object Created event.
SLA rules won't work if the ticket or topic is created by a support agent and support agent is not assigned with the specific rule.
SLA Reporting
You can view how well you are meeting your SLA policies by building custom reports based on specific conditions related to SLAs to show the objects that were successfully resolved within SLA metrics or on the contrary in which service levels were violated.

You can also monitor service level performance using SLA timing to display whether objects are within SLA or not at the moment:
- On the full object page at the top right;
- In the Requests section where you can add SLA Time as a table column and will see SLA metrics displayed in minutes.
If you have any questions at all, please feel free to reach out to us by sending an email at support@onsitesupport.io and we'll get back to you in no time.