
All cloud accounts are created under the domain yoursubdomain.onsite.com by default. To enhance the user experience and make your URL more recognisable, you can add custom domains.
If you have multiple portals, you can assign a unique custom domain to each portal.
The changes described below can be made only if the Feedback Module is enabled and can be performed by administrators.
Adding a Custom Domain in Onsite
To set up a custom domain:
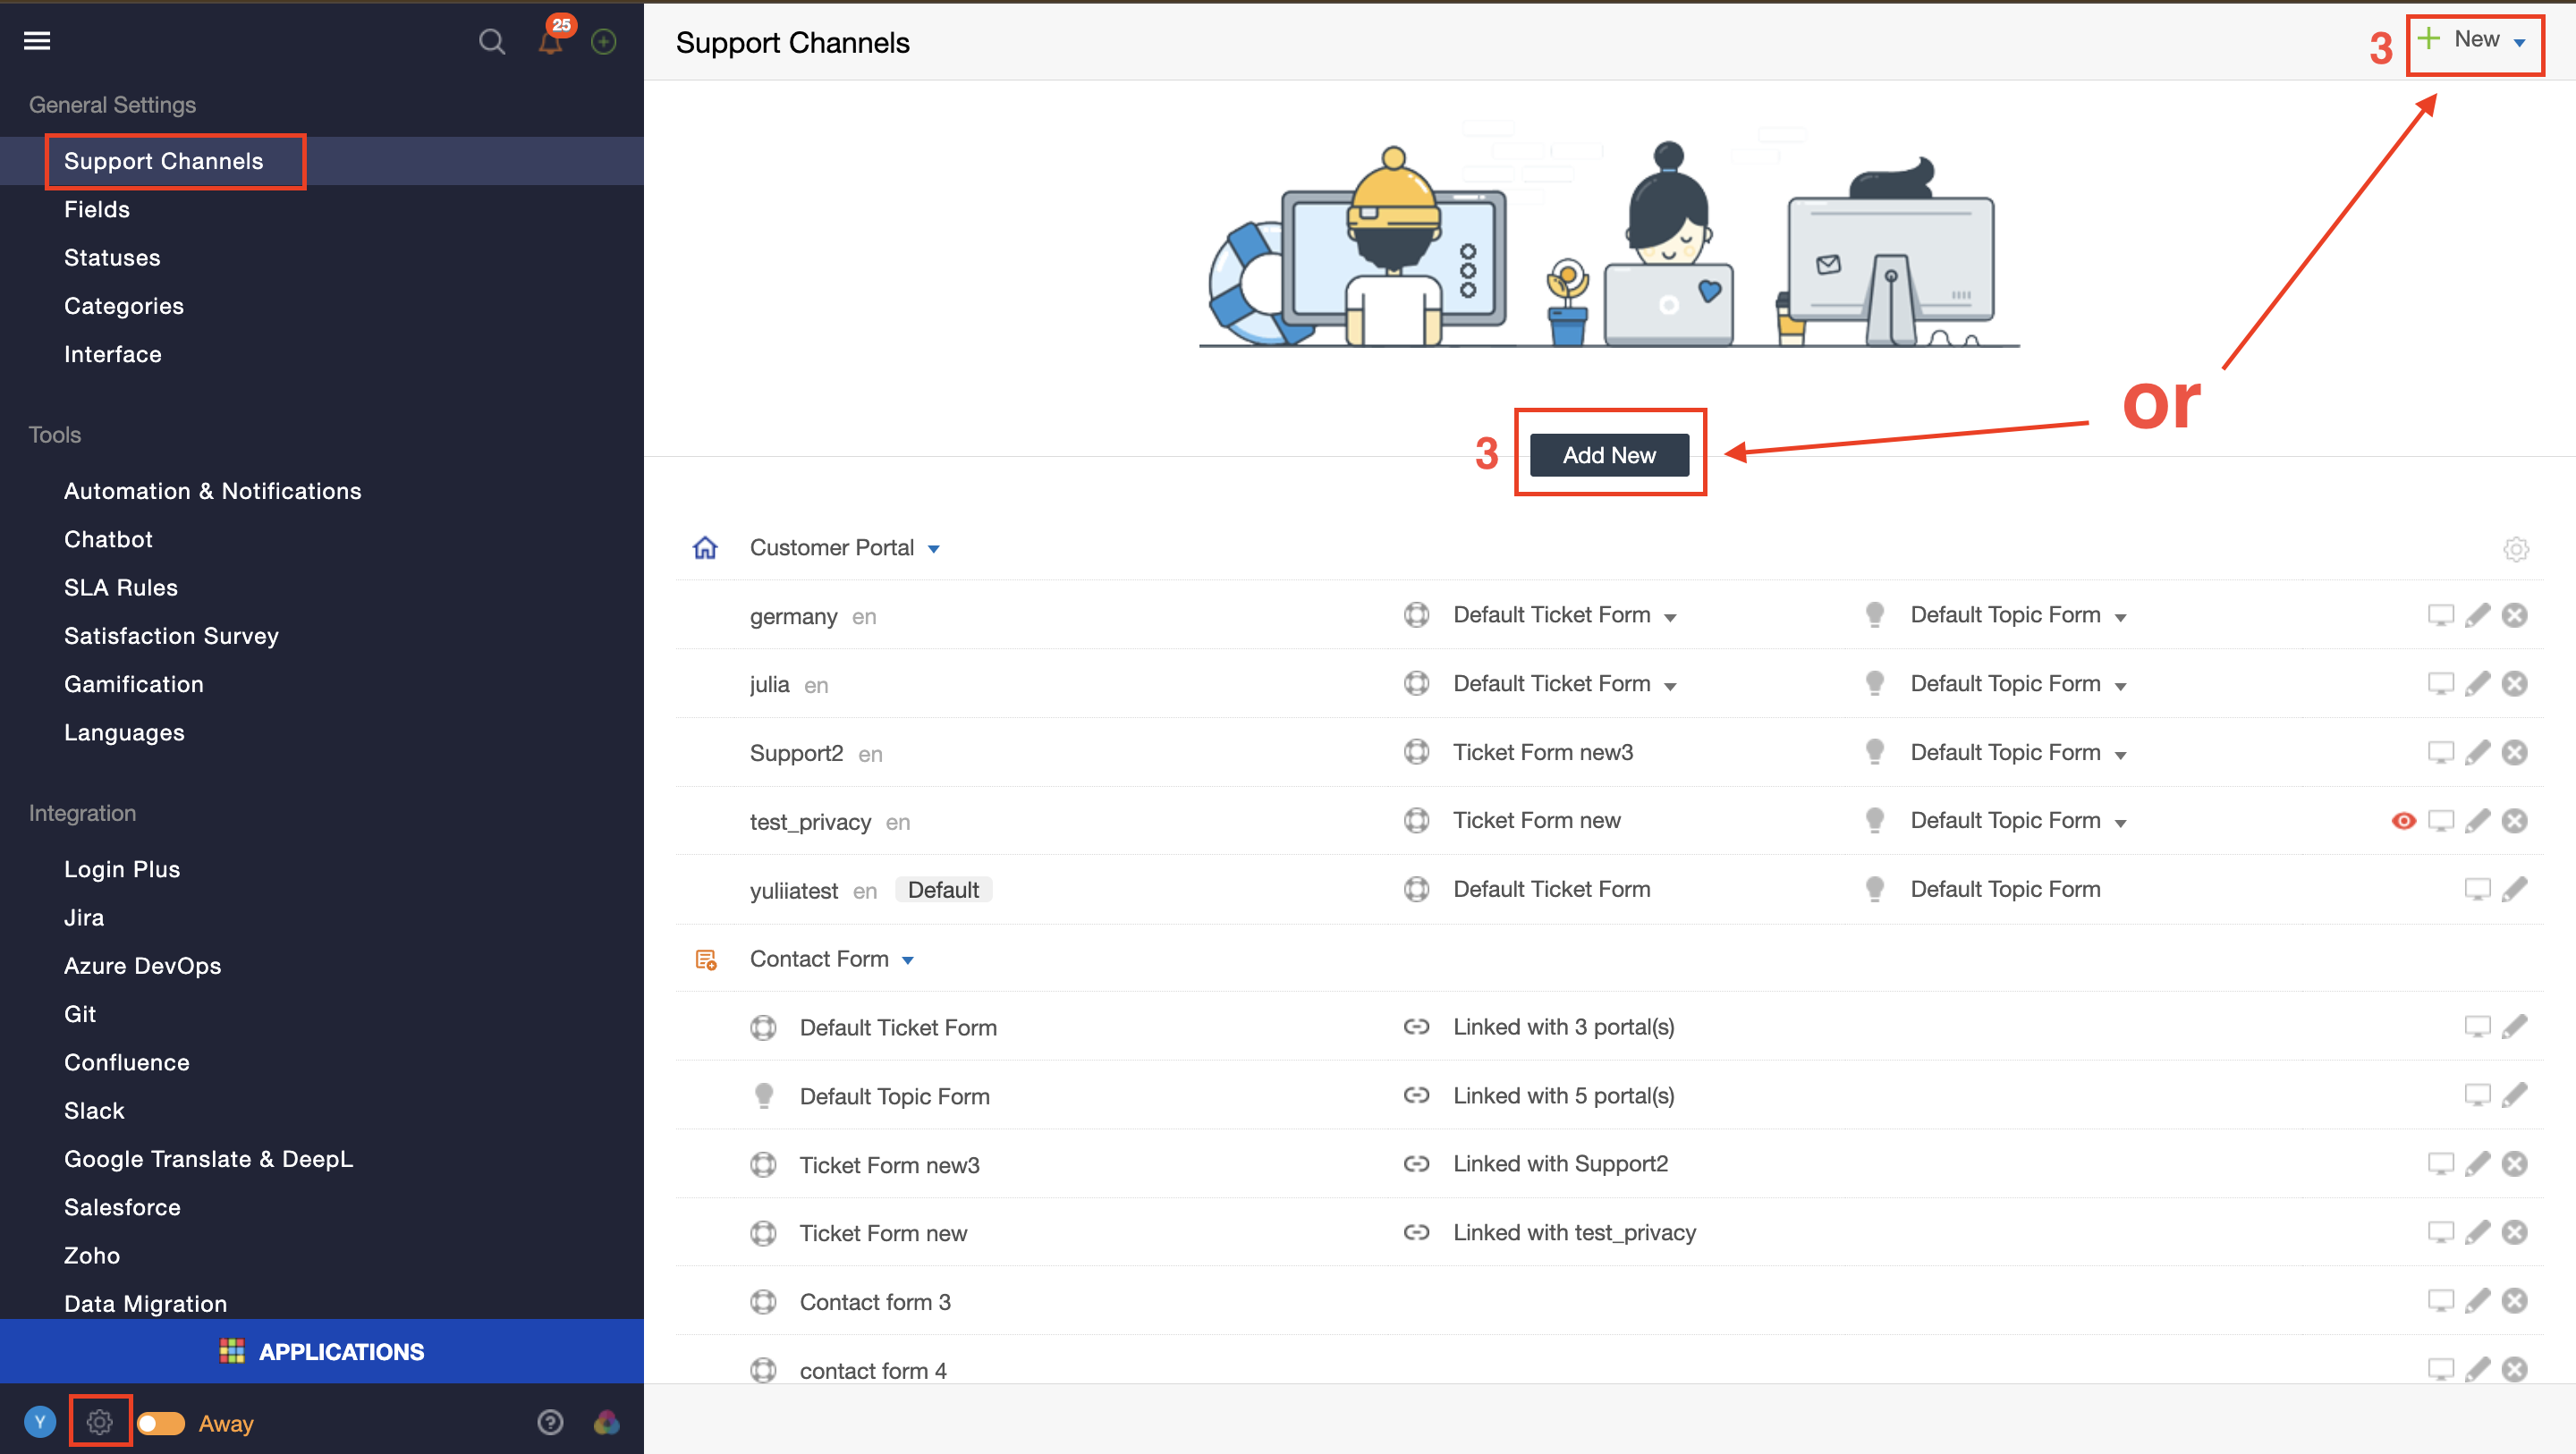
- Go to Administration -> Support Channels -> click Add New or "+ New"
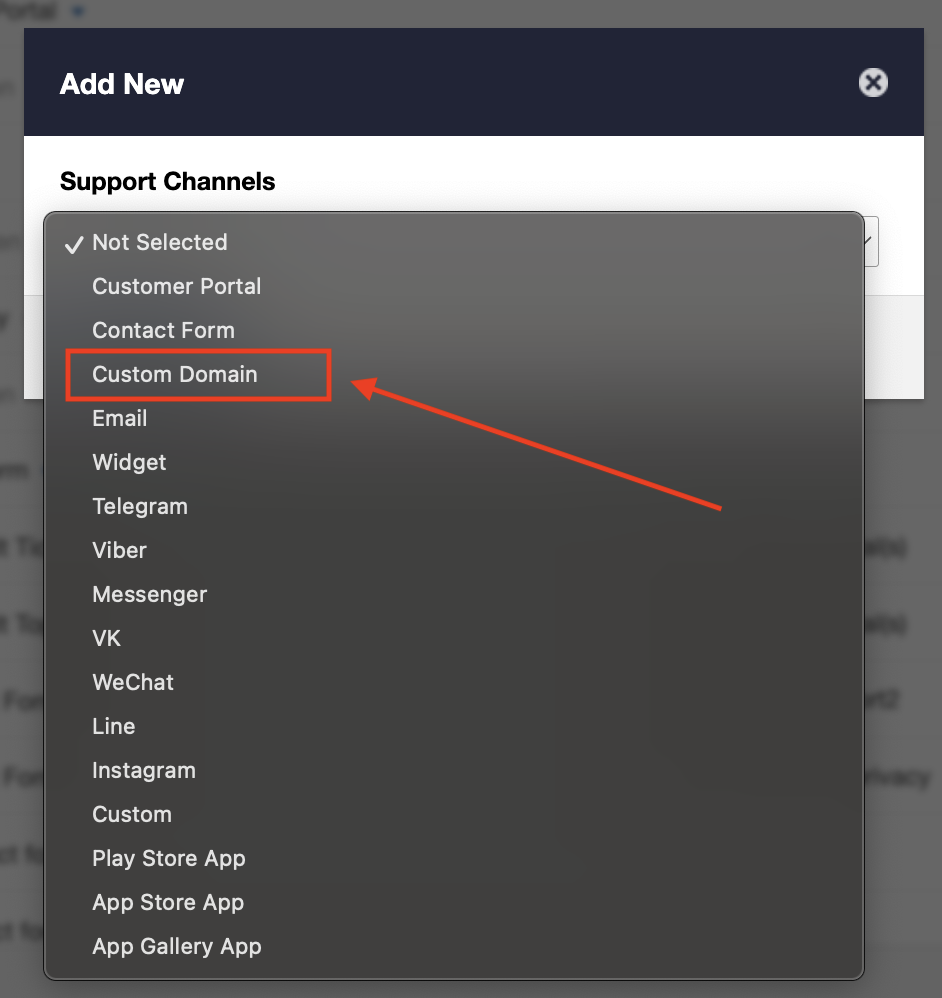
- Select Custom Domain from the dropdown list and press Continue
- Enter your custom subdomain (e.g., subdomain.yourwebsite.com) and click Submit.
Update DNS Records
The newly added custom domain will appear in the Domains section under Support Channels.
Please log in to your domain control panel, where the domain is registered. Each register has its own method of changing DNS, so please refer to the internal manual.
The first method would be adding just a CNAME record if you don't have specific fields for that provided by the domain control panel:
SUBDOMAIN 14400 IN CNAME YOURSUBDOMAIN.ONSITE.COM
If you have built-in tools find DNS or Nameservers next to your domain and create a new DNS record of CNAME type. Point your custom URL (subdomain) to yoursubdomain.onsite.com.
You also can find the relevant domain in the list and click the Verify button.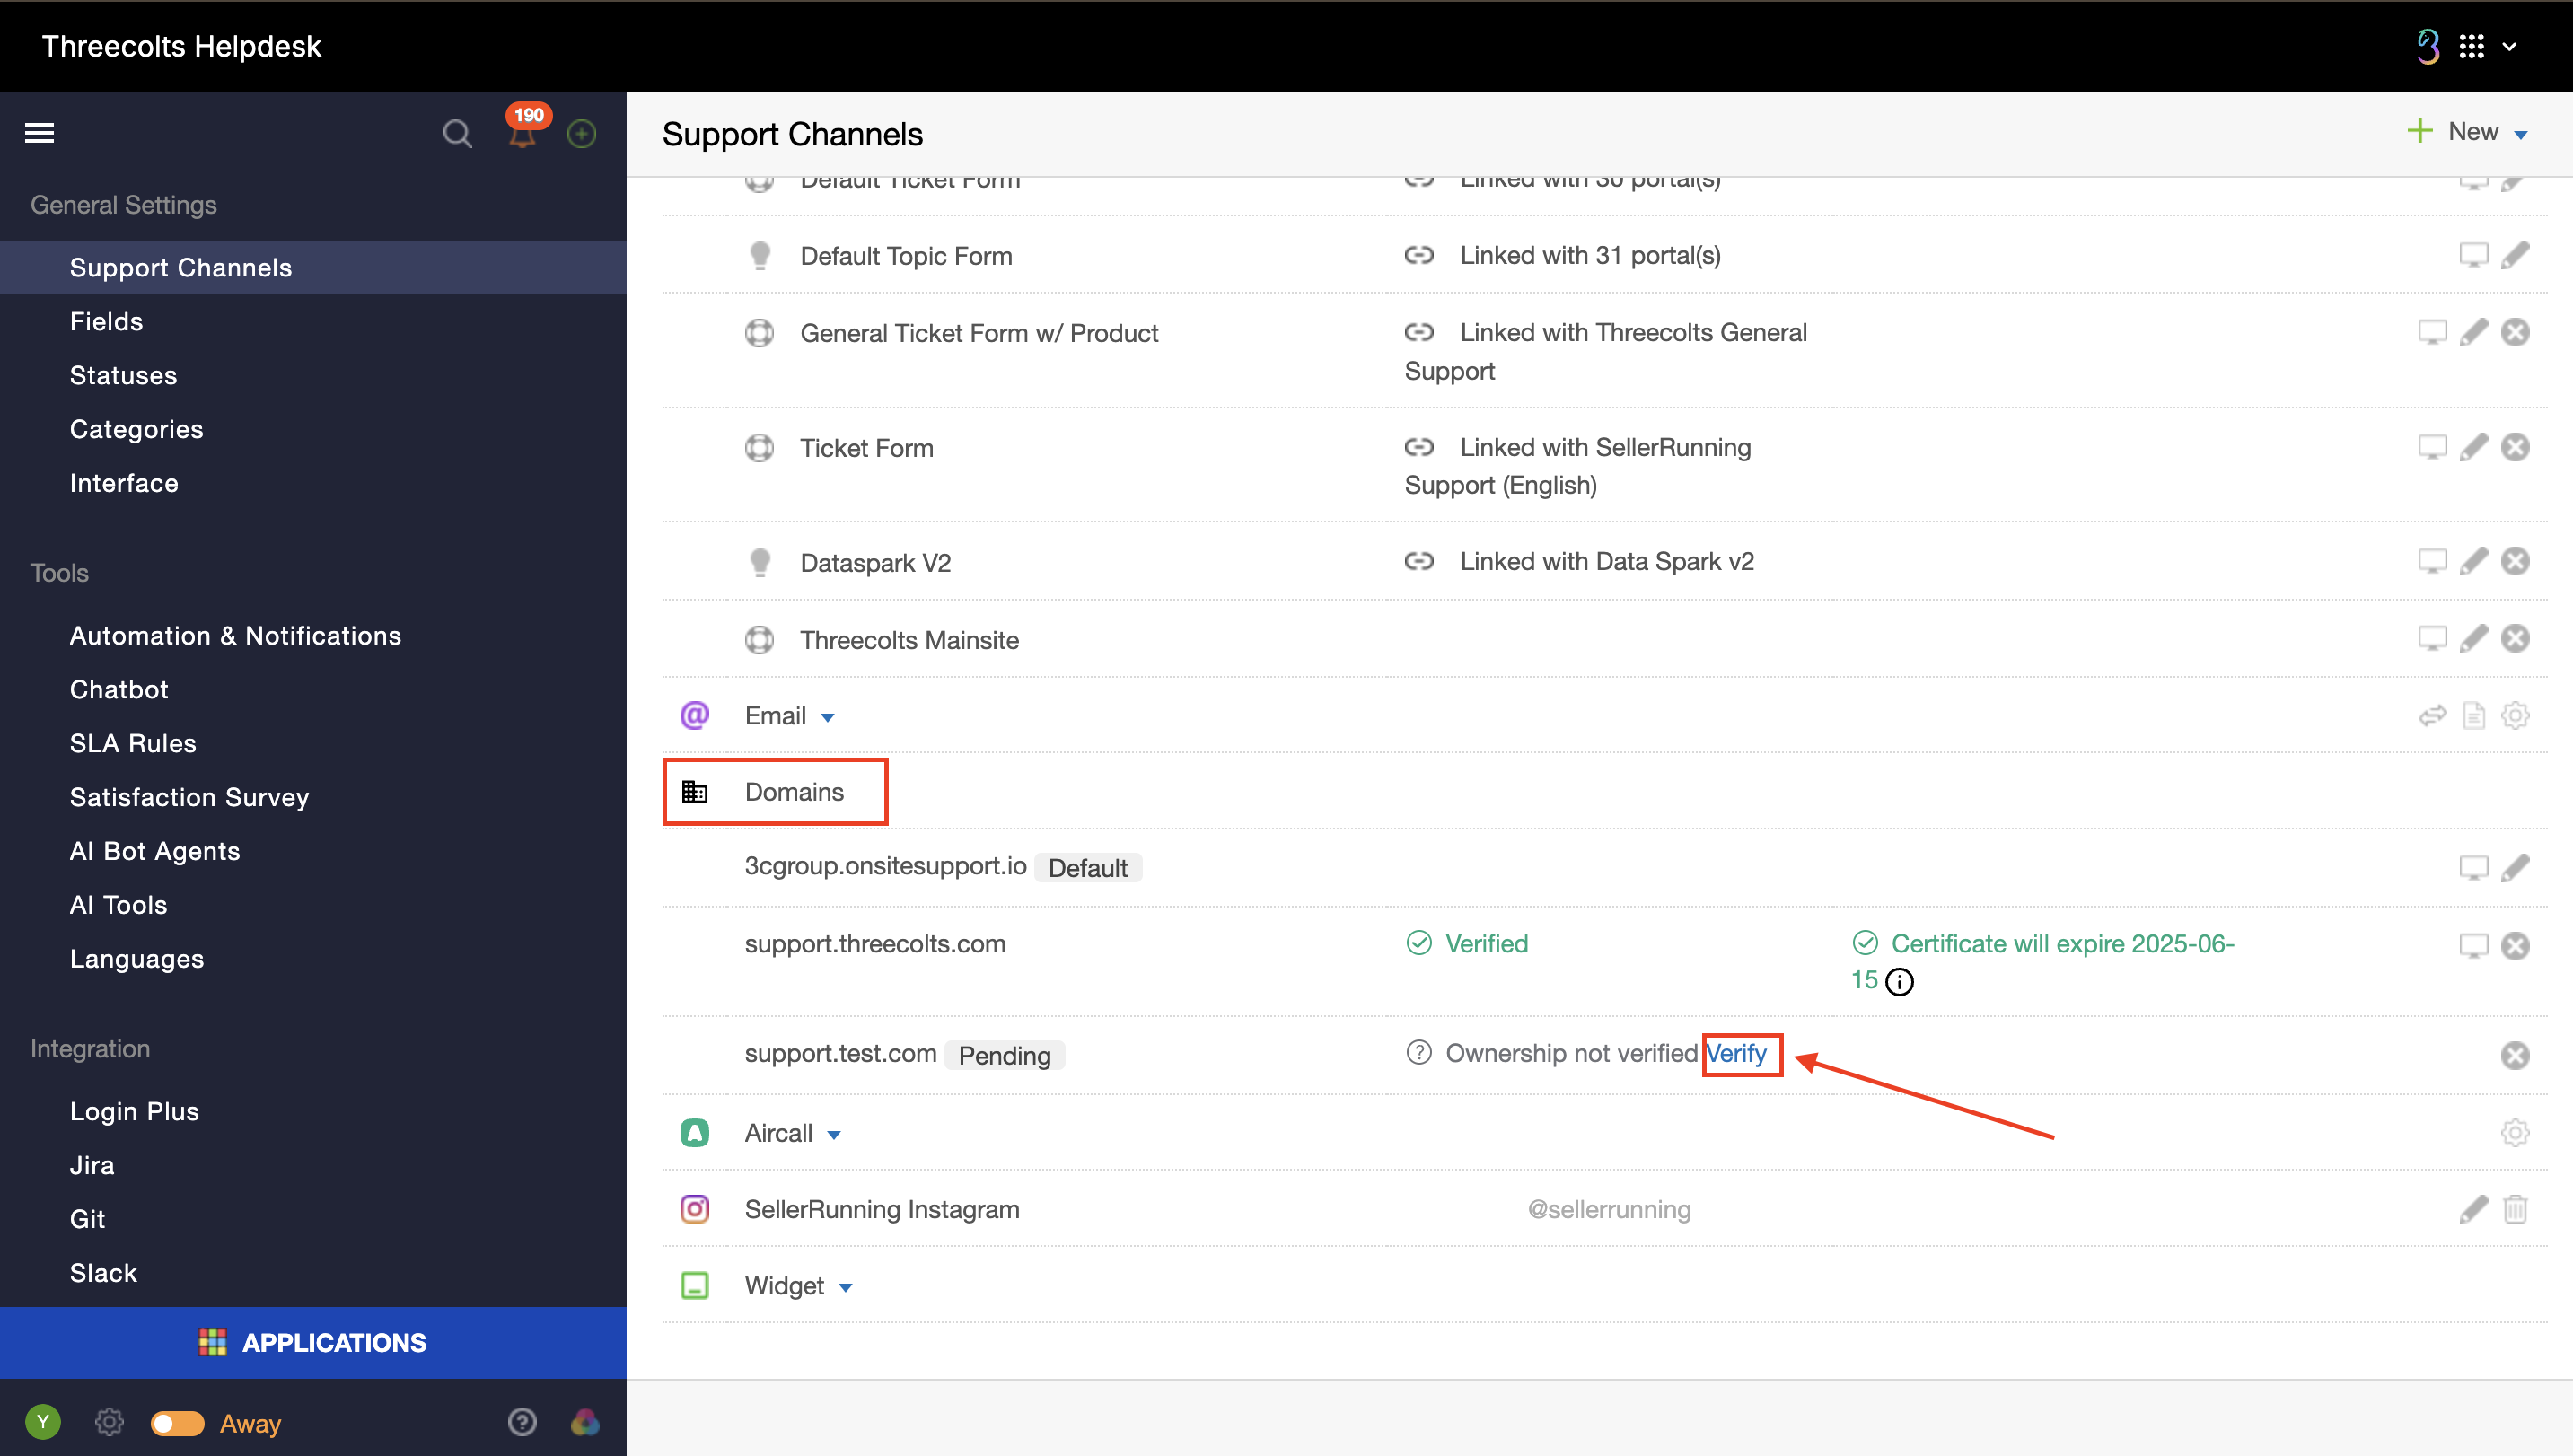
Instructions will be displayed on what needs to be done.
CloudFlare Settings
If you use CloudFlare to hide your identity, there are specific settings while setting up your DNS records. Go to your CloudFlare account and under DNS settings of your main domain add CNAME record and make sure that cloud icon is grey. That way only this CNAME record won't be used for hiding identity of your community portal.

You can feel safe as your other DNS records of main website would be protected by Cloudflare and only CNAME record would point to our servers. Protection of your support center remains on us.
The status of DNS and SSL Certificate
In the Domains section under Support Channels you can also check:
- The status of each domain (e.g., Verified).
- The SSL certificate expiration date for each domain, along with the automatic renewal date.

SSL certificates are automatically generated. There is no need for manual updates, as certificates are renewed automatically one day before expiration.
Configuring Custom Domains for Individual Portals
Once a custom domain is added and verified, it can be used across all portals.
Key points:
- After adding the first custom domain, the default yourportal.onsite.com domain will no longer be used.
- If only one custom domain is added, it will automatically replace the default domain for all portals. The URL format will be subdomain.yourwebsite.com/portalname.
- If two or more custom domains are added, each portal will have the option to select a different domain from the available custom domains.
- After adding multiple custom domains, the first added custom domain will remain the default for all portals unless manually changed in the portal settings.
If you want the domain to lead to a specific portal, you need to configure this in the settings by following these steps:
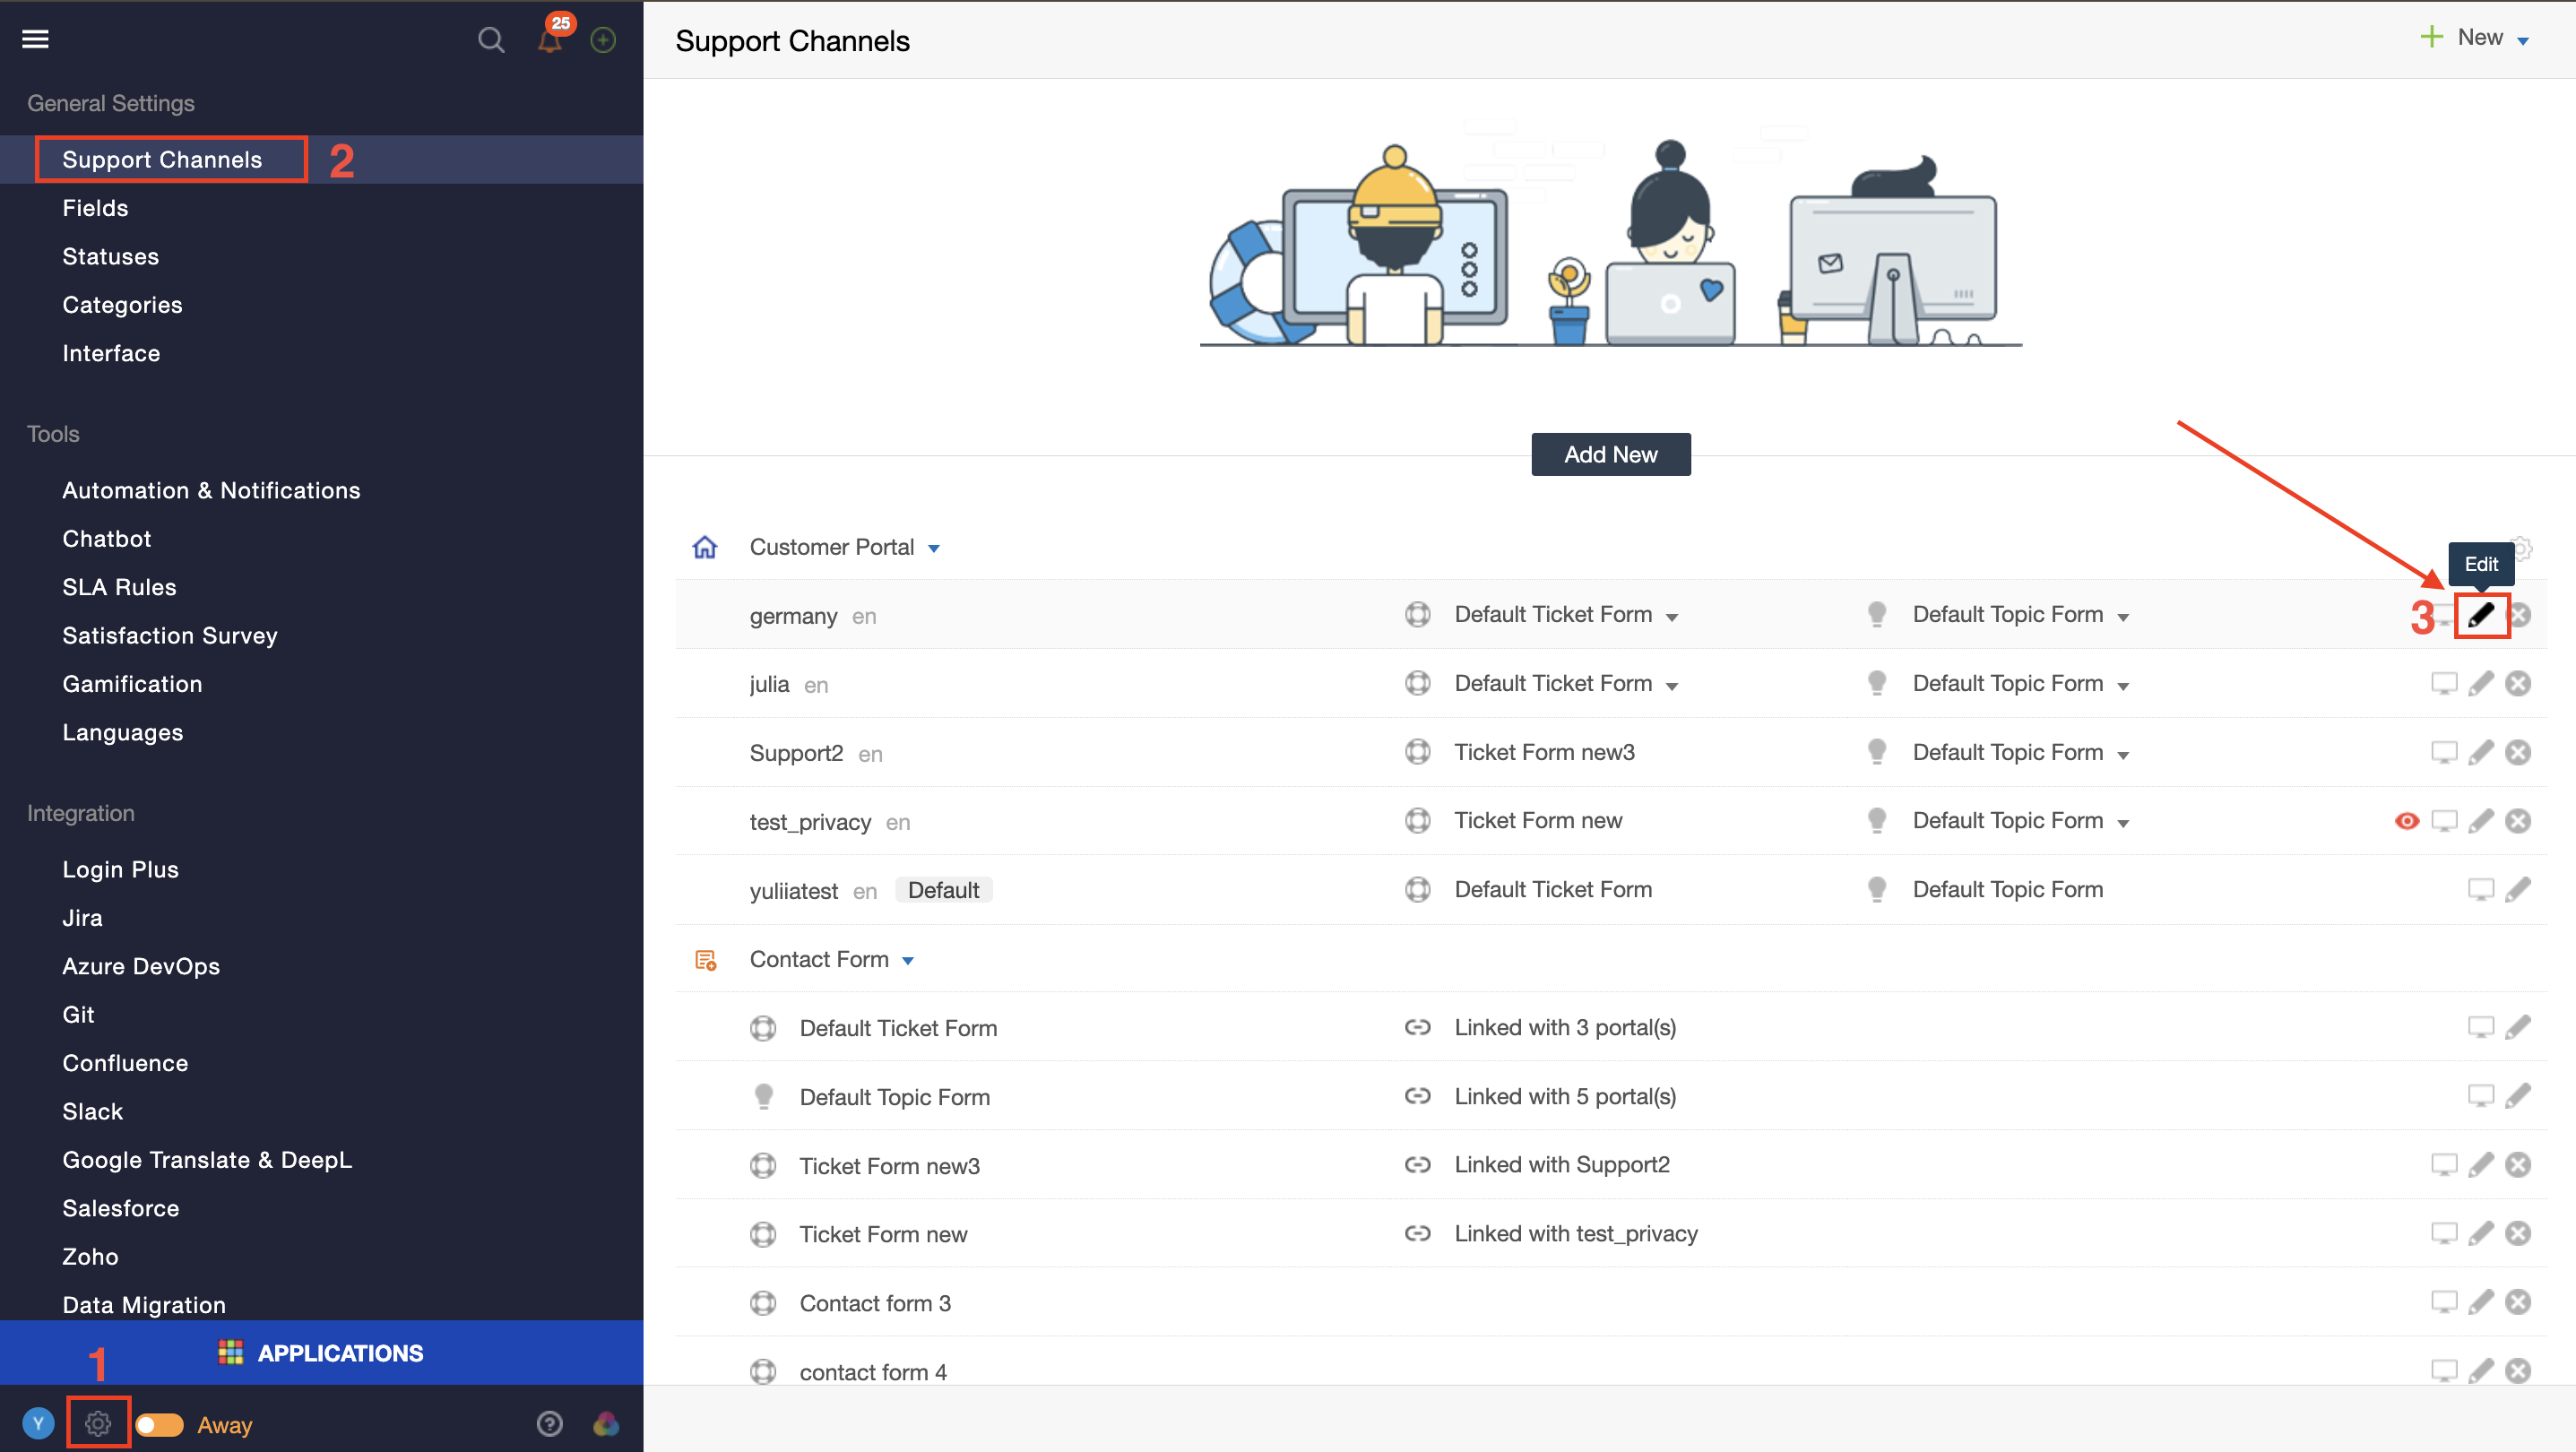
- Go to Administration -> Support Channels and click the edit icon next to the portal you want to configure
- In the Community URL dropdown field, select the desired domain for that portal

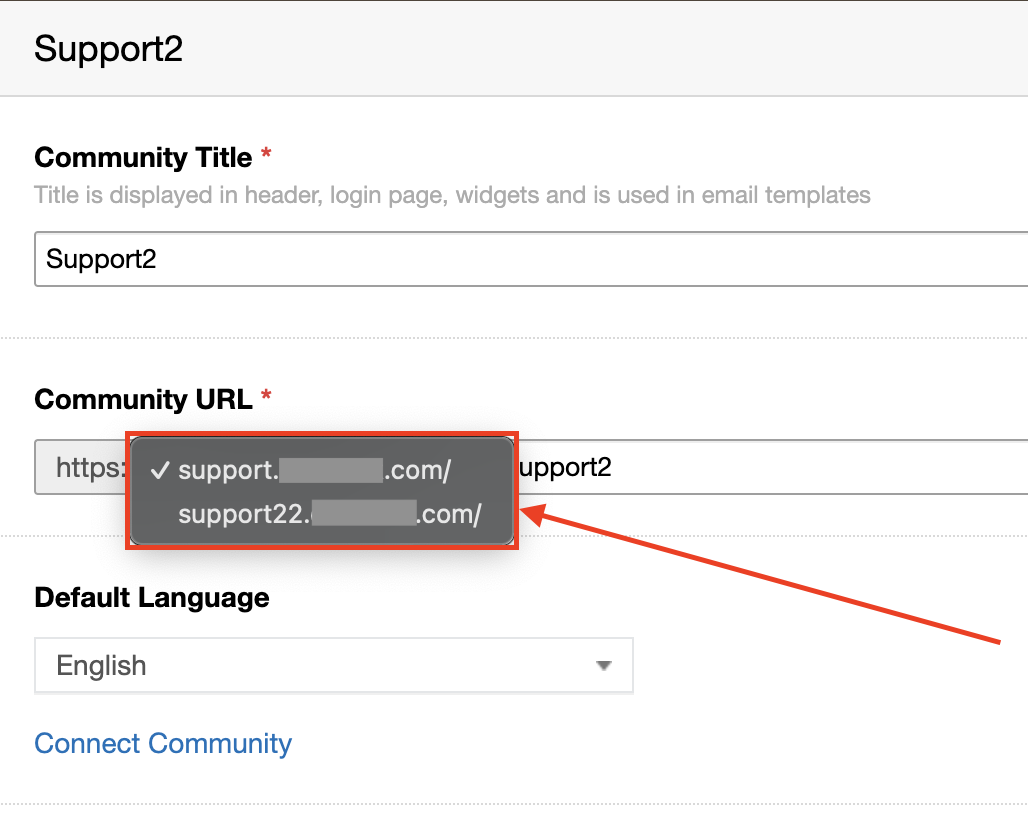
- Save your changes.
This way, you can assign a custom domain to each portal individually.